Diagnostic Web Server (DWS)
The Diagnostic Web Server (DWS) is a built-in web service on all BrightSign players. It provides valuable info and functions, including:
- Key player info such as uptime, serial number, system logs, and real‑time screenshots of the display output
- Diagnostic tools to troubleshoot issues
- The ability to modify some player settings and apply OS updates
Important note regarding player settings in the DWS
When a player is registered to BrightSign Author or Content, player settings are stored on BrightSign Cloud. While the DWS may enable temporary changes to player settings, BrightSign Cloud remains the ultimate "source of truth" and will override any local settings upon player reboots. Therefore you should modify player settings using the Properties panel in BrightSign Author, BrightSign Content, or by using Cloud APIs, both of which will update the player settings in BrightSign Cloud.
This also applies to players registered with Property Lock explicitly disabled (by default, Property Lock is enabled).
The above is only a partial list. The DWS' full capabilities are covered below.
Local vs. Remote Access
The DWS can be accessed in two ways:
- Locally, over the local network or via a serial connection
- Remotely, over the internet through BrightSign Cloud (either the free BrightSign Control Plus or the paid BrightSign Author Plus).
While the DWS offers substantially the same features whether accessed locally or remotely, some differences do exist as noted below.
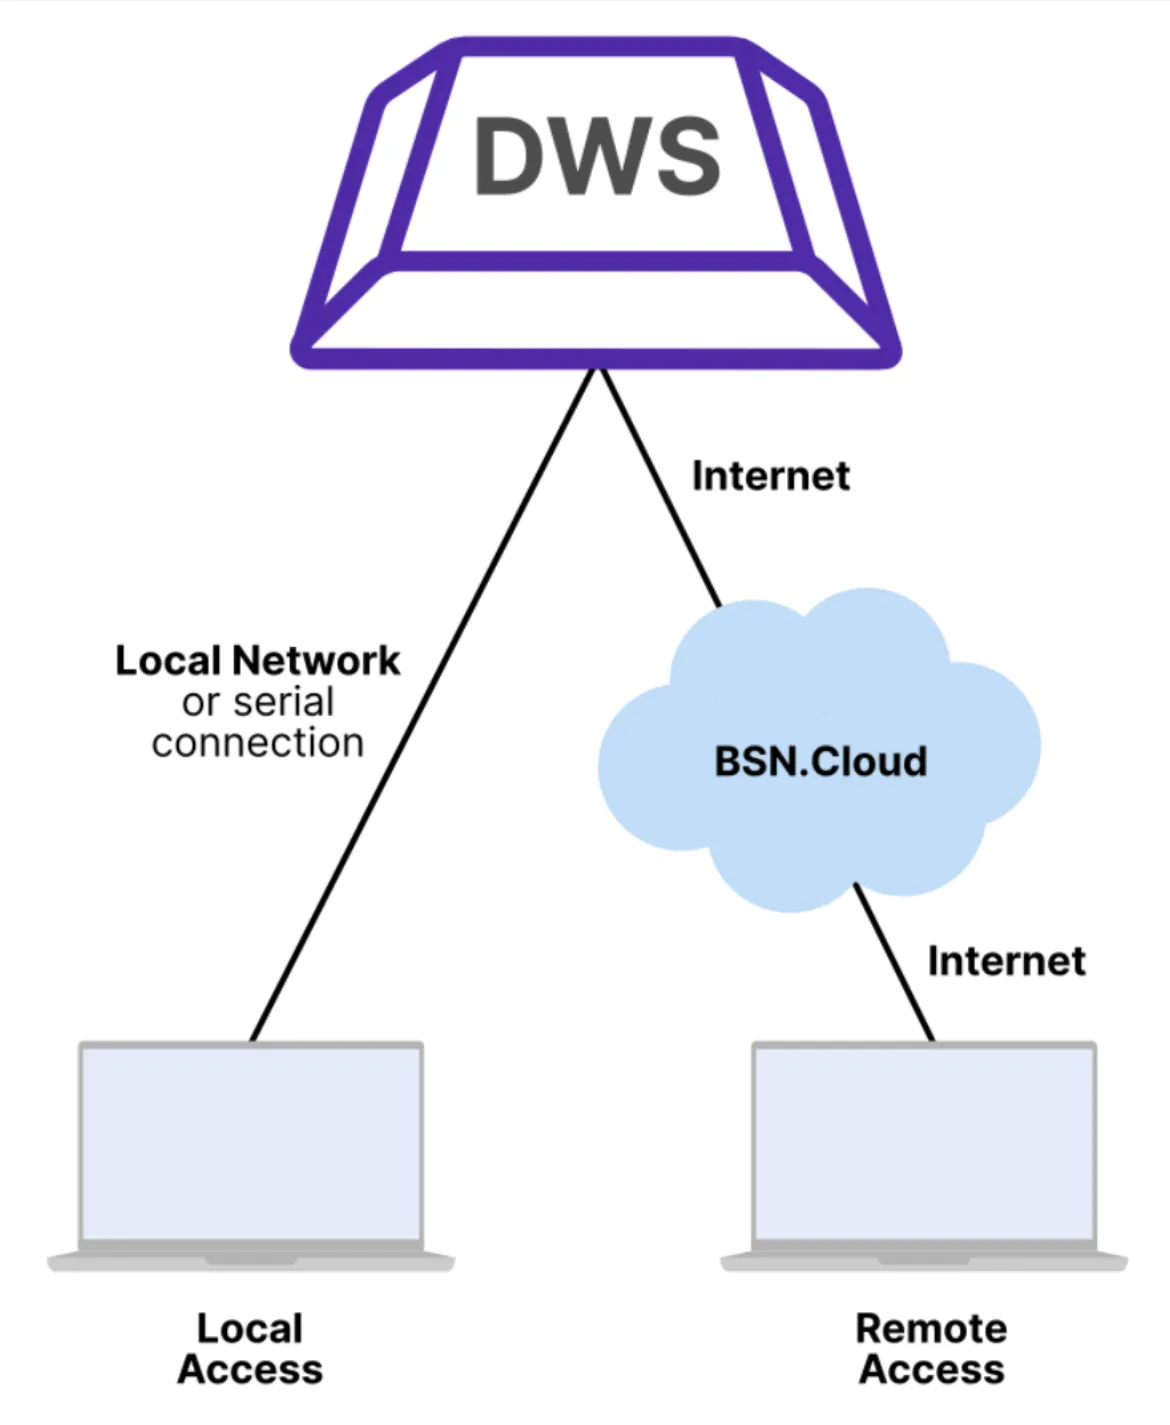
Note that traditionally, local access of the DWS has been referred to as the Local DWS or LDWS, and remote access of the DWS has been referred to as the Remote DWS or RDWS. These terms may be used throughout the documentation.
Local access to the DWS is disabled by default as of BrightSignOS 9.0.218 (on the 9.0 branch) and BrightSignOS 9.1.75 (on the 9.1 branch). In BrightSignOS versions prior to these, local access to the DWS was enabled by default.
Note that some specially configured players have the external microSD card port and USB storage disabled at the factory (SKU: SVC-internal-storage-only). For these players, local access to the DWS remains enabled by default.
For info on accessing the DWS locally, see DWS: Local Access. For info on accessing the DWS remotely, see DWS: Remote Access.
The DWS is organized by a horizontal row of tabs, each one with a different set of functions. Descriptions for each tab are detailed in the expandable sections below.

Info
This tab provides general information about the player and its current status.
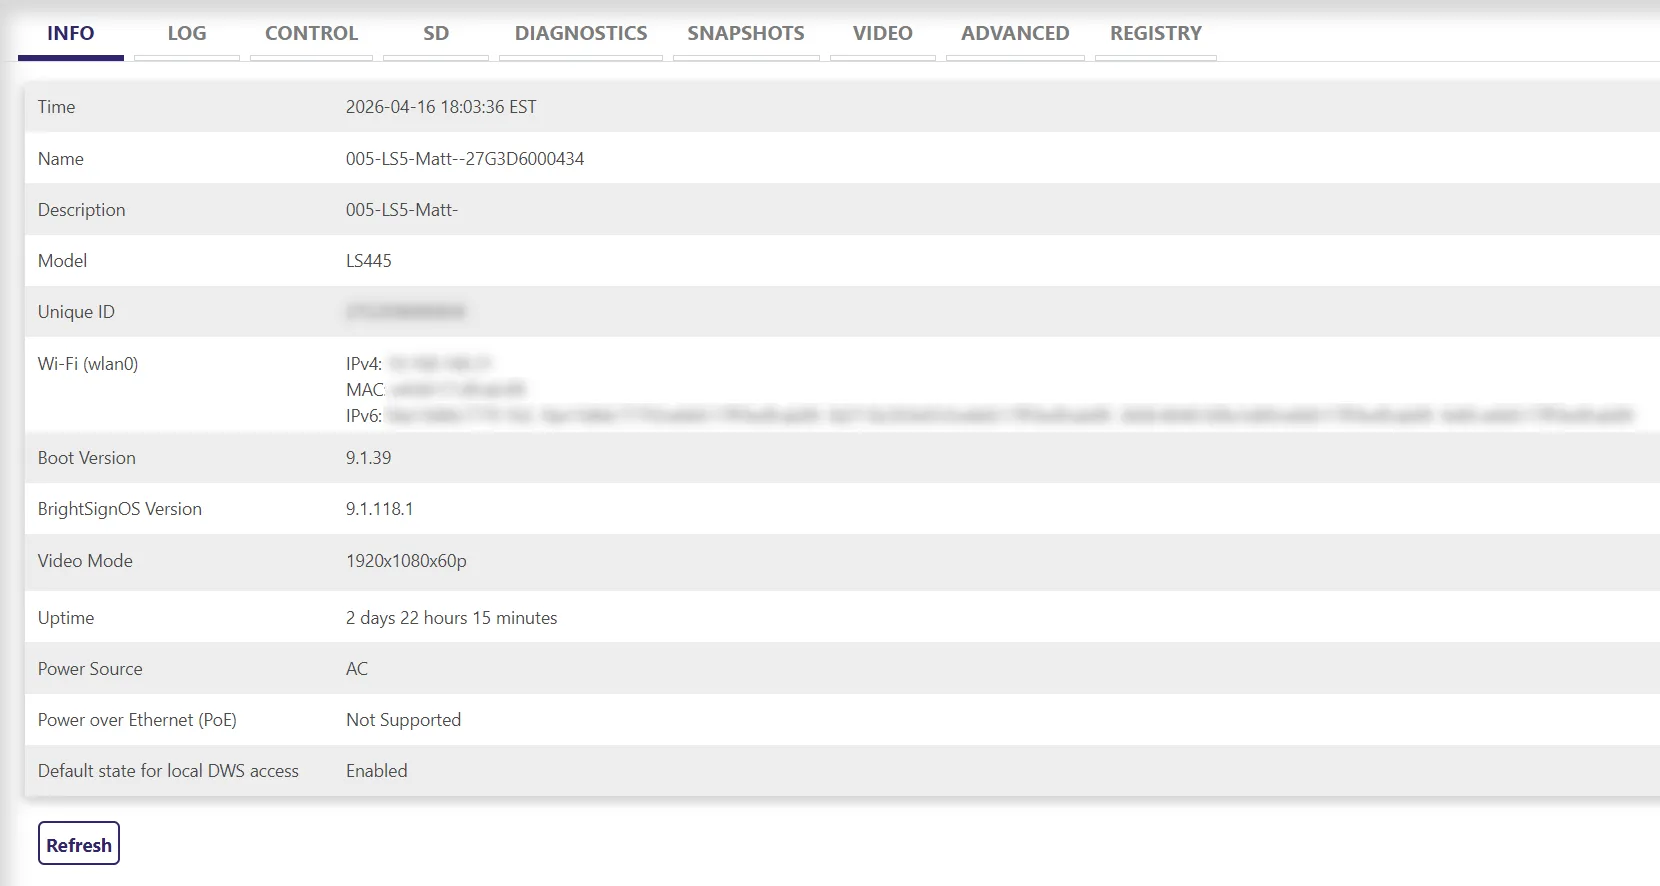
Time
The current time as it is configured on the player. When the DWS is accessed locally, you can select the time icon (clock icon) to configure the time on the player:
- Automatically: Click Use Client to set the time of the player using the current time of the browser/application.
- Manually: Enter a Time and Date to set on the player. These values will go into effect the moment you click the Set Time button. If you would like to interpret the date/time using the time zone of the player, check the Apply Timezone box. Otherwise, the date/time will be applied as a UTC value.
The player's time zone cannot be edited from the DWS. To change the time zone, you will need to apply a new Setup to the player.
Name
The user-supplied name of the player.
Description
An optional user-supplied description for the player.
Model
The model number of the player.
Unique ID
The serial number of the player.
Network Info
IPv4: The IPv4 address of the player
MAC: The MAC (Media Access Control) address of the player
IPv6: The IPv6 address of the player
Boot Version
The current version of the primary boot loader.
BrightSignOS Version
The current OS version installed on the player.
Video Mode
The current video output resolution. You can change the video resolution in the Video tab.
Uptime
The amount of time the player has been powered on and working correctly.
Power Source
Displays the power source (e.g., AC or PoE).
Power over Ethernet (PoE)
The status of the PoE interface (applicable to PoE capable models only).
Default state for local DWS access
Local access (i.e., access over the local network) of the Diagnostic Web Server (DWS) is disabled by default as of BrightSignOS 9.0.218 (on the 9.0 branch) and BrightSignOS 9.1.75 (on the 9.1 branch). In BrightSignOS versions prior to these, local access to the DWS was enabled by default. To enable local access to the DWS, see DWS: Local AccessDWS: Local Access.
Note that some specially configured players have the external microSD card port and USB storage disabled at the factory (SKU: SVC-internal-storage-only). For these players, local access to the DWS remains enabled by default.
Remote access (i.e., access over the internet) of the DWS remains available for all internet-connected players registered with BrightSign Cloud.
The "default state" for local access of the DWS can either be enabled or disabled. Here, a player's “default state” refers to when the player 1) is brand-new from the factory or 2) when it has been factory reset.
Importantly, this setting is only representative of the player’s default state; it is not necessarily representative of the player’s current state. A player may have local access to the DWS enabled (e.g., through a Setup File or a custom script) even though the player’s default state is for local DWS access to be disabled.
This setting does not affect remote access of the DWS. Remote access of the DWS is always enabled if the player is registered on BrightSign Cloud.
Extensions
The Info Tab will include this field if the player has one or more extensions installed.
Log
This tab provides a log of system processes and events on the player. The output is similar to the info generated through a serial connection.
- Download log: Download the current log.
- Refresh: Retrieve new log information from the player.
- Download crash dump: Retrieve information about the most recent crash on the player (if one has occurred); this is useful data for BrightSign Support when troubleshooting.
Control
This tab allows general control of the system processes of the player.
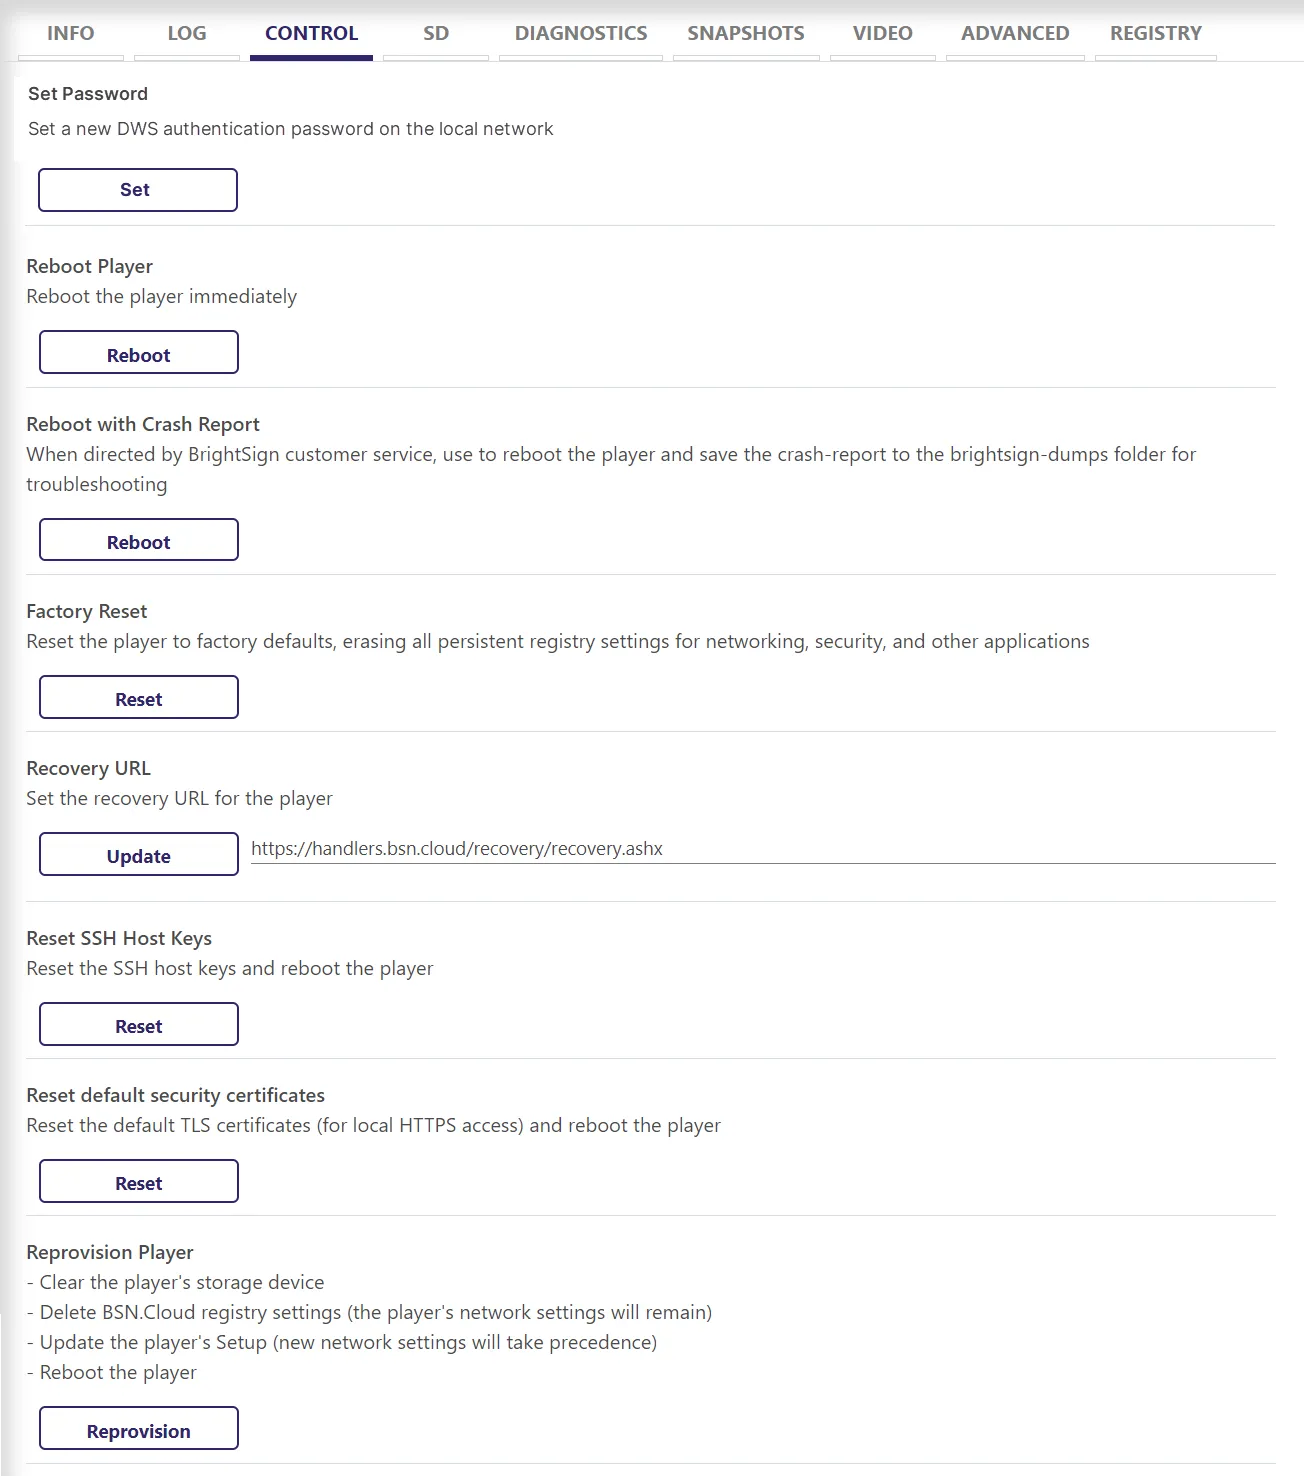
Set Password
Setting a password for the DWS is only required when accessing the DWS locally. A password is not required for remote access of the DWS as security is provided by BrightSign Cloud and BrightSign Author. This option is only available when local access to the DWS has been enabled.
Set a new password for DWS authentication on the local network.

The password must be at least eight characters long and include at least one uppercase letter, one lowercase letter, one number, and one special character.
Reboot Player
Reboot the player.
Reboot with Crash Report
Reboot the player and save a crash-report file to the "brightsign-dumps" folder. BrightSign support may request the crash report when helping you troubleshoot the player.
Factory Reset
Perform a Factory Reset of the player. This resets the player to its factory defaults, erasing all persistent registry settings for networking, security, and other applications. In some cases, a player should be reprovisioned instead of factory reset - see Reprovision vs. Factory Reset.
Recovery URL
Set a Recovery URL which is used by the player to perform content recovery in the event of an autorun-related failure.
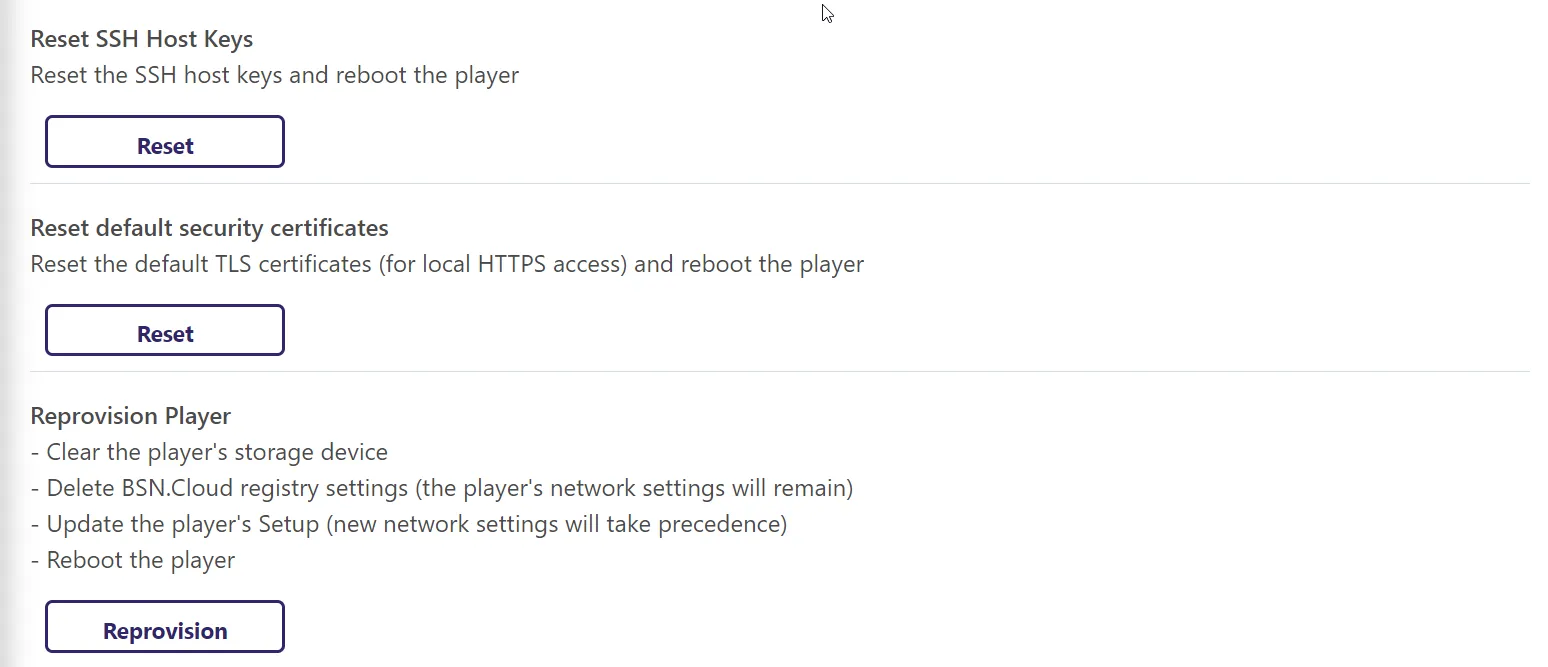
Reset SSH Host Keys
SSH host keys establish trust between the player and SSH clients so that they can communicate with each other. Resetting the host keys may be desired when:
- The host key is suspected to have been exposed or compromised.
- Multiple players share the same host keys (e.g., a cloned microSD card was used across players), representing a potential security risk.
- It is desired to reset the trust relationships with SSH clients.
This function resets the SSH host key and reboots the player. The next time you connect to the player via SSH, you will be asked to re-trust the new key.
Reset Default Security Certificates
This function generates a new set of default security certificates (specifically, TLS certificates that enable HTTPS access) and reboots the player.
When HTTPS is enabled for local DWS access, and a specific server certificate is not specified (more info here), default self-signed certificates will be created. When browsing to a player using default security certificates, users will need to accept browser security warnings and accept the certificate (more info here).
This feature has no effect on configured custom certificates and only affects the default certificates.
Default certificates have a 10-year expiration and are stored in a system partition and not on the storage device (e.g., microSD card or SSD).
Reprovision Player
This feature is only available remotely.
As covered in the BrightSign Primer section, setting up a player for use involves applying a SetupSetup to the player, and applying a Setup File to a player using BrightSign Cloud is known as provisioning.
Applying a new Setup File to a player which already has a Setup File requires a process known as reprovisioning. It is important to understand that from BrightSign Author's Provision screen, a new Setup File can be applied to a player, a process which associates the player with the new Setup File. Importantly, however, the new Setup File will not actually take effect on the player until the player is explicitly reprovisioned (more details here) which is the function of this section of the DWS. The Reprovision Player function performs the following:
- Clears the player's storage device (e.g., microSD card).
- Deletes the player's registry settings. Note that the player's network settings are unaffected.
- Updates the player's Setup File. If the Setup File includes new network settings, then those network settings will be incorporated.
- Reboots the player.
In addition to BrightSign Author or Control, a new Setup File can also be applied using the POST and PUT API operations (see Version 3.0 B-Deploy Endpoints and Version 2.0 B-Deploy Endpoints). As with applying a Setup File to a player using BrightSign Author, the player must be reprovisioned for the Setup File to actually take effect.
SD / SSD / USB
This tab provides information related to the storage device attached to the player. The title of the tab will reflect the interface that the storage device is using to connect to the player. For example, the SD tab will be displayed if a microSD card is attached to the player.
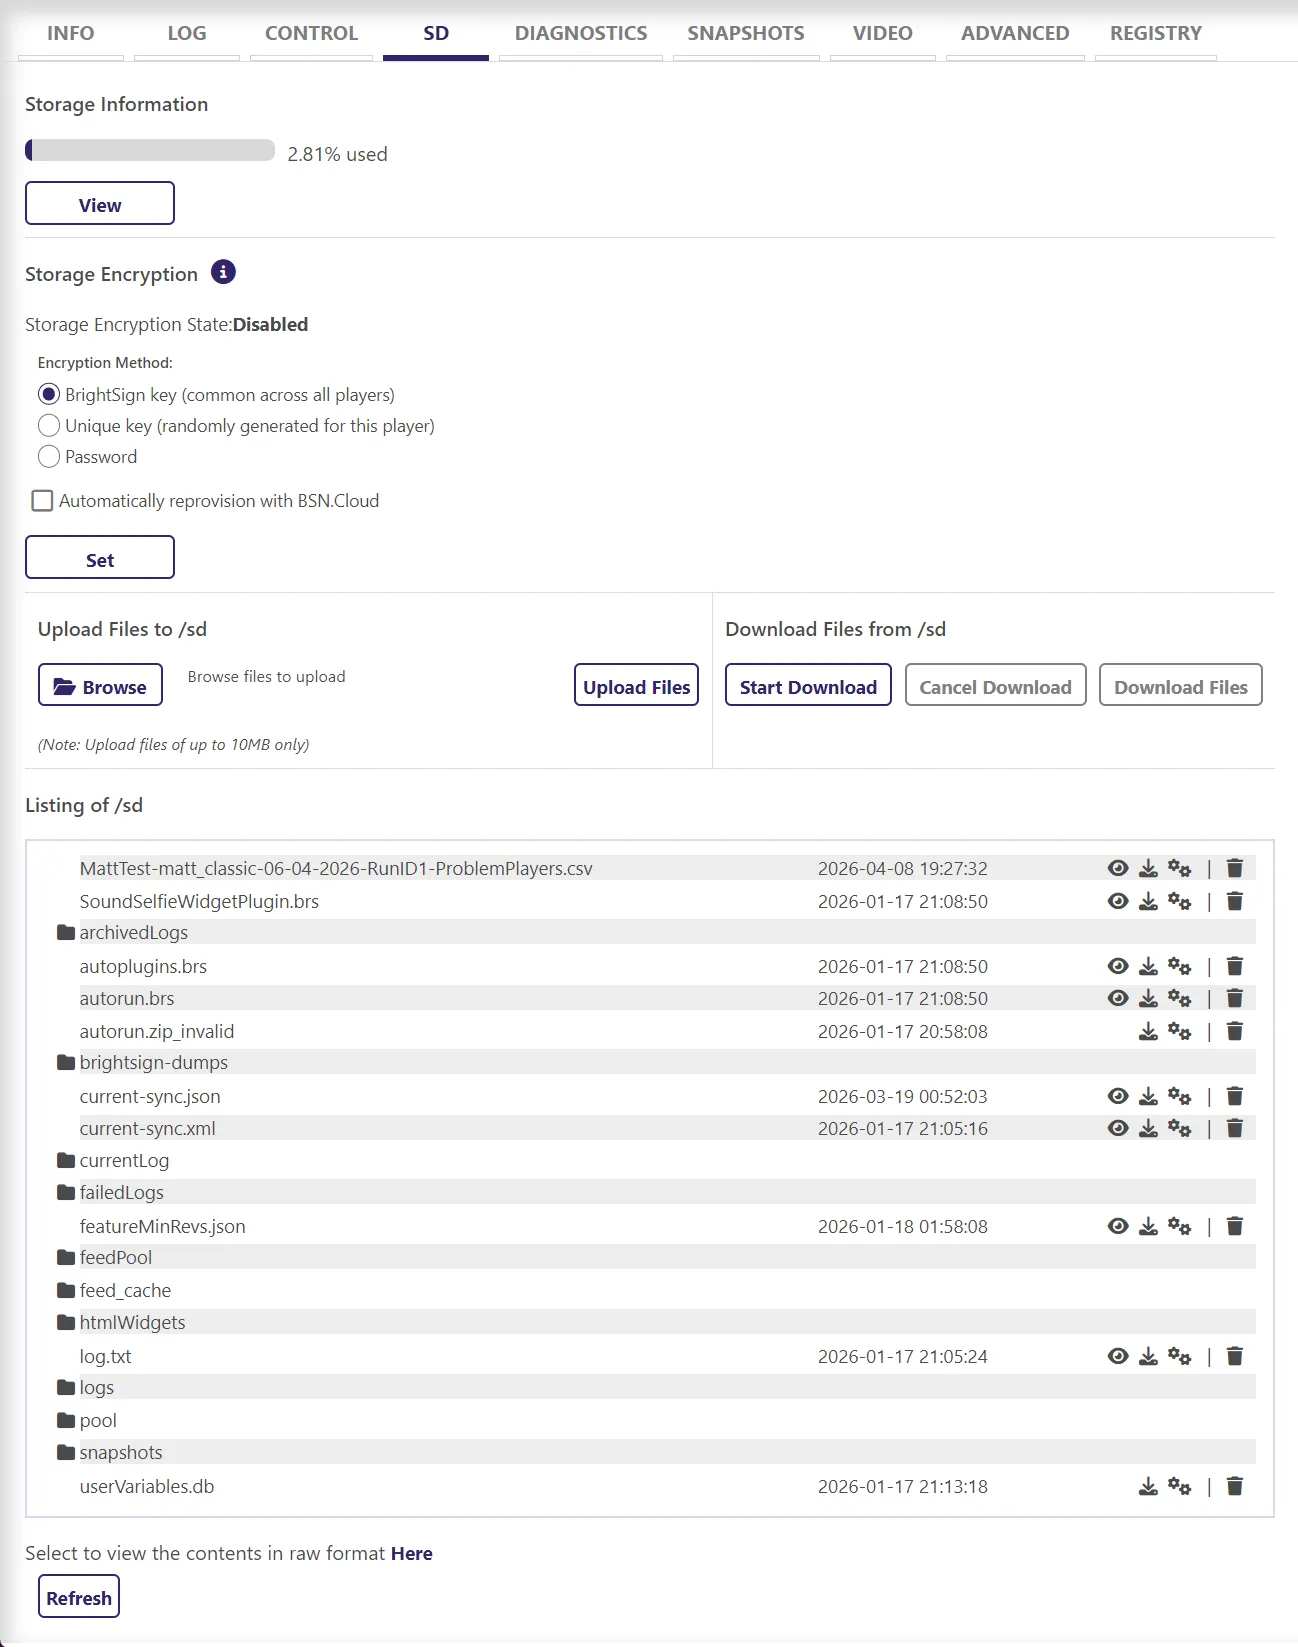
Storage Information
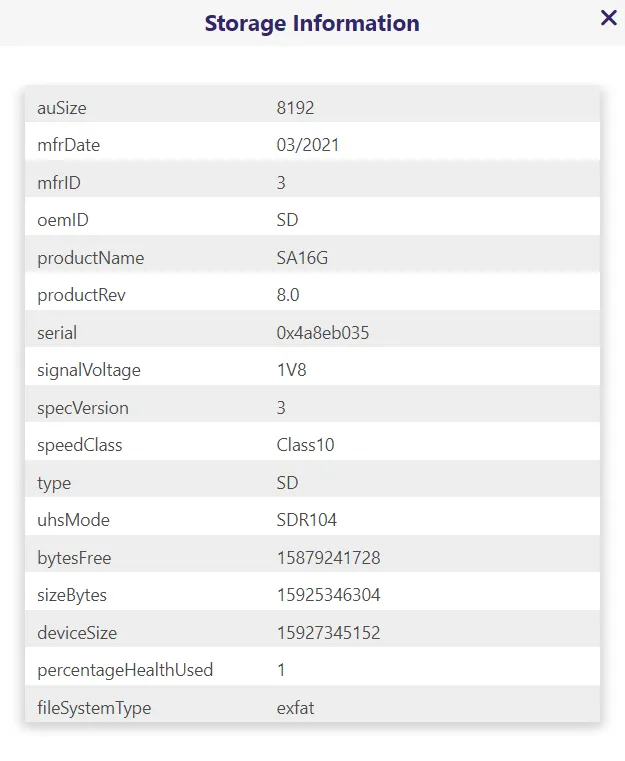
Select View to get more information about the player's storage device such as the health of the storage device, size of the storage device, percentage of storage used, etc.
Storage Encryption
Player storage device encryption is available for all Series 5 players except the XC line (support coming soon) using BrightSign Author version 1.55.1 or later. Players must be running BOS 9.0.211 or later.
The Storage Encryption State indicates whether encryption is Enabled or Disabled. The available encryption methods are:
- BrightSign key This is a common key across all BrightSign players.
- Unique key This is a randomly generated key that can only be used for this player. On players with both internal and external SD slots (e.g. XD6, HD6), an SD card encrypted using this option will be linked to the SD slot it was encrypted in. For example, an SD card encrypted in the internal SD card slot will error if you try to read it from the external SD card slot.
- Password This enables the setting of a custom password to be used as the encryption key.
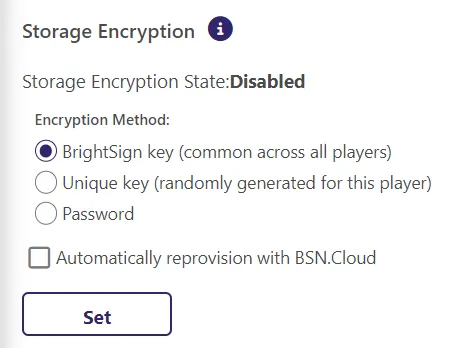
Storage encryption necessarily requires reformatting of the storage device which erases all content.
Encrypting the storage device may result in the player losing its association with Bright Sign Cloud. You should therefore select Automatically reprovision with BSN.Cloud to ensure that the player is able to successfully re-associate with BrightSign Cloud after the encryption process.
Upload Files
Upload files to the player’s storage device (e.g., microSD card). Files are uploaded to the currently selected directory. To upload files, click the Browse button to select one or more files, then click Upload Files. The maximum allowable size for files uploaded remotely is 10 MB. Aside from storage device capacity limits, there are no file size limitations for files uploaded locally.
Download Files
This enables the download of the contents on the storage device (e.g., microSD card).
- Start Download: This creates a .zip file of the storage device's contents.
- Cancel Download: This cancels the creation of the .zip file.
- Download Files: This button is available once the .zip file has been created. It is grayed out otherwise. After the .zip file has been created, click this button to download the .zip file to your computer. Note that after downloading the .zip file, the .zip file will no longer be available for download. To download the storage device's contents again, the process must be initiated again by creating a new .zip file.
Listing
Provides a listing of all files on the storage device. Depending on the type of file, there will be several options:
- Open folder: Click a folder (indicated by the folder icon) to view its contents.
- Download: Click the Download icon to download a file to your computer. File downloads are limited to 10 MB on the Remote DWS.
- File options: Click the gears icon to view more options associated with the file:
- About <filename>: Provides the file size and last modified date.
- Rename: Provides various options for renaming the file. You can specify a custom name or choose from among a list of common filenames. Use caution if renaming a file to "autorun.brs". The system does not check the integrity of the new autorun file.
- Analyze Media File: Performs media analysis of a video or audio file.
- Delete: Click the trashcan icon to delete the file from the storage device.
Diagnostics
This tab provides various network and system tools that are helpful for diagnosing problems and getting information about a player.
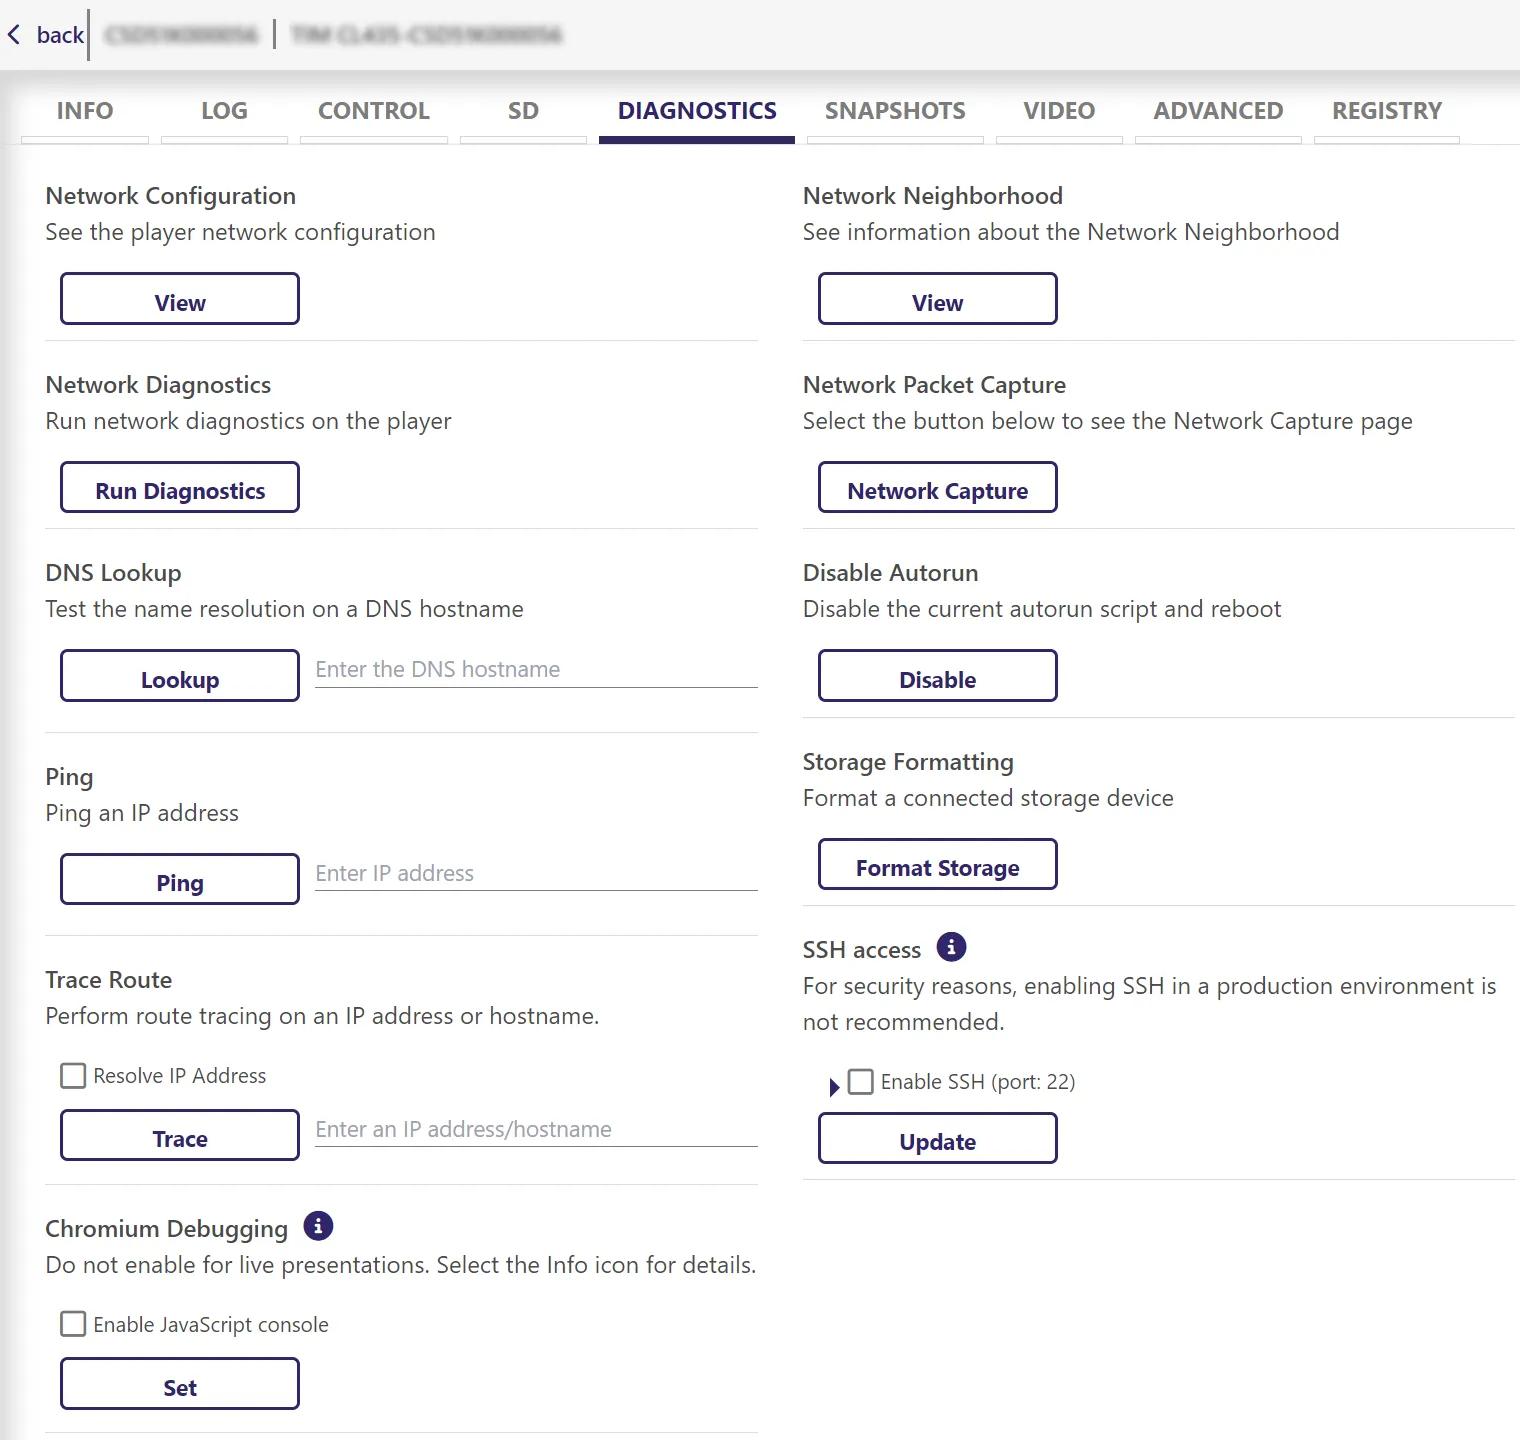
Network Configuration
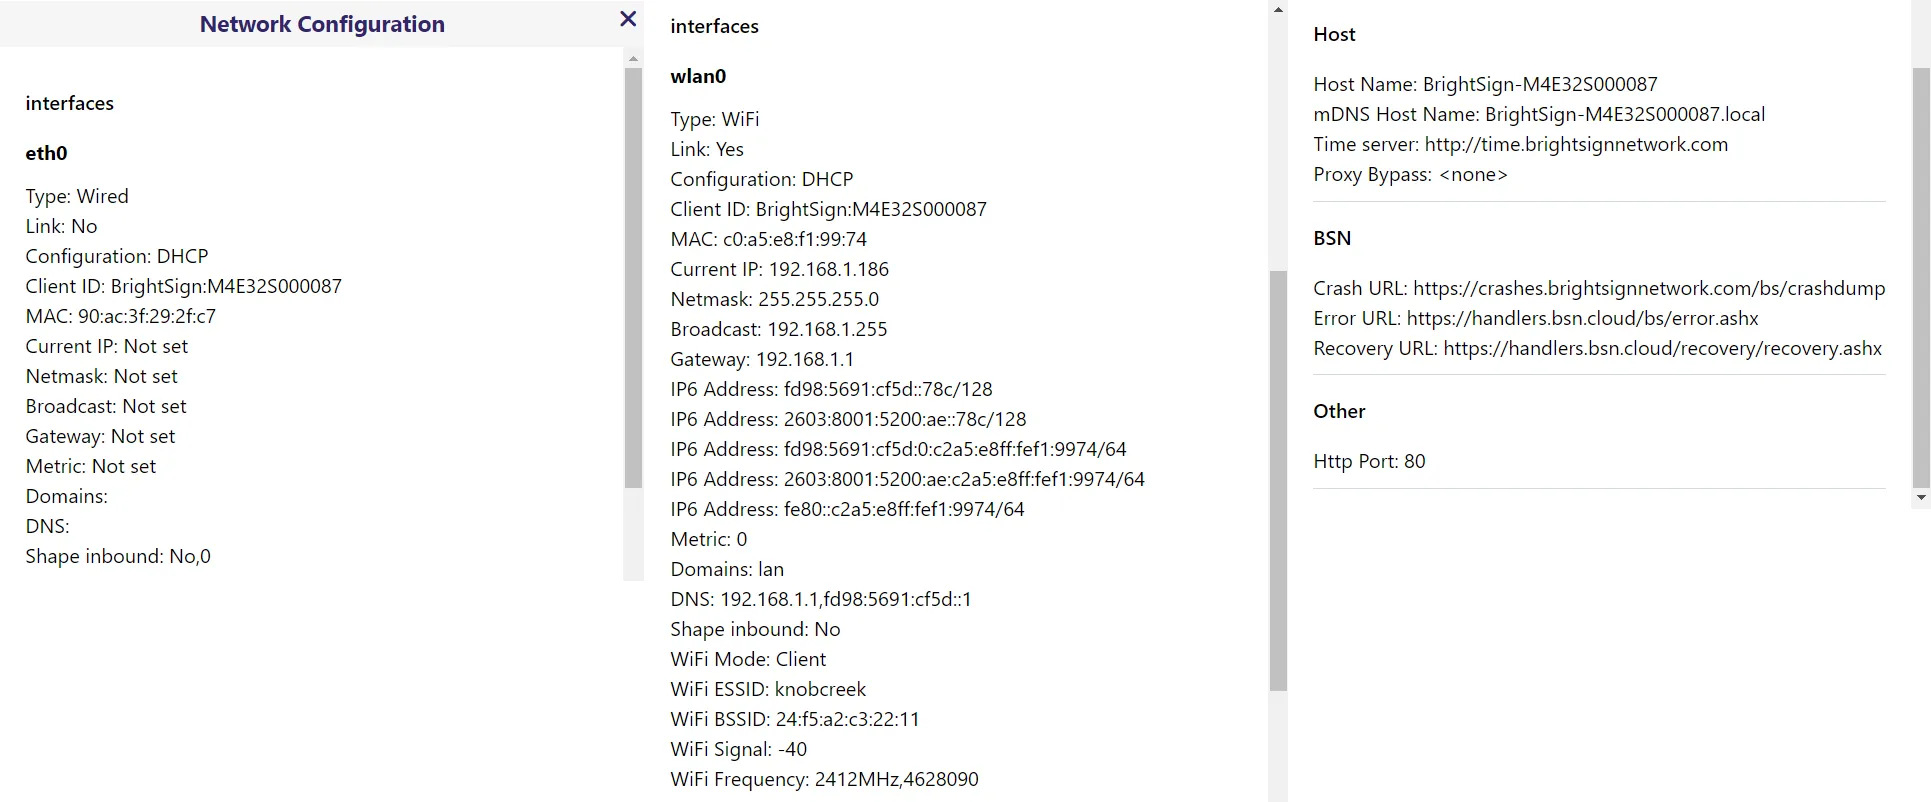
View extensive info about network interface settings such as interface names, IP address, DNS servers, etc.
Network Diagnostics
Run network diagnostics to check all Ethernet, Wi-Fi, Modem, and Internet connections. This process may take some time to complete, especially when certain tests fail.
DNS Lookup
Test the specified DNS address to check whether name resolution is working.
Ping
Ping a device with the specified IP address or DNS name.
Trace Route
Perform a standard traceroute diagnostic on the specified IP/DNS address. Check the Resolve IP Addresses box to resolve the specified DNS name.
Chromium Debugging
This feature lets you enable the JavaScript console if you have also selected Enable JavaScript console in BrightSign Author (Presentation > State Properties > Options). To disable the JavaScript console, uncheck the checkbox. The console should only be enabled for presentations that are not in production, since it can cause memory and security issues.
If you are not using BrightSign Author, the JavaScript console can be enabled through APIs via roHtmlWidget or htmlwidget.
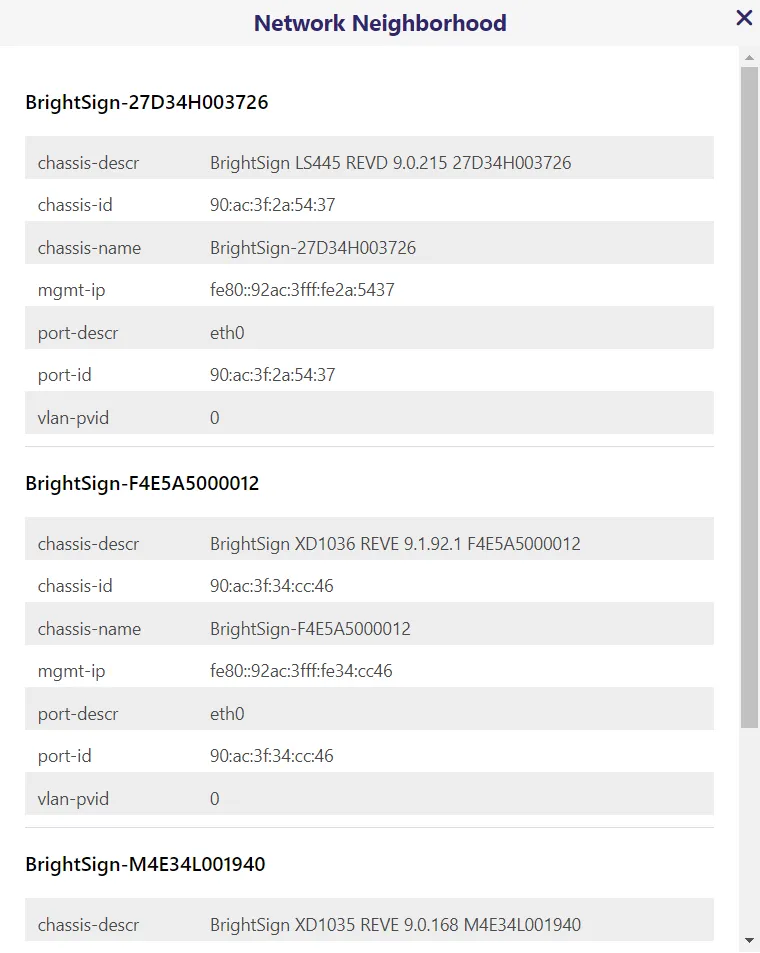
Network Neighborhood
Display info about all players residing on the same local network.
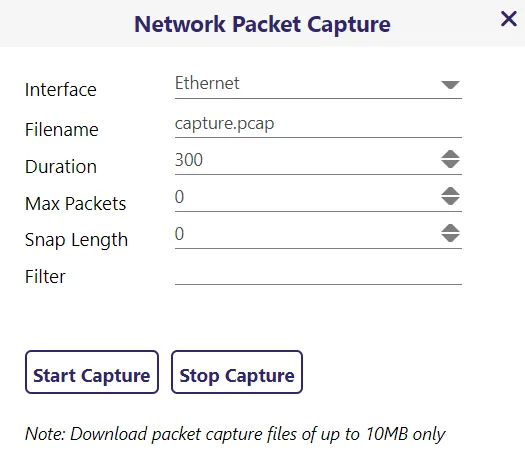
Network Packet Capture
Allows for the capture and collection of live network packet data over the network interfaces connected to the player.
Disable Autorun
Force the player to reboot and disable the autorun script when the player restarts. This allows the player to display the OS version and IP address on screen (if the player is connected to a local network). If the player has a serial port, you will be able to access the BrightSign Shell over a null-modem serial cable.
Storage Formatting
This takes you to the Format Storage page, which allows you to format storage devices attached to the player.
Storage devices that are currently unformatted can be directly formatted from here.
If the storage device already contains an autorun file, the autorun must first be disabled using the Disable Autorun function described above before proceeding with formatting of the storage device.
- Storage: Select a storage device from the drop-down menu (sd, ssd, or usb).
- File system: Select a supported file system to use when formatting the storage device.
SSH
Telnet access to players is no longer available in the Diagnostic Web Server (DWS) as of BrightSign Author 1.67.0, BrightSignOS 9.0.218 (on the 9.0 branch), and BrightSignOS 9.1.70 (on the 9.1 branch). Telnet can still be enabled via BrightScript or JavaScript. For more details on Telnet, see Enable Telnet & SSH.
Authorized public keys can be provided for SSH. Public key authentication can be mixed with password authentication. To disable password authentication do not set a login password.
Enables SSH on the player which lets you access the BrightSign application console when the serial port (the default I/O for the application console) is inaccessible. For security reasons, enabling SSH in a production environment is not recommended.
SSH access is available in most OS versions and can be enabled by using a custom script or by writing the registry key registry write networking ssh 22. Enabling SSH via the DWS, however, is only available in BrightSignOS 9.0.110 or 8.5.46 and above.
- Enable SSH: Enter the SSH port number (22 is the default).
- SSH Password: Enter the SSH password. The password must be at least 8 characters long and include at least one uppercase letter, one lowercase letter, one number, and one special character.

Screenshots (Snapshots)
This tab allows you to view Screenshots of what the player is displaying.

Click the New Screenshot button to take a screenshot. Once the screenshot has been taken, you can click the thumbnail to view a full-size image of the screenshot.
As of BrightSignOS 8.5.31, screenshots are captured at resolution with a maximum size of HD. Select Return the screenshot at its original resolution (do not downscale to HD) to get the screenshot at a higher resolution.
Video
This tab provides several diagnostic tools related to the player's video settings.
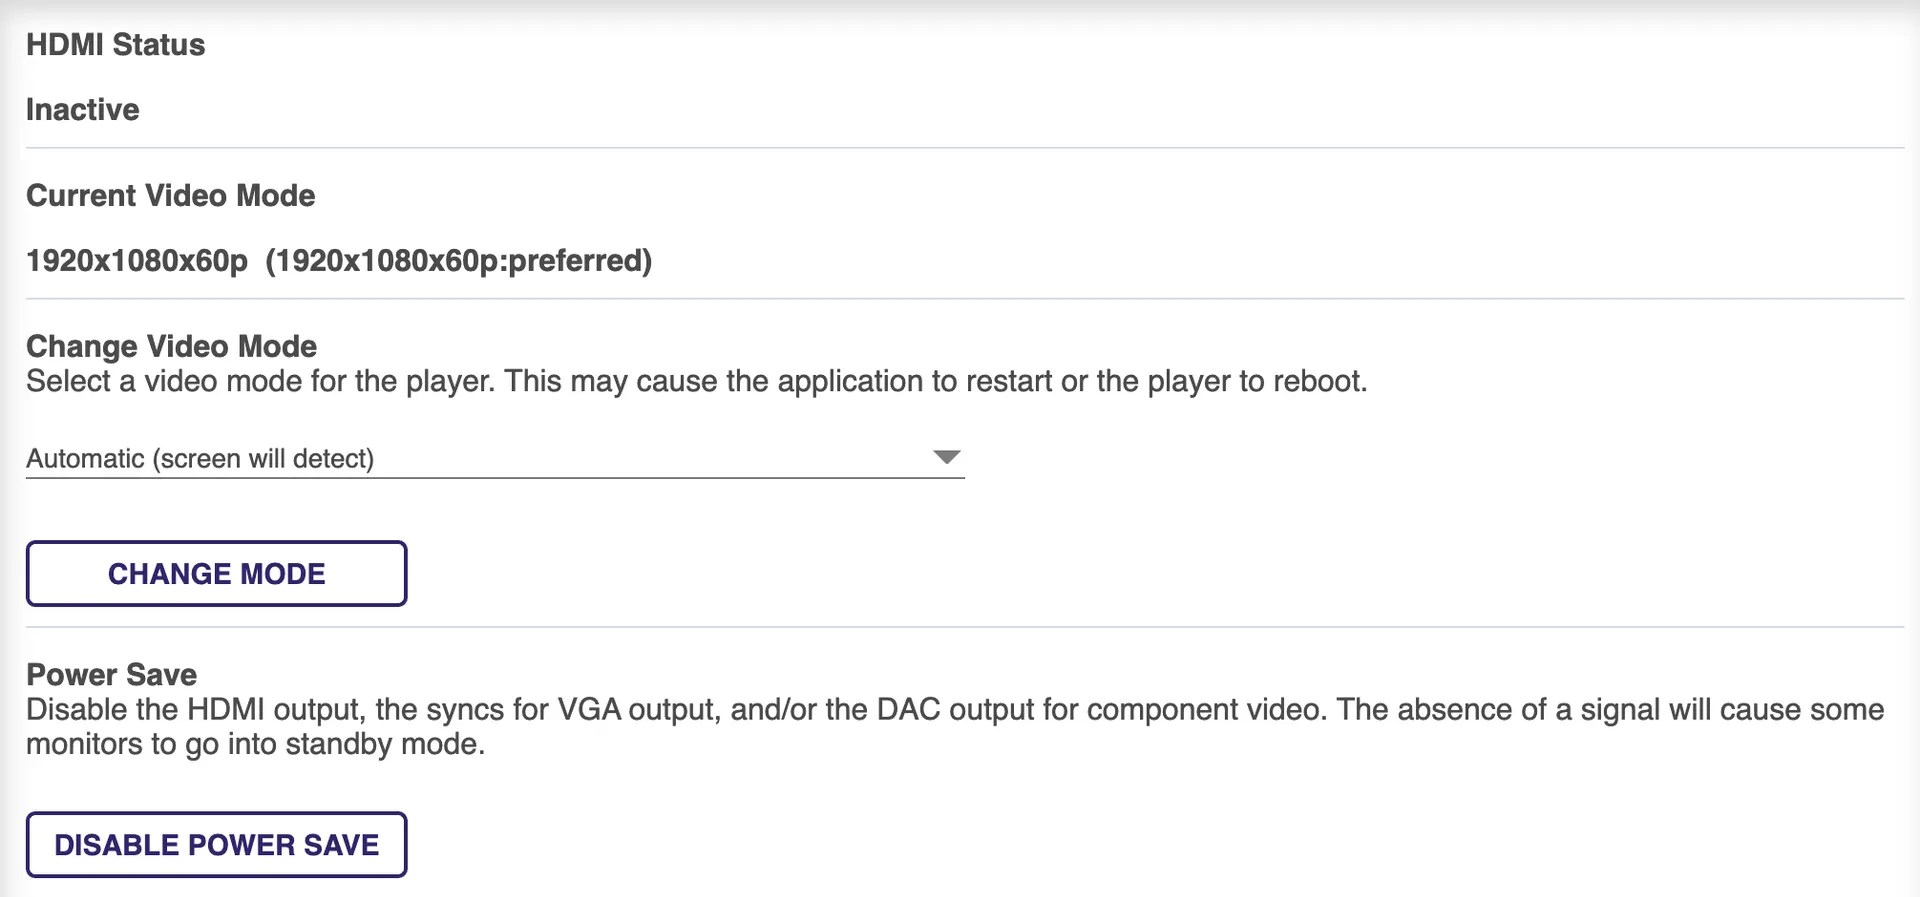
HDMI Status
Whether each player's HDMI® connection (indicated as HDMI-1, HDMI-2, etc.) is “Active” or “Inactive”.
Current Video Mode
This is the video resolution currently being output on the HDMI connection. If the player has multiple HDMI connections, each HDMI connection will be numbered (e.g., HDMI-1, HDMI-2, etc.). If the player is set to a 4K video mode, this field will also indicate whether the 10-bit color space and/or HDR (high dynamic range) is currently being output.
Power Save
Disables HDMI output, the syncs for VGA output, and/or the DAC output for component video for each HDMI connection (indicated as HDMI-1, HDMI-2, etc.). The absence of a signal will cause some monitors to go into standby mode.
EDID Information
Displays the EDID data returned from one or more monitors attached to the player’s HDMI ports (indicated as HDMI-1, HDMI-2, etc.). This info can be copied and pasted into a text editor.
Change Video Mode
Changes the display mode / resolution of the player on all video outputs (HDMI®, VGA, and Component). The player will reboot and automatically disable the current autorun script (similar to the Disable Autorun button in the Diagnostics tab). It the autorun script is not disabled, the autorun script will reset the video mode of the player.
It is important to note that this behavior applies to both BrightSign Author presentations as well as custom applications. If the DWS is used to temporarily change the player's video mode, you will need to reboot the player once again to return it the player the video mode set in its presentation or custom application.
Advanced
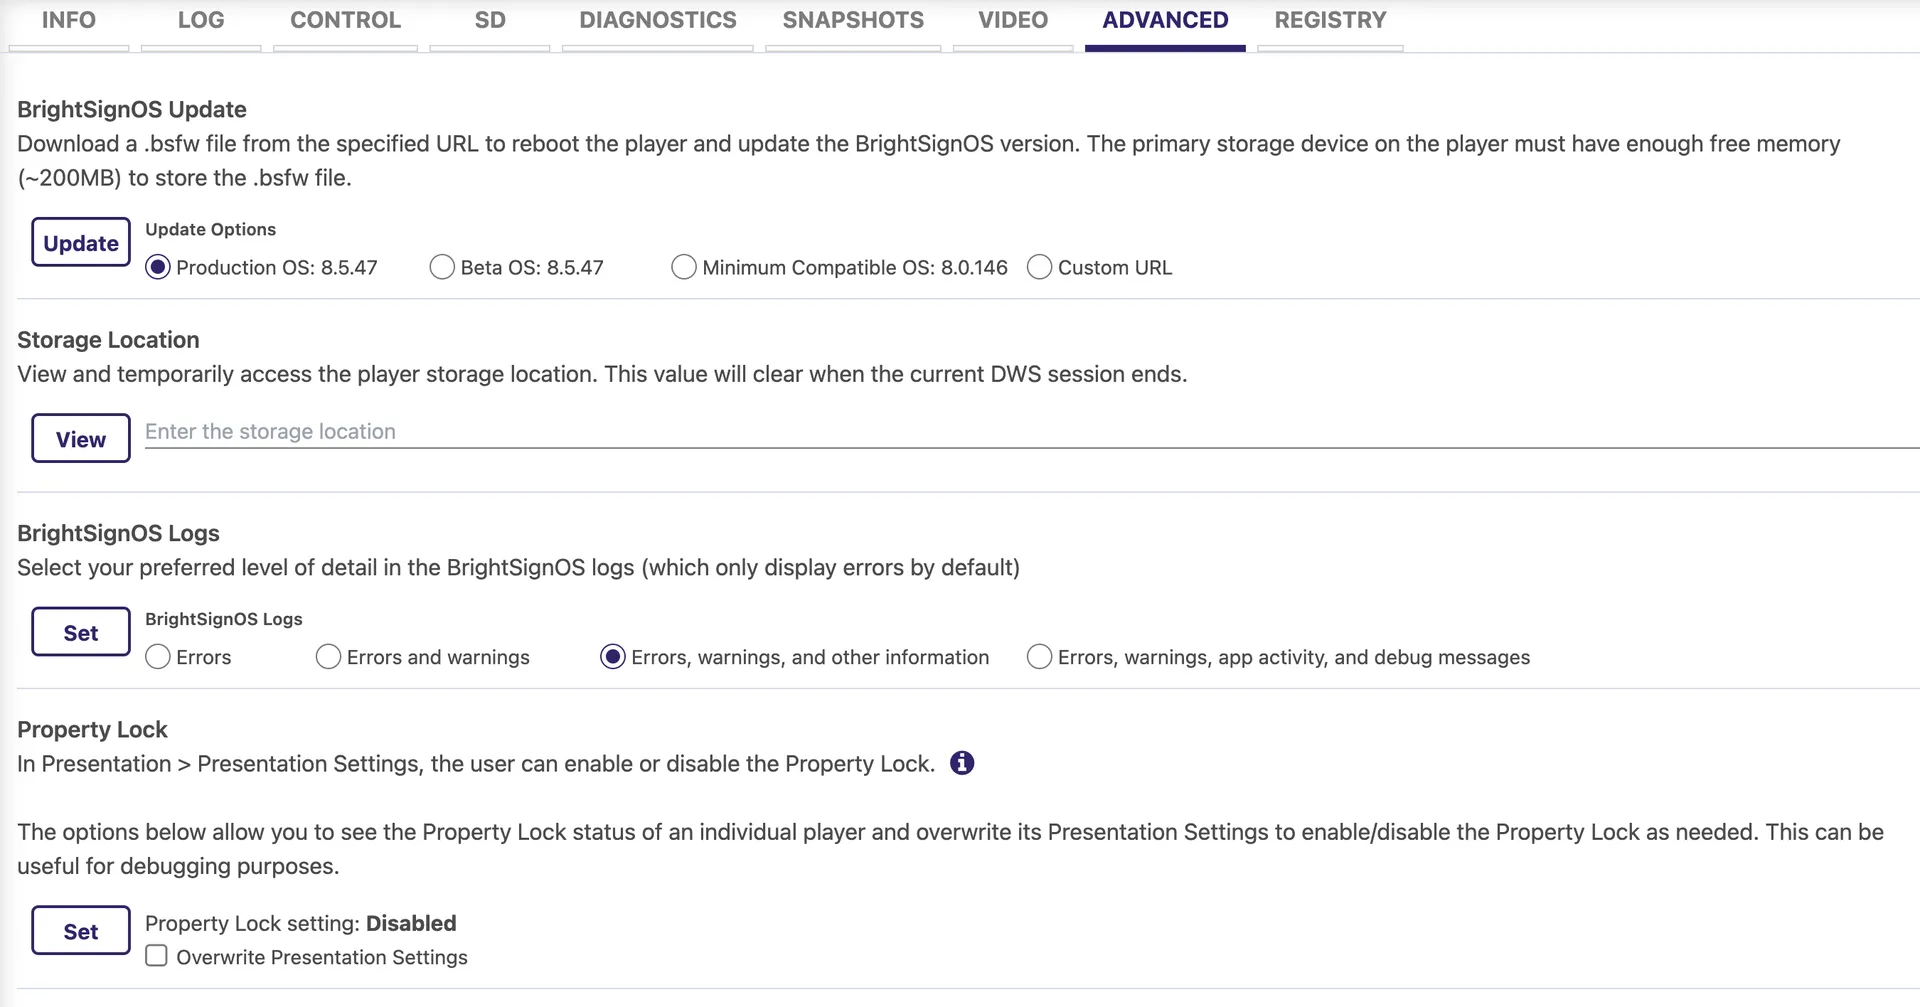
This tab includes the options below.
BrightSignOS Update
Specific BrightSignOS versions are required for each player model/family. If you attempt to update your player's OS with an OS for a different player model, you will get an error.
Select one of the Update Options described below, and then select Update to download that version to your player, which will then reboot:
- Production OS: the latest production BrightSignOS release for your player model
- Beta OS: the latest Beta version of the BrightSignOS for your player model
- Minimum OS: the minimum BrightSignOS version that can run on your player
- Custom URL: provide a player-accessible URL containing the desired BrightSignOS version, hosted by either you or BrightSign Example: https://brightsignnetwork.com/download/anon/firmware/cobra-9.0.110-update.bsfw
Storage Location
By default, the DWS will display tabs for all active external storage devices (e.g., SD, SSD, USB). In addition, you can also temporarily view and access the player's internal storage. Enter the desired internal storage location (e.g., flash, tmp) and select View. A tab for the specified internal storage will be created. This tab is temporary and will only be displayed for the current DWS session; subsequent DWS sessions will not automatically show this tab.
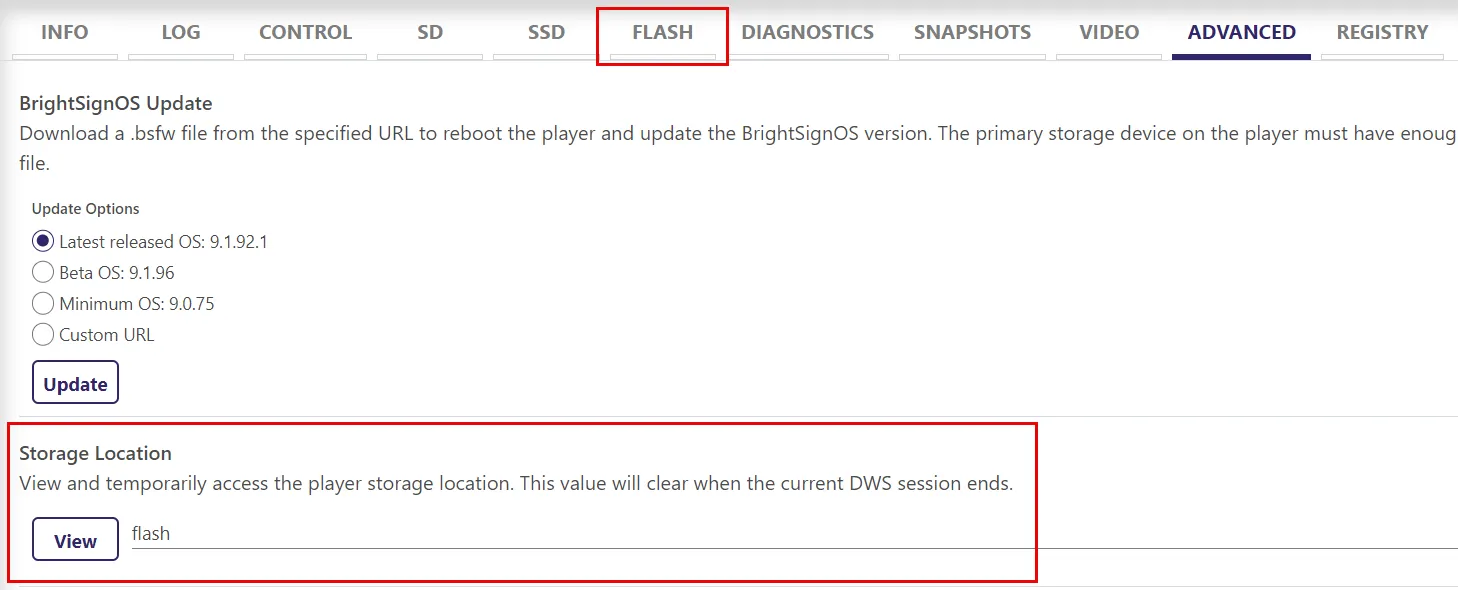
Note that if you enter a storage device that is already listed, you will get an error. In the example above, entering SD will result in an error because the SD tab is already being displayed.
BrightSignOS Logs
Select the level of detail you prefer in the BrightSignOS logs and then select Set to apply that setting. The highest logging level will be included when lower logging levels are selected (for example, if you select info, error and warn loggings will be included as well).
These are the logging levels:
- error: Critical errors or failures in the application
- warn: Warnings about potential issues that are not critical but may require attention
- info: Informational messages about the application's normal operations. This is the default logging level.
- trace: Detailed tracing information, typically used for debugging.
Property Lock
Allows you to decide if your presentation settings should be overwritten or not. For more info on Property Lock, see here.
Registry
This tab allows you to view and edit the player's registry.
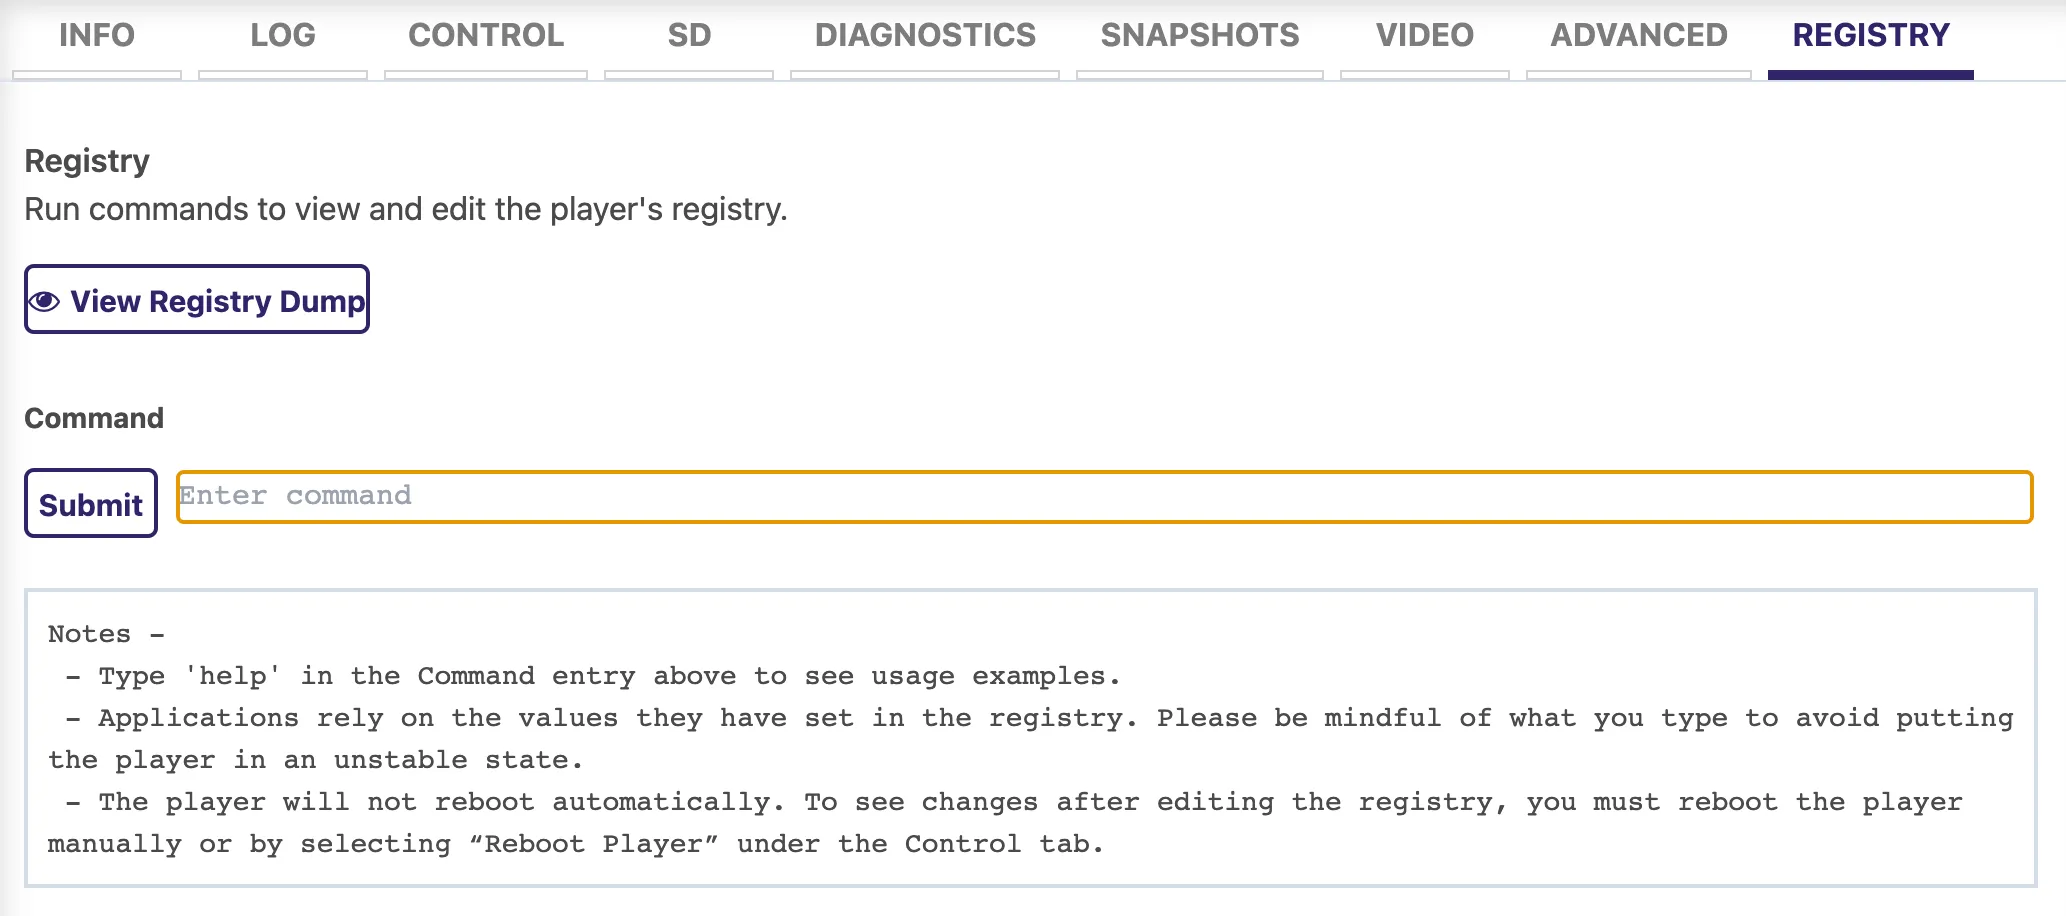
- Select View Registry Dump to view the player registry. You can copy the output to the clipboard or download it to a text file.
- To submit registry commands, add registry entries, or delete registry entries, enter that information in the empty field under Command and then select Submit. You must reboot the player to see changes to the registry.
This page describes the DWS for BrightSignOS 8 and later. Refer to the PDF below for documentation on the DWS prior to BrightSignOS 8.