DWS: Local Access
Local access (i.e., access over the local network) of the Diagnostic Web Server (DWS) is disabled by default as of BrightSignOS 9.0.218 (on the 9.0 branch) and BrightSignOS 9.1.75 (on the 9.1 branch). In BrightSignOS versions prior to these, local access to the DWS was enabled by default.
Note that some specially configured players have the external microSD card port and USB storage disabled at the factory (SKU: SVC-internal-storage-only). For these players, local access to the DWS remains enabled by default.
This page describes several methods to enable local access to the DWS.
Enable Local Access
Local access to the DWS can be enabled using one of the methods described below.
BrightAuthor:connected
The easiest way to enable local access to the DWS is to use the BrightSign Author app to create a Setup File that enables and configures the DWS.
Go to the Admin tab and select Setup.
Under Player Settings > Player Configuration, click the checkbox next to Enable Local Diagnostic Web Server.
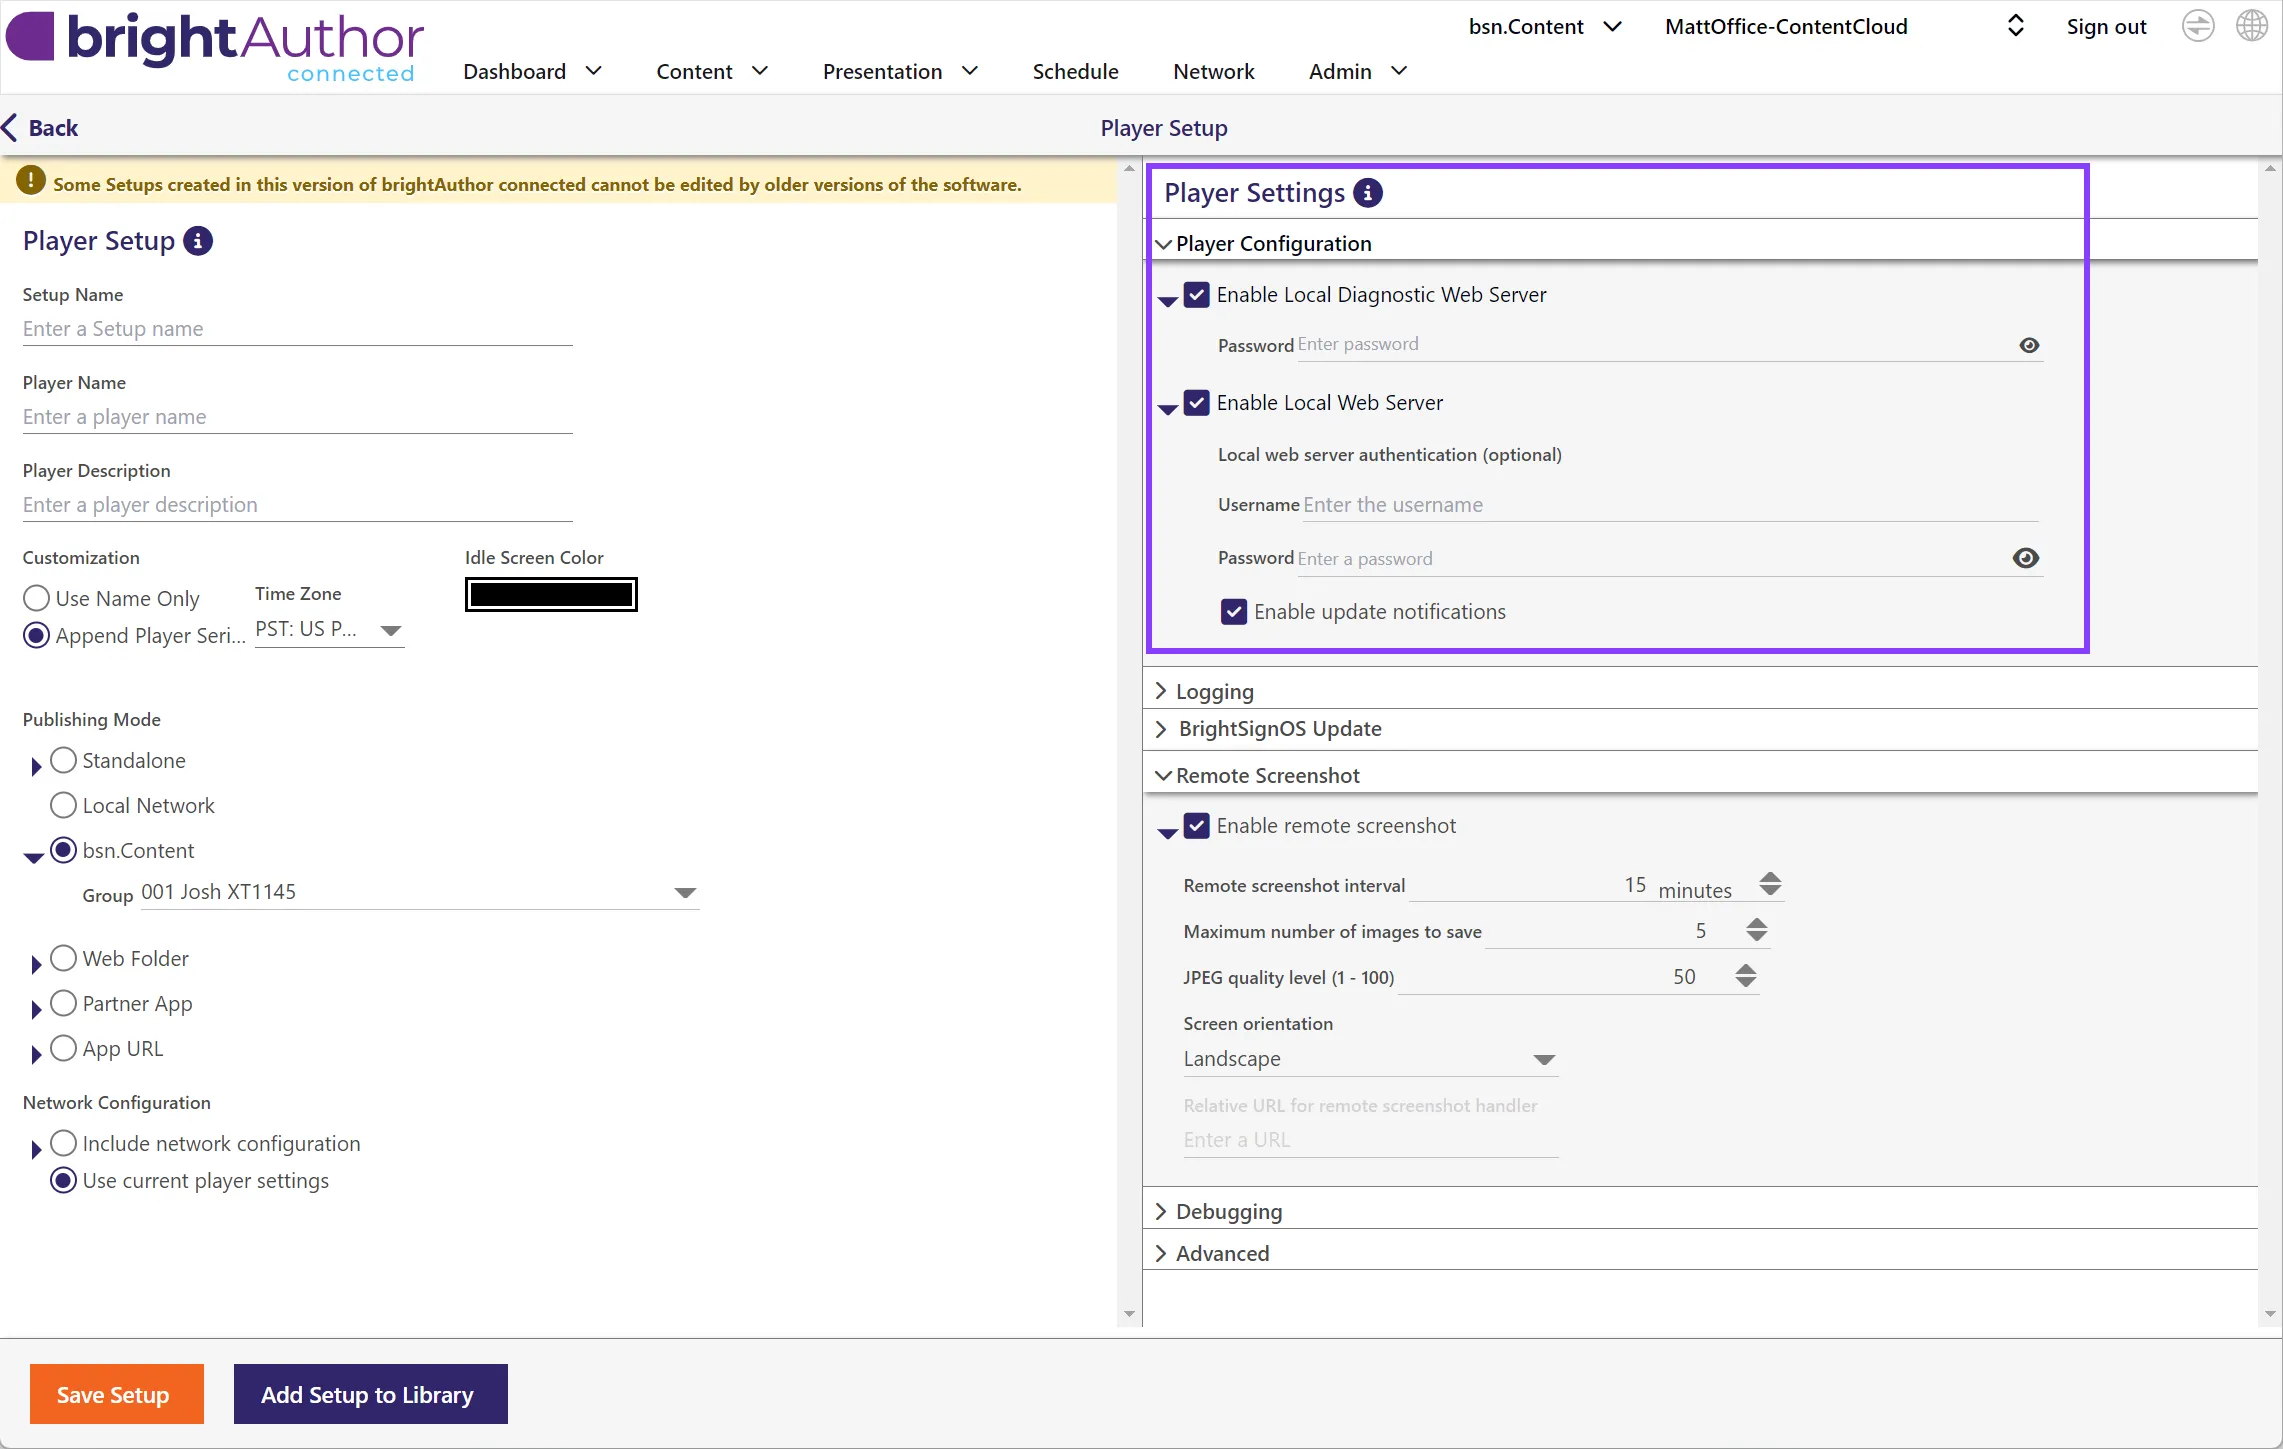
For players that are already set up and connected to a BrightSign Cloud network, the DWS can also be turned on or off under Network > Properties.
Enter a Password for the DWS. Password must be at least 8 characters long and include at least one uppercase letter, one lowercase letter, one number, and one special character. The Username will always be “admin”.
Specify other player settings as desired and either save the Setup File to a file location or add the Setup to the Setup Library.
The player must then be provisioned which applies the Setup File to the desired player. For instructions, see this page: Provision
Advanced Methods
Local access to the DWS can also be enabled using BrightScript, the JavaScript API, or the BrightSign serial command prompt. These methods require more technical expertise than using the BrightSign Author app.
The full instructions and scripts to enable local access to the DWS can be found here.
BrightScript
A custom script containing the roNetworkConfiguration object can be used to enable local access to the DWS. Include the following lines in a autorun.brs script to enable access to the DWS on Ethernet port 80. This example script also sets the password (replace "your_password_here" with a strong password).
Sub Main()
	' Create network configuration object (0 = eth0, 1 = wlan0, 2 = ppp0, usb0 and usb1 can be input as well)
	nc = CreateObject("roNetworkConfiguration", 0)
	dwsConfig = { port: 80, open: "your_password_here" }
	rebootRequired = nc.SetupDWS(dwsConfig)
	nc.Apply()
    registrySection = CreateObject("roRegistrySection", "networking")
	registrySection.Write("dwse","yes")
    if rebootRequired then
       RebootSystem()
    end if
    // rest of the code
End Sub
JavaScript API
Local access to the DWS can be enabled through the JavaScript API by using the script below. This example script also sets the password (replace "your_password_here" with a strong password).
const DWSConfiguration = require("@brightsign/dwsconfiguration");
const systemClass = require("@brightsign/system");
const registryClass = require("@brightsign/registry");
async function configureLDWS() {
	const config = {
		port: 80,                      // HTTP port for web interface
		password: {
			value: "your_password_here",
			obfuscated: false          // Password stored as plain text
		},
		authenticationList: ["digest"] // Use digest HTTP authentication
	};
	try {
        const dwsConfig = new DWSConfiguration();
		await dwsConfig.applyConfig(config);
        // Also write networking.dwse key
        const registry = new registryClass();
        await registry.write("networking", "dwse", "yes");
        // Reboot the player
        const system = new systemClass();
		system.reboot();
	} catch (error) {
		console.error("Configuration failed:", error.message);
	}
}
configureLDWS();
Serial Prompt
Local access to the DWS can be enabled through the player's serial port using the BrightSign Shell. The following commands enable local access to the DWS by writing to the player's registry. This is the least preferred method of enabling local access to the DWS as it does not set a strong password; it sets the player's serial number as the password
registry write networking dwse yes
registry write networking http_server 80
registry flush
A registry flush is necessary if you plan to power cycle the unit after executing the registry command. Registry writes will buffer for a few seconds because the EEPROM and NAND have a limited number of writes (and thus need to protect against carrying out too many writes too quickly).
Access the DWS
Once local access to the DWS has been enabled using one of the methods outlined above, you can access DWS by entering the player's local IP address into your web browser. Note that there will be a redirect to a secure web connection (i.e., https://{player-ip}).
If the player's IP address is not known, brightsign-${serial}.local can be entered into the browser's address bar where {serial} is the serial number of the player. As with entering the IP address, there will be a redirect to a secure web connection.
Your browser may display a security warning to the effect of "Your connection is not private" or "This connection is not secure". This occurs because the player is using a self-signed SSL certificate which browsers do not automatically recognize as trusted. This warning is expected and safe to bypass. Self-signed certificates, while lacking third-party validation, provide the same encryption protection as trusted certificates.
Example
See this BrightSign GitHub page which demonstrates three different methods to enable and configure the DWS on your player.