Create a BrightSign Cloud Account & Network
6 min
This page / section pertains to BrightSign Author, our latest app for authoring and managing content and players. For the legacy BrightAuthor Classic app, refer to our Legacy DocsLegacy Docs.
Create Your Account
If you have not previously created a BrightSign Cloud network, you will be prompted to create one when you sign in to BrightSign Control or BrightSign Author.
BrightSign Control
- Go to https://control.bsn.cloud/
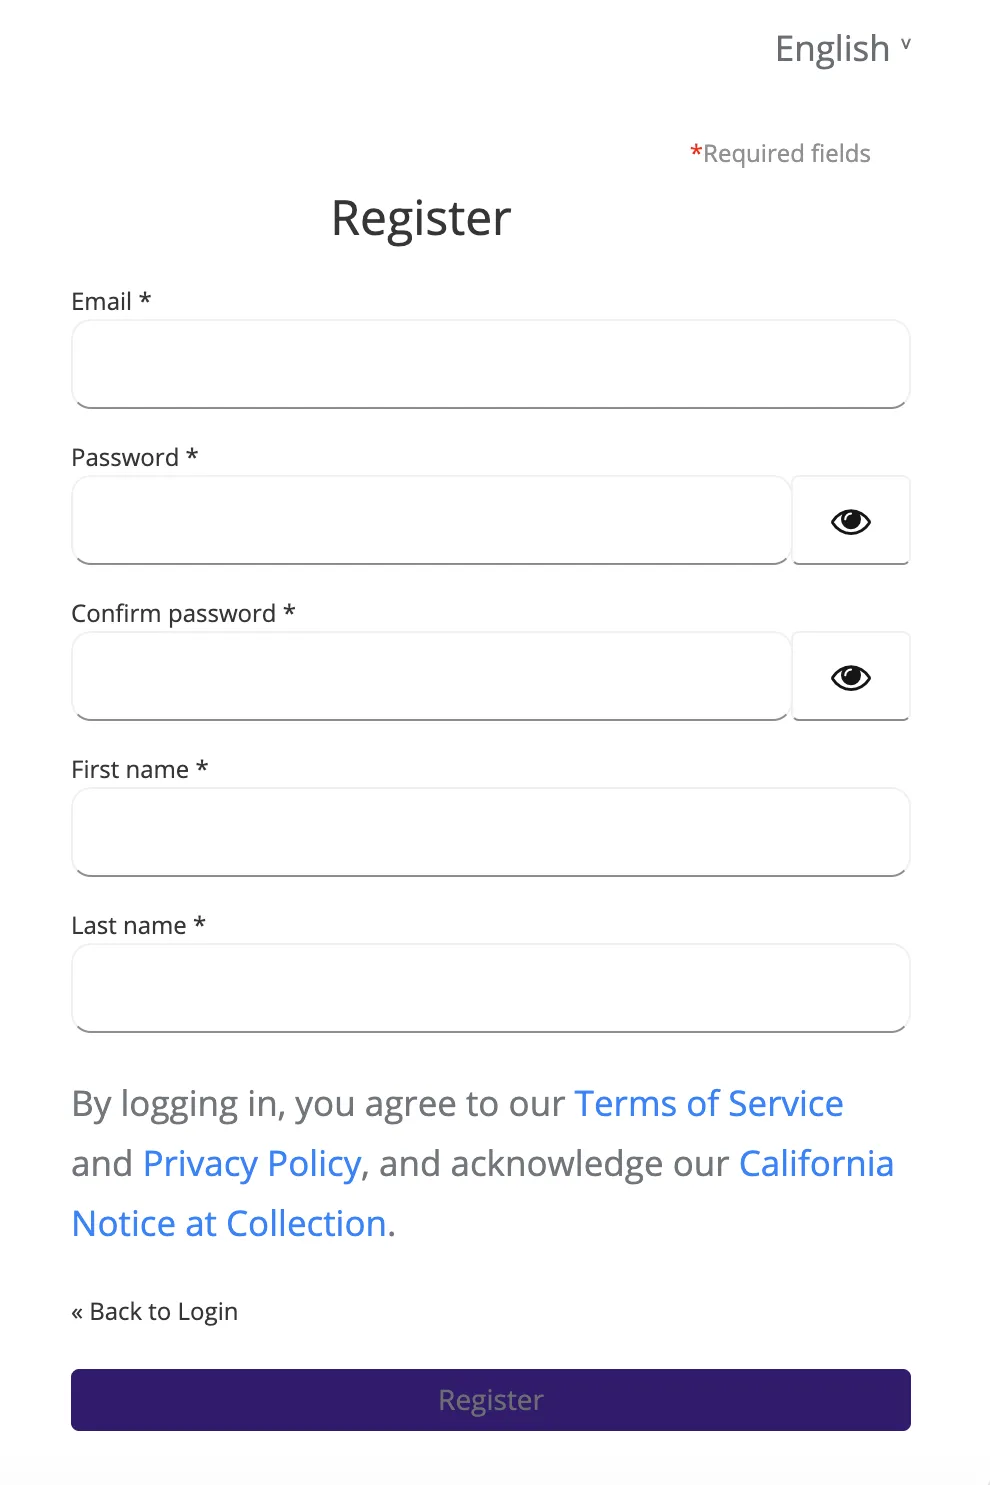
- Select New user? Register at the bottom of the dialog box
- Fill out the information and select Register when you are done.
BrightSign Author
- Select Connect.
- Sign in as a New User and enter the required information to Sign Up for BrightSign Cloud.
- Validate the email and return to BrightSign Author to log in with your new credentials.
- Give your new BrightSign Cloud network a name and agree to the terms and services to create the network.
- To create a BrightSign Author Plus subscription, go to the Admin tab and select the bsn.Content trial.
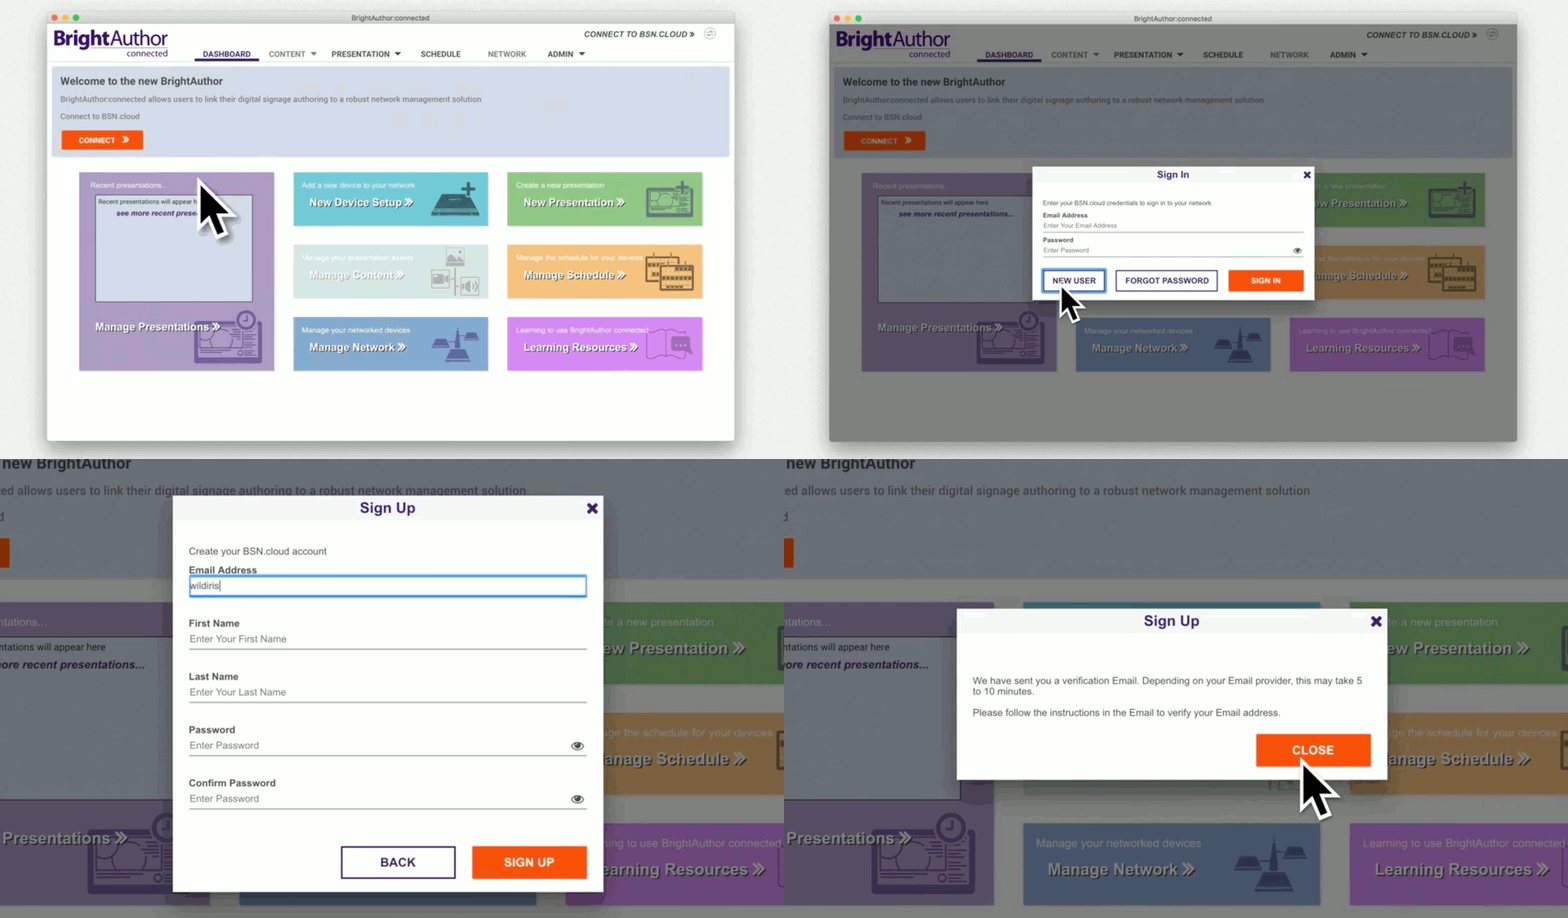
Image 1: Connect, Sign In, and Sign Up to create a BSN.Cloud account
Create a New Network
You can create multiple networks from the same account in BrightSign Control or BrightSign Author.
BrightSign Control
- Go to control.bsn.cloud and sign in
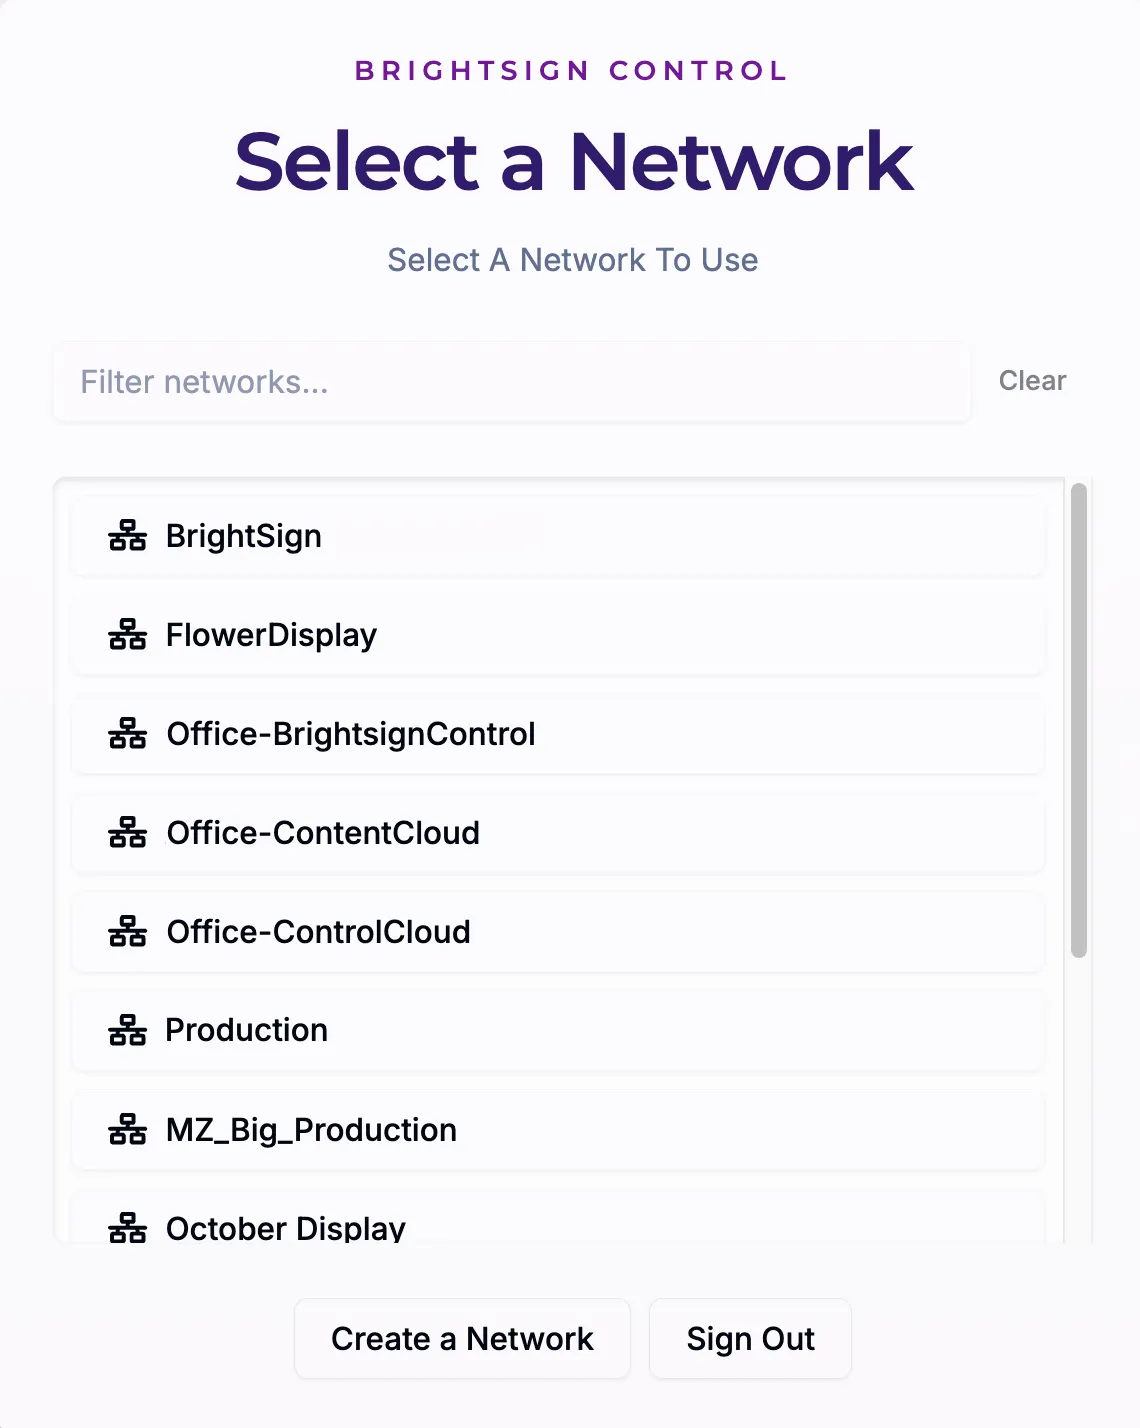
- In the Select a Network screen (shown below), pick Create a Network.
- In the next dialog box, enter a Display Name and a URL-friendly Network Name
- Select Create Network. You will get an email confirmation that the network has been created.
BrightSign Author
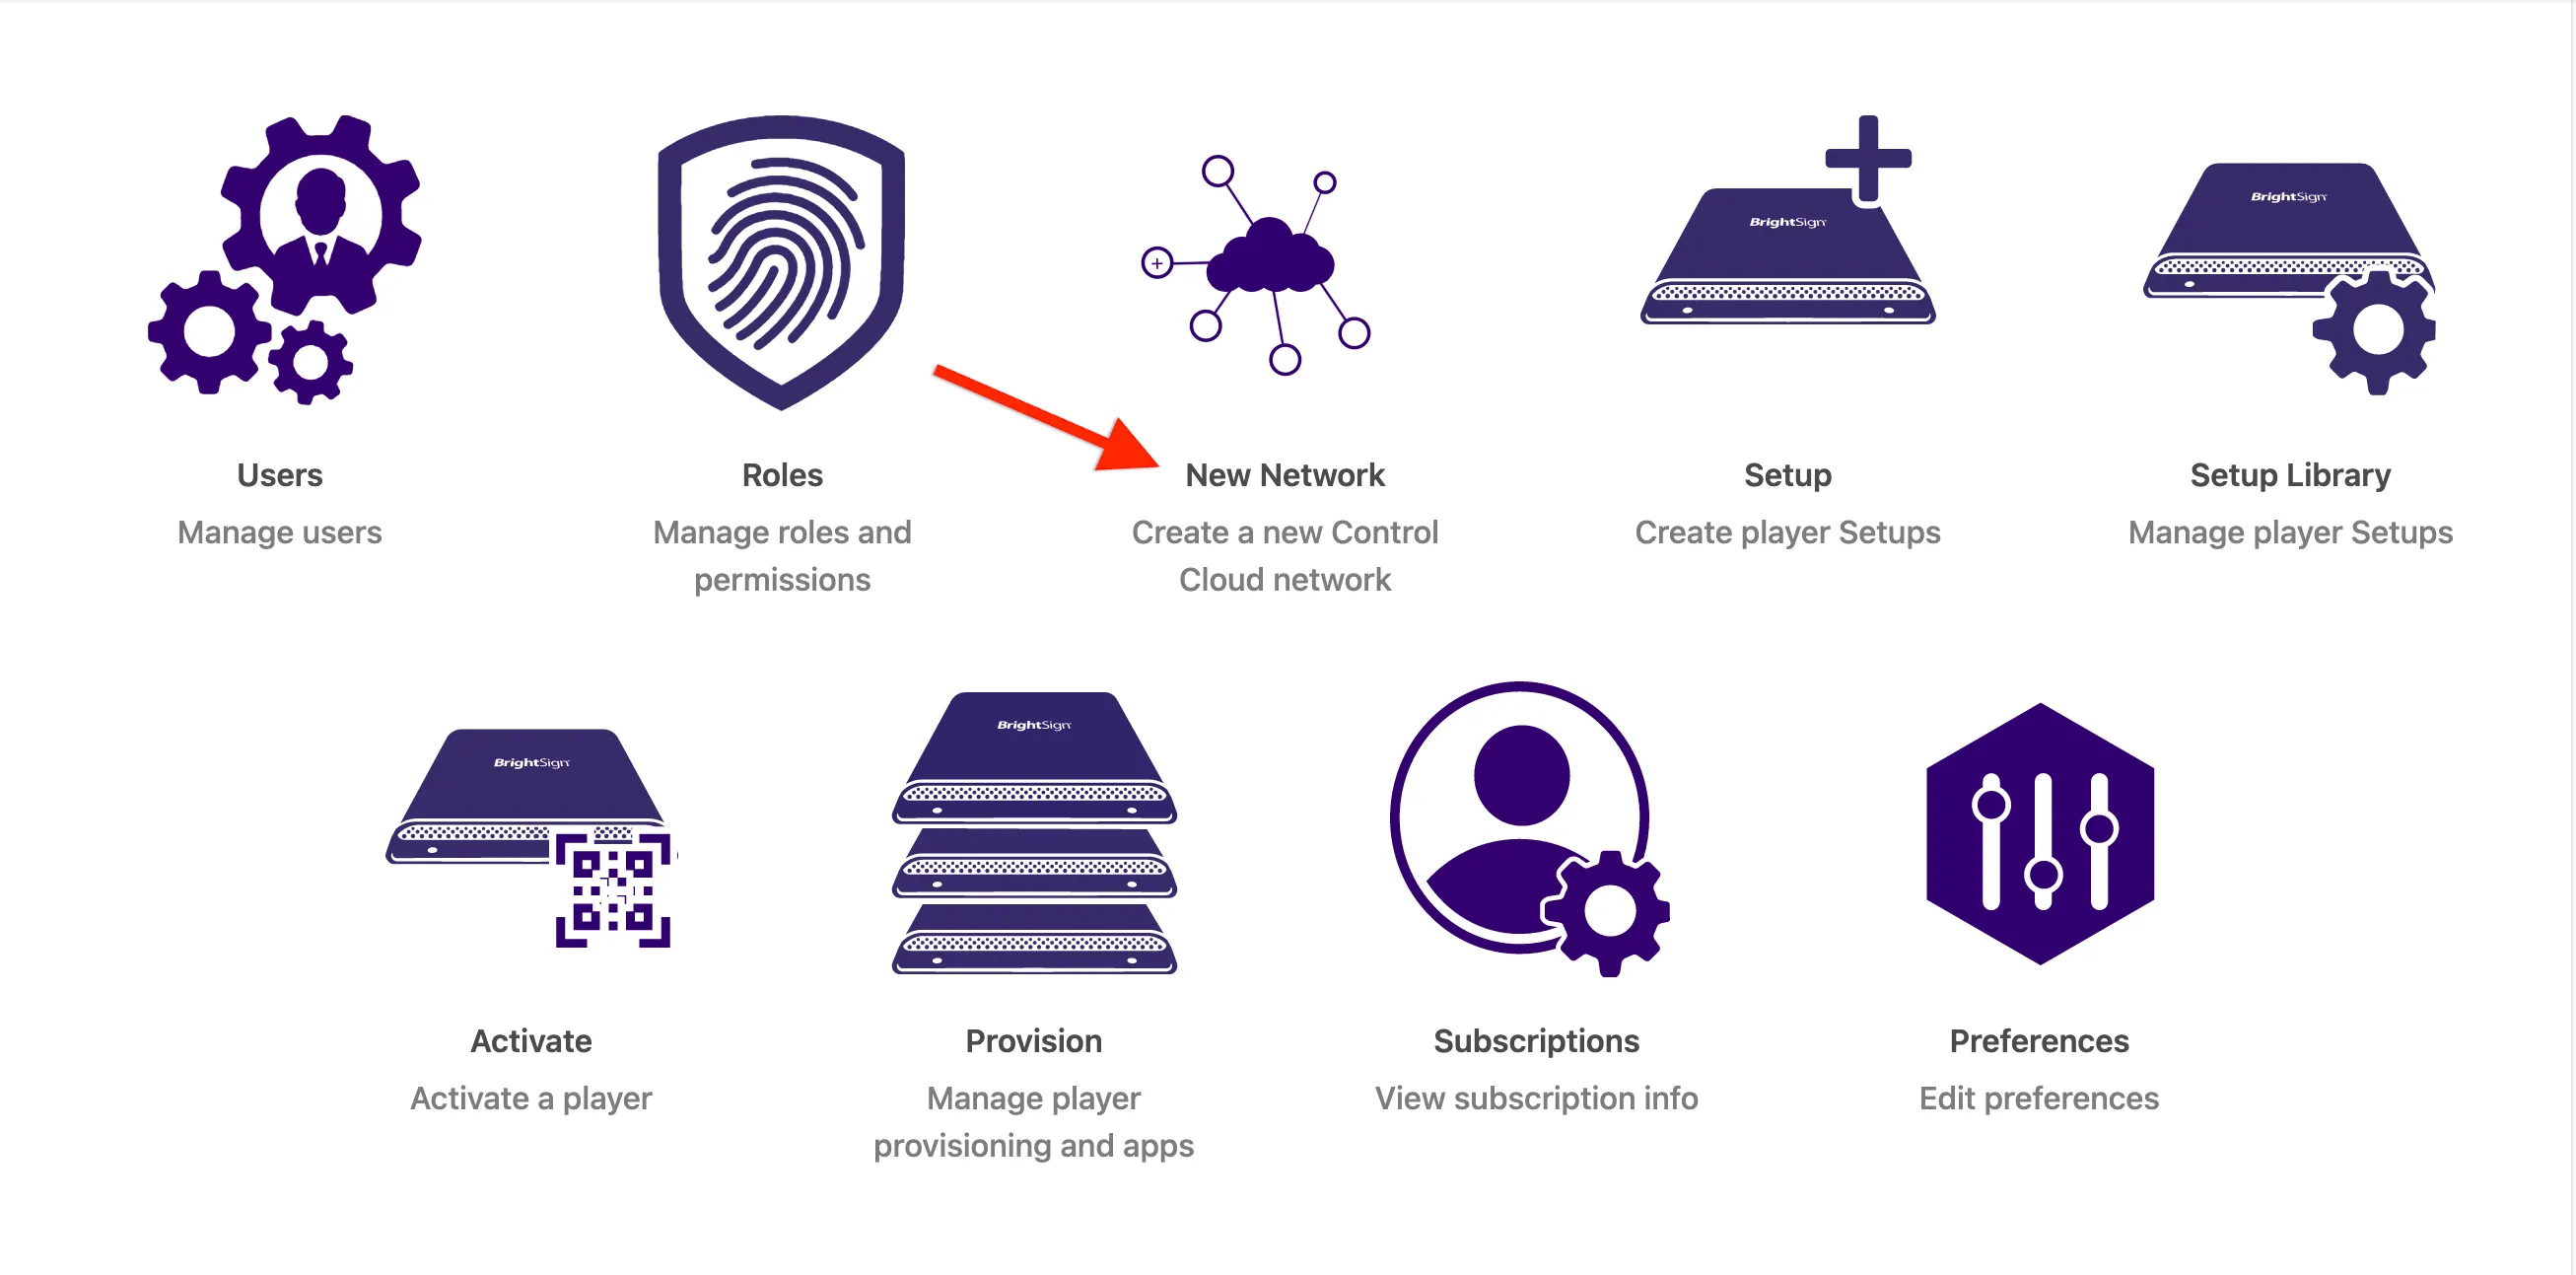
- Go to the Admin tab.
- Select New Network as in the image below.
- You will be prompted to add a unique Network Name in a new dialog box.
- Select Create. You will receive an email with login instructions when your new network has been created.
Next Steps
See BrightSign Author for more information about creating presentations using the BrightSign CMS and other tools.
See BrightSign Control for more information about managing players on your network.