Direct Wi-Fi Setup
There are several ways to configure Wi-Fi connectivity for players equipped with Wi-Fi modules:
- Create a Setup with the required Wi-Fi info. Provision the player to apply the Setup File to the player. Temporarily connect the player to the network via Ethernet to enable the transfer of the Setup File to the player. After the Setup File has been installed, the Ethernet connection can be removed, and the player will connect via Wi-Fi.
- The "Direct Wi-Fi Setup" method described on this page can also be used. This method does not require a temporary Ethernet connection nor the manual copying of a Setup File to the player.
Prerequisites
Note that ALL conditions listed below must be met in order for the player to use Direct Wi-Fi Setup.
- The player must have a Wi-Fi module installed.
- The player must be either brand-new or have been factory reset.
- The player's storage device (e.g., microSD card) must be blank.
- The player must be running BrightSignOS 8.4.X or higher.
- The player must not be connected to the network via an Ethernet cable. If the player has an active Ethernet connection, it will not be able to perform Wi-Fi Setup.
- The player must be connected to a display.
Procedure
After booting up, the player will display the BrightSign Player Setup screen.

Configure with USB Keyboard
Most players have a USB port (USB-A and/or USB-C) which enables the attachment of a USB keyboard (and optionally, a mouse) to enter Wi-Fi credentials. A mouse is not strictly required as the TAB key on the keyboard can be used to move to the required fields.
Once attached, click Next to proceed with Wi-Fi setup. This will take you to Step 4 below. If you need more time, click Stop Timer.
If you are unable to or do not want to use a USB keyboard, you can still configure Wi-Fi as described in Step 3. If you have already attached a USB keyboard and mouse, Step 3 will not appear and you will be taken to Step 4.
Configure without USB Keyboard
After ~60 seconds, the Player Setup screen will automatically go to the Wi-Fi Setup screen below which enables Wi-Fi setup without a keyboard or mouse.
In older versions of BrightSignOS, this screen may be titled Wireless Access Point and look a bit different.
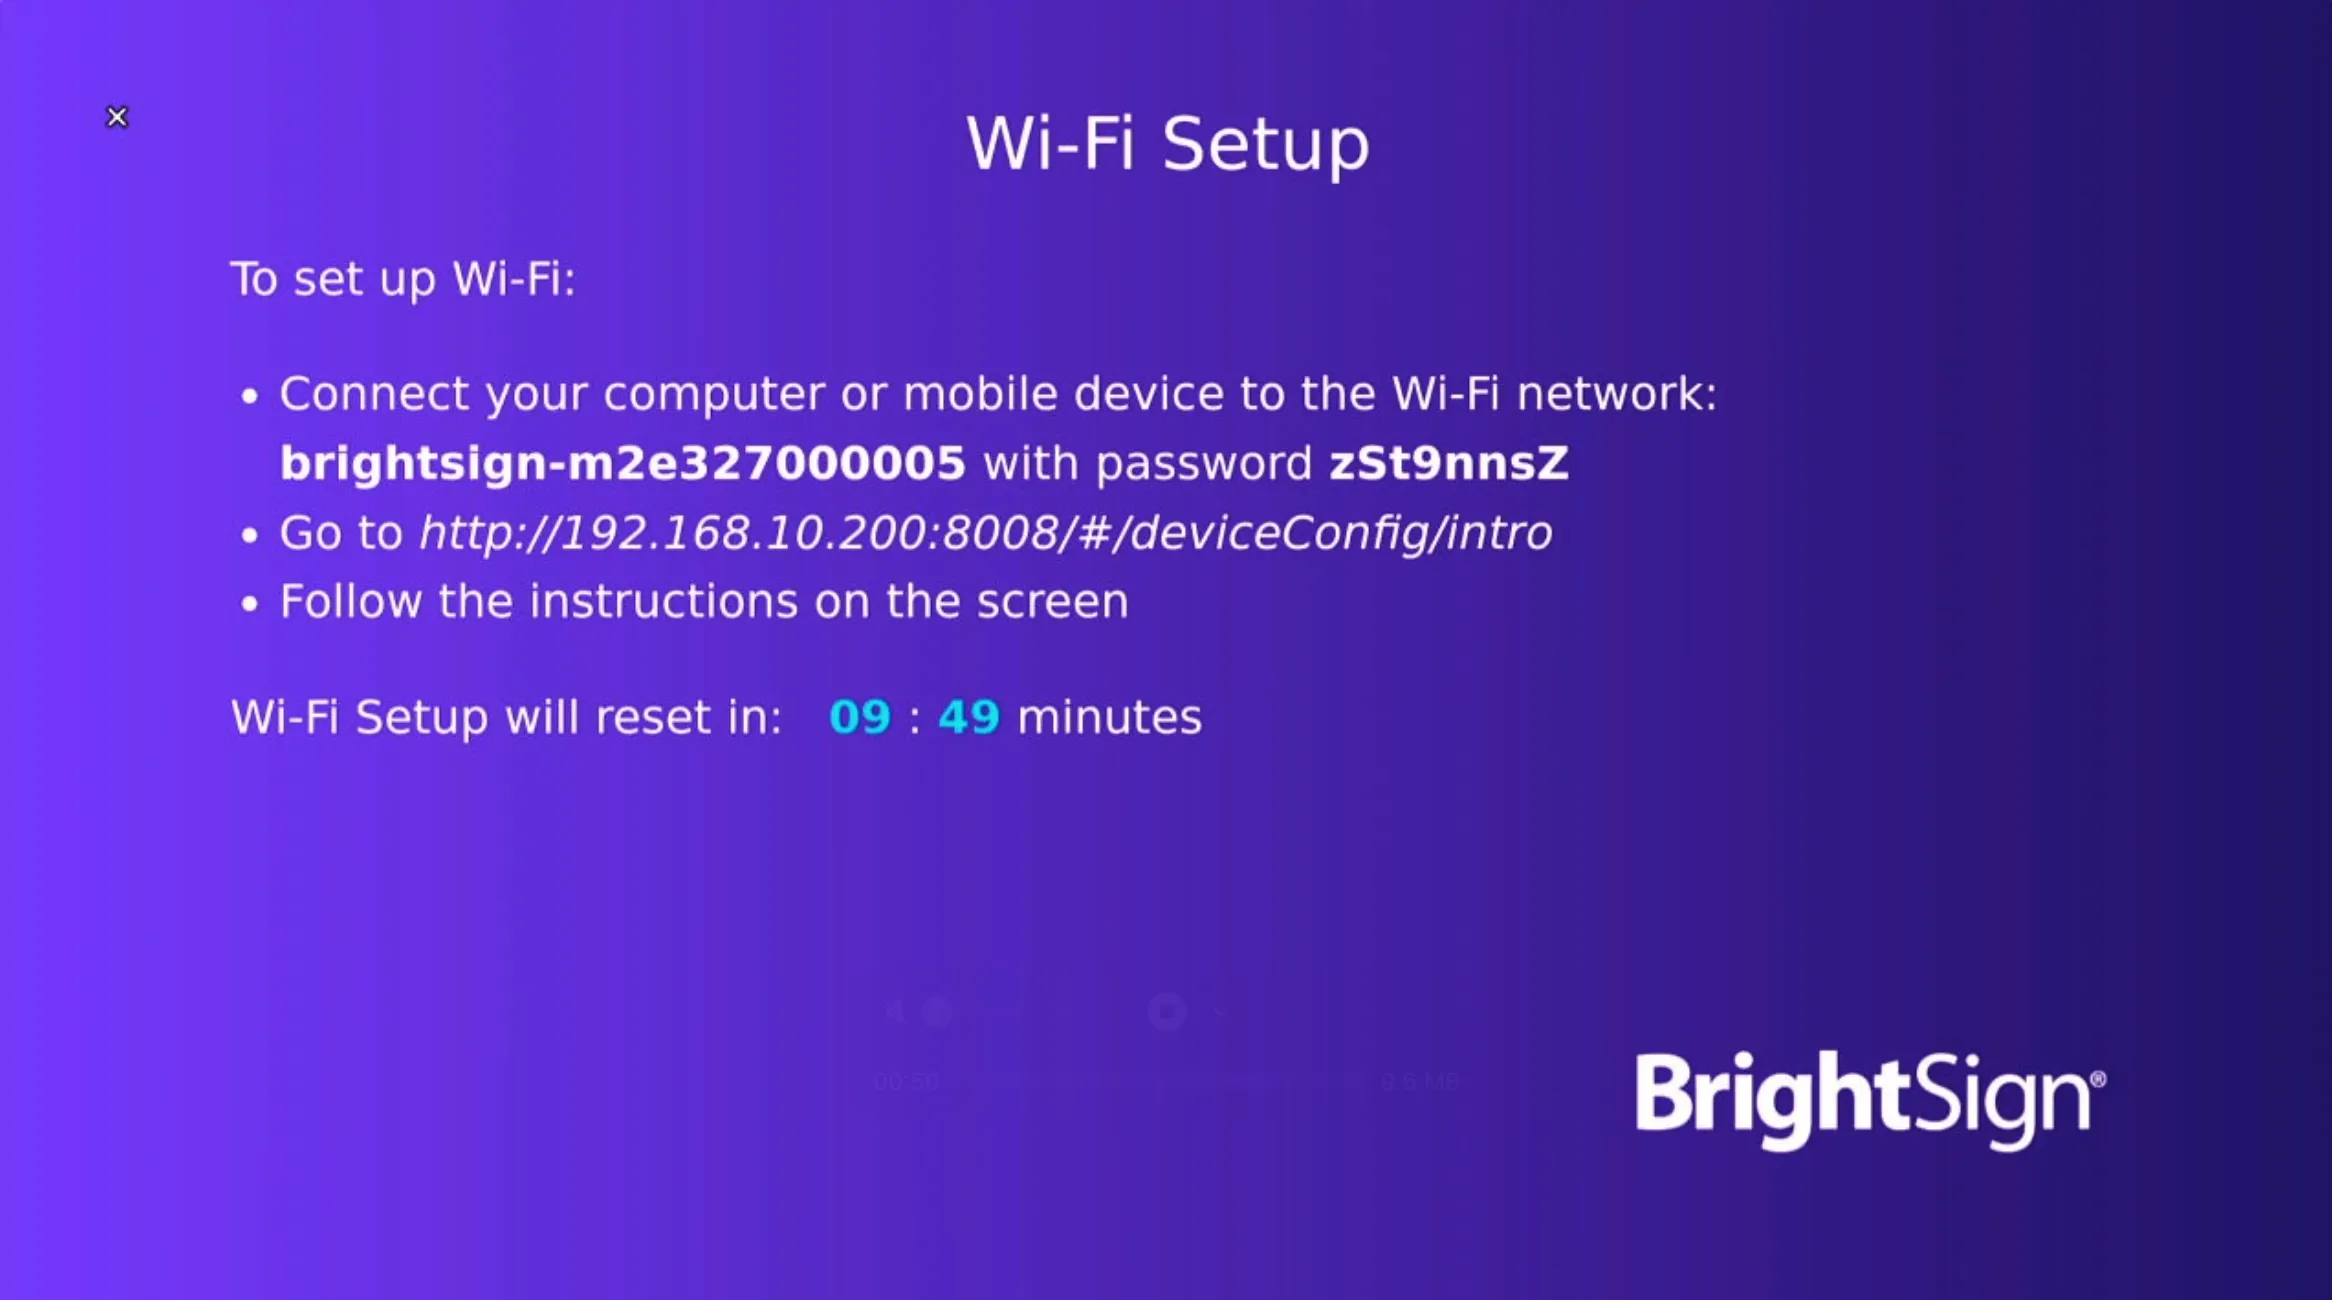
Connect your computer or mobile device to the Wi-Fi network shown on the screen. In the example above, the Wi-Fi network is brightsign-m2e327000005 and the password is zSt9nnsZ.
After connecting to the Wi-Fi network, open your web browser and go to the address shown on the screen. In the example above, you'd go to http://192.168.10.200:8008/#/deviceConfig/intro.
This page closely resembles the previous BrightSign Player Setup page, but instead of appearing on the player-connected screen, it's shown in your web browser via the local network.
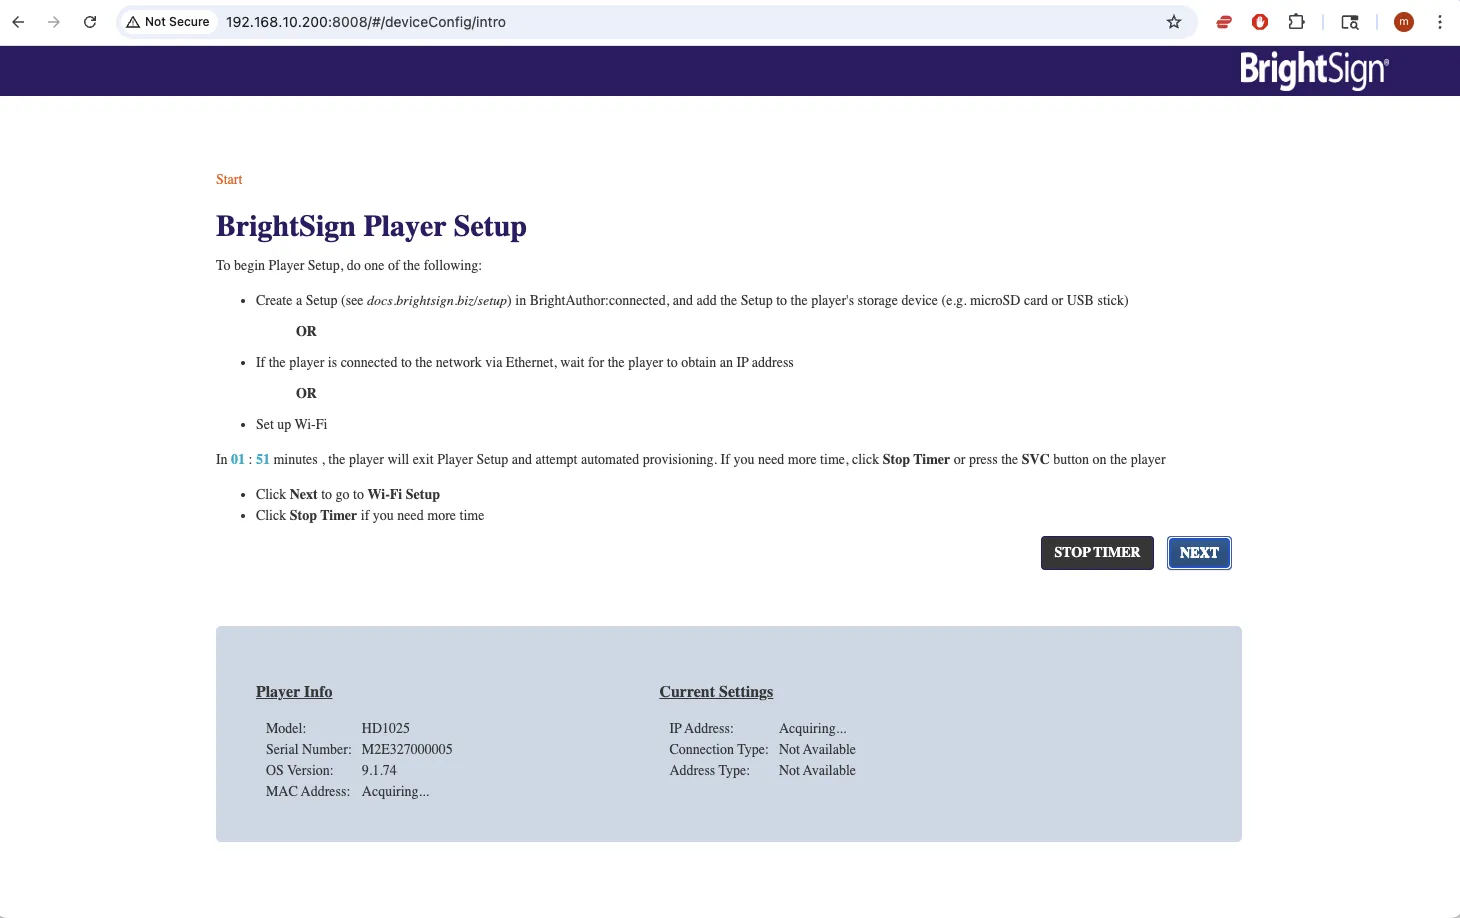
Click Next to proceed with Wi-Fi setup. If you need more time, click Stop Timer.
Wi-Fi Setup
The following screen will be displayed, either on the player-connected screen if you are using a USB keyboard, or on the web browser of your computer or mobile device if you were either unable to or chose not to use a USB keyboard. Select the SSID from the drop-down menu and enter the password.
In rare instances, the SSID scan may not yield any results at which point a text box is provided for manual entry of the SSID.
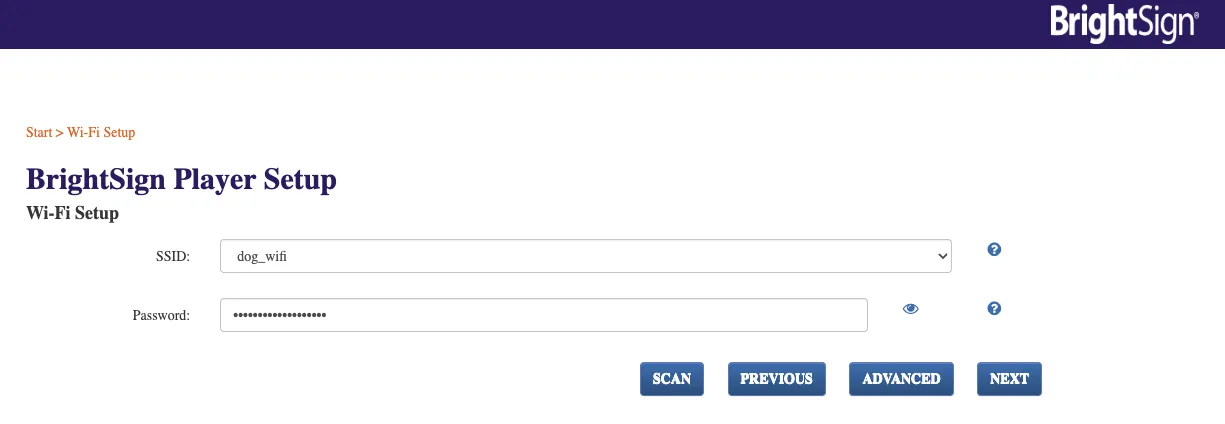
Once the Wi-Fi connection has been established, the player will reboot.
Upon reboot, the player will connect to the Wi-Fi network and check to see if the player has been provisioned.
Provisioned
If the player was provisioned beforehand, it will automatically download and install the Setup File assigned to it. It is important to note that the player must be provisioned before powering up the player. See Provision for more info.
Not Provisioned
If the player was not provisioned beforehand, the player will display the Activate screen.
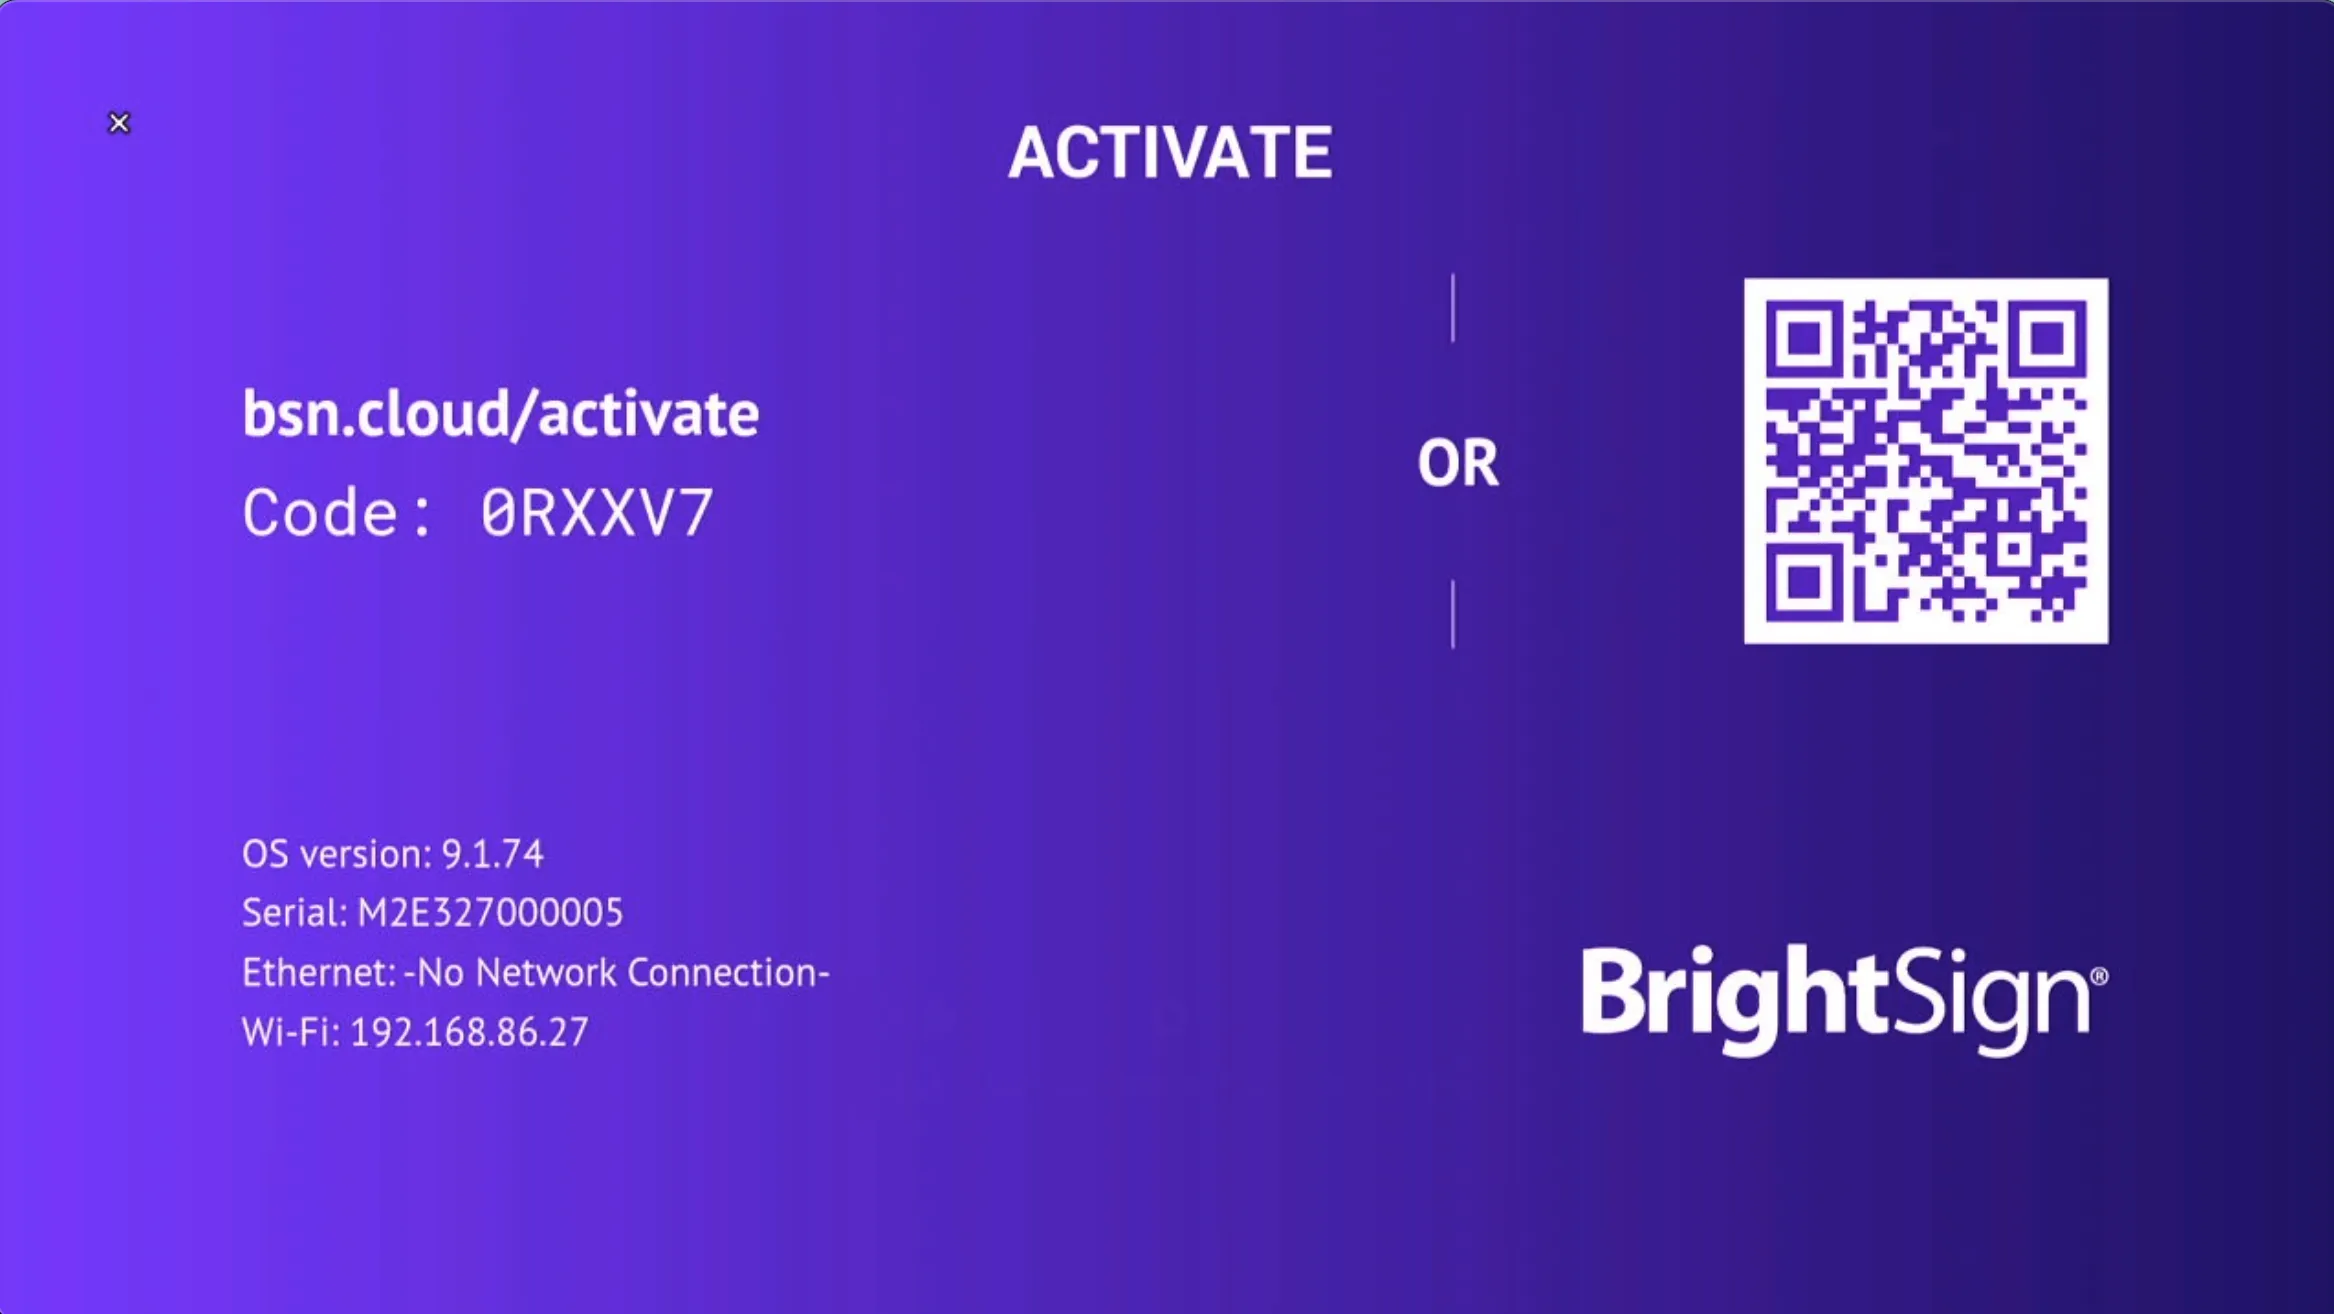
To download and install the Default Setup from BSN.Cloud:
- In BrightSign Author, go to Admin > Activate and enter the Activation Code (0RXXV7 in the example above).
- In BrightSign Control, enter the code in the Player Setup > Registration section.
Note that the Activate process will install the Default Setup to the player. If you want to install a different Setup File, you should provision the player with the desired Setup File beforehand.
More info about the Activation process can be found here.
Advanced Wi-Fi Settings
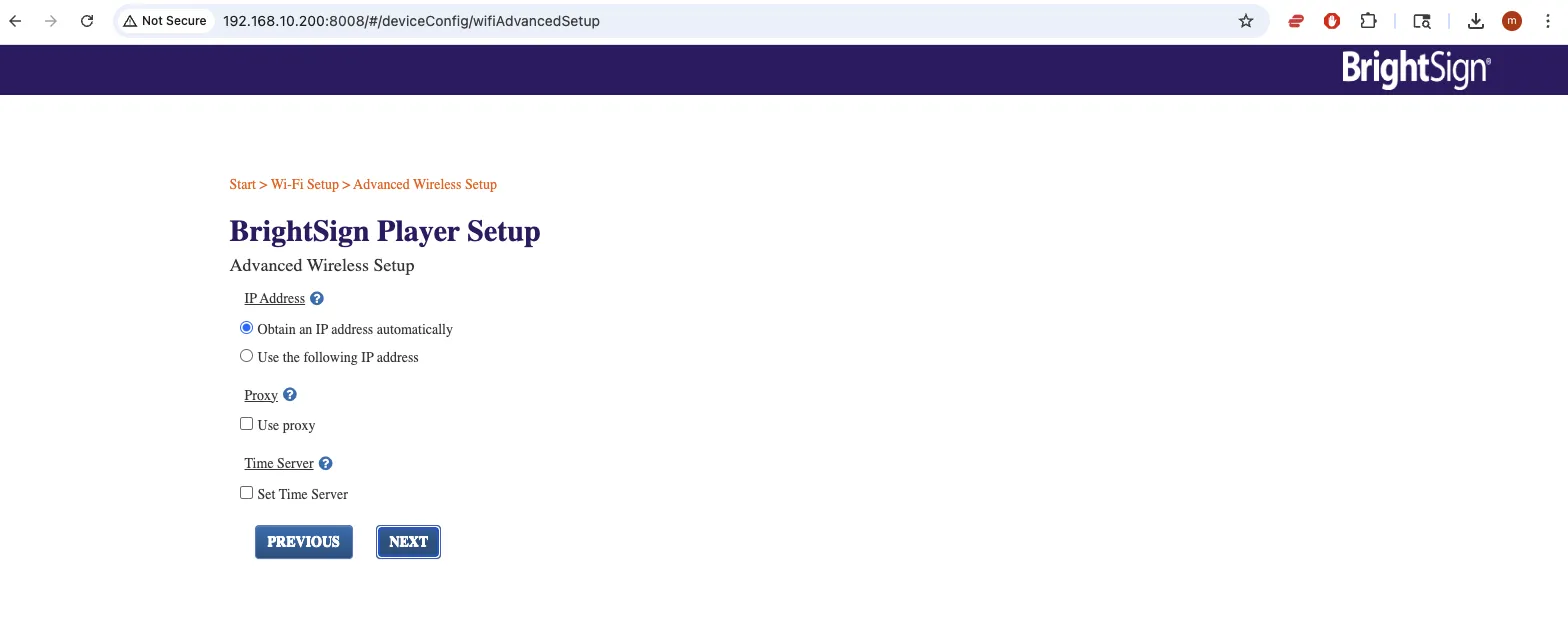
The Advanced button enables the configuration of additional Wi-Fi settings.
- IP Address
- Obtain an IP address automatically: The IP address is obtained automatically using DHCP.
- Use the following IP address: The IP address is set manually.
- Proxy Check the Use proxy box to configure the player to communicate via a proxy server.
- Address: Enter the address of the proxy. To provide a user name and password for the proxy, use the :@ format (for example, admin:[email protected] ).
- Port: Enter the port number of the proxy.
- Time Server Check the Set Time Server box to change the server that the player will use to synchronize its clock. The BrightSign Network time server is used by default.
- URL: Enter the URL for the time server.
When you are finished configuring the Wi-Fi network settings, click Next. The player will then attempt to connect to the Wi-Fi network using these settings.