Restrict/Allow Access in Author Plus
You can hide almost anything on your network from a specific role or user so that even if the network is shared, each person only sees the features, groups, players, presentations, or content you allow. The most common reason to do this is licensing or security.
Access Overview
Access works in three layers. Each layer is only able to further restrict what the layer above it allows:
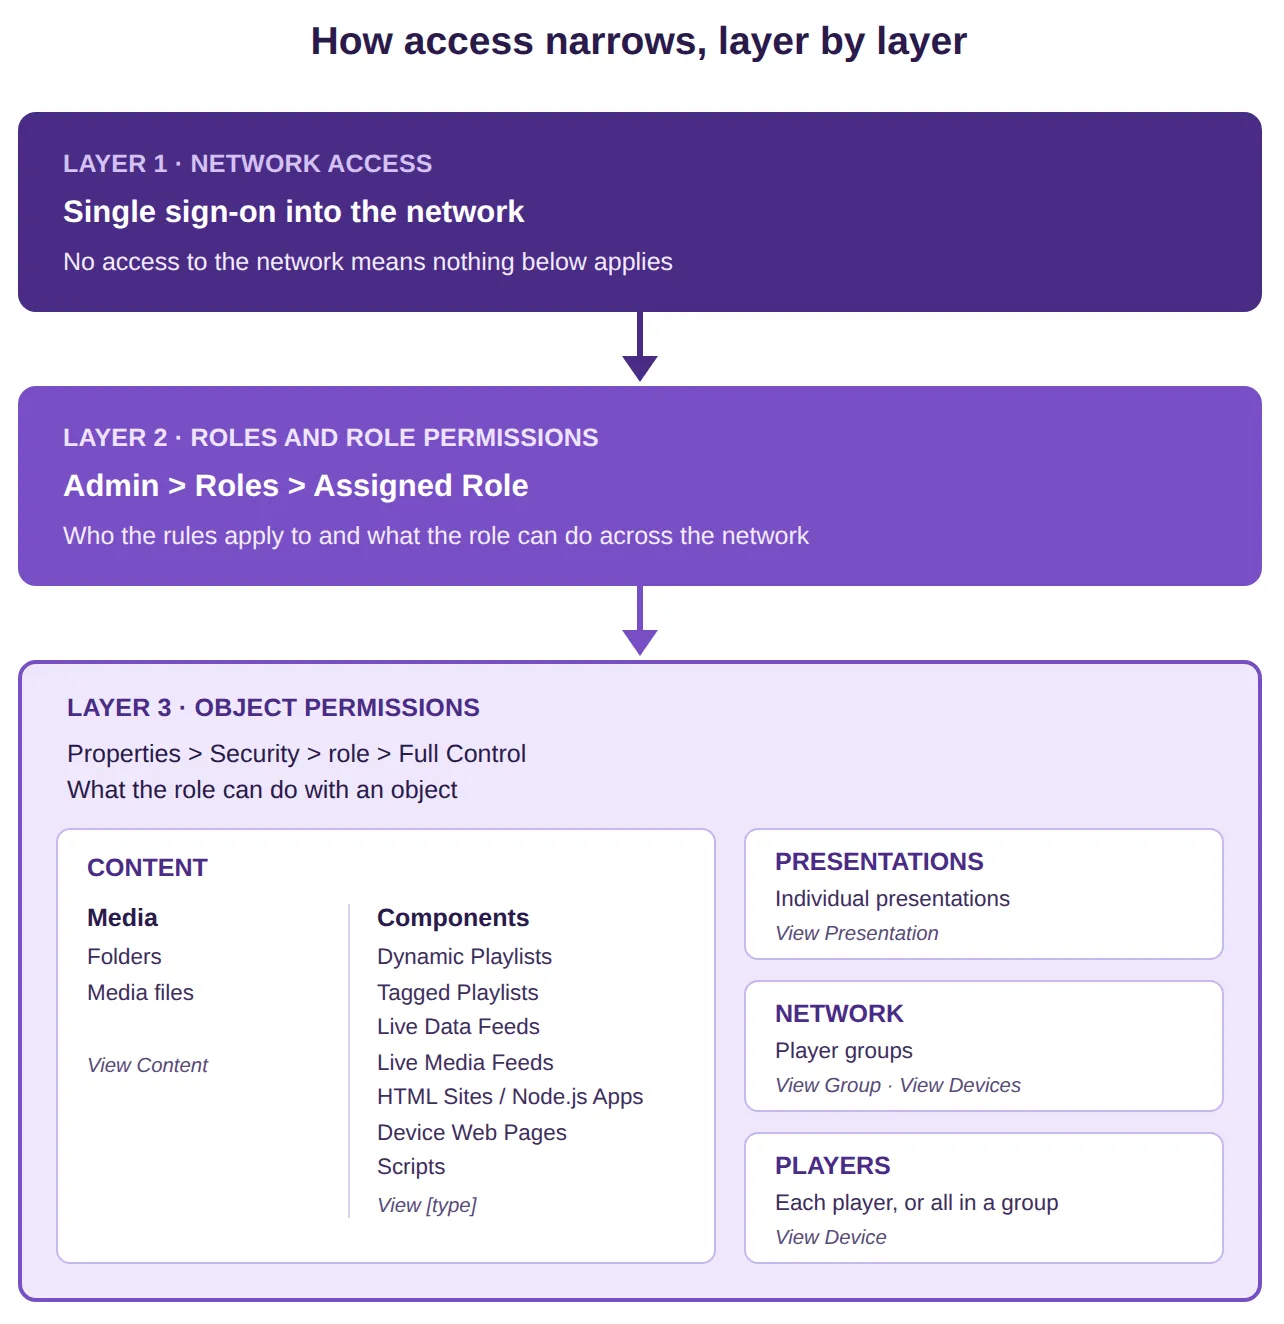
Note that:
- An object's switches only work if the role allows that type of object. If the role has that object turned off, the object switches are grayed out. The labels stay dark, so the switches look active even though they aren't.
- You can override higher level permissions if you change object level permissions. However, you must be an Administrator to do this.
- Folder access settings override the files settings in it; hide a folder and everything in it disappears, show a folder and you can still hide single files inside it.
Creating Custom Roles
When the preset roles are not specific enough for your user, you can create a custom role that has the restrictions needed for your use case. Follow the steps below to create a custom role:
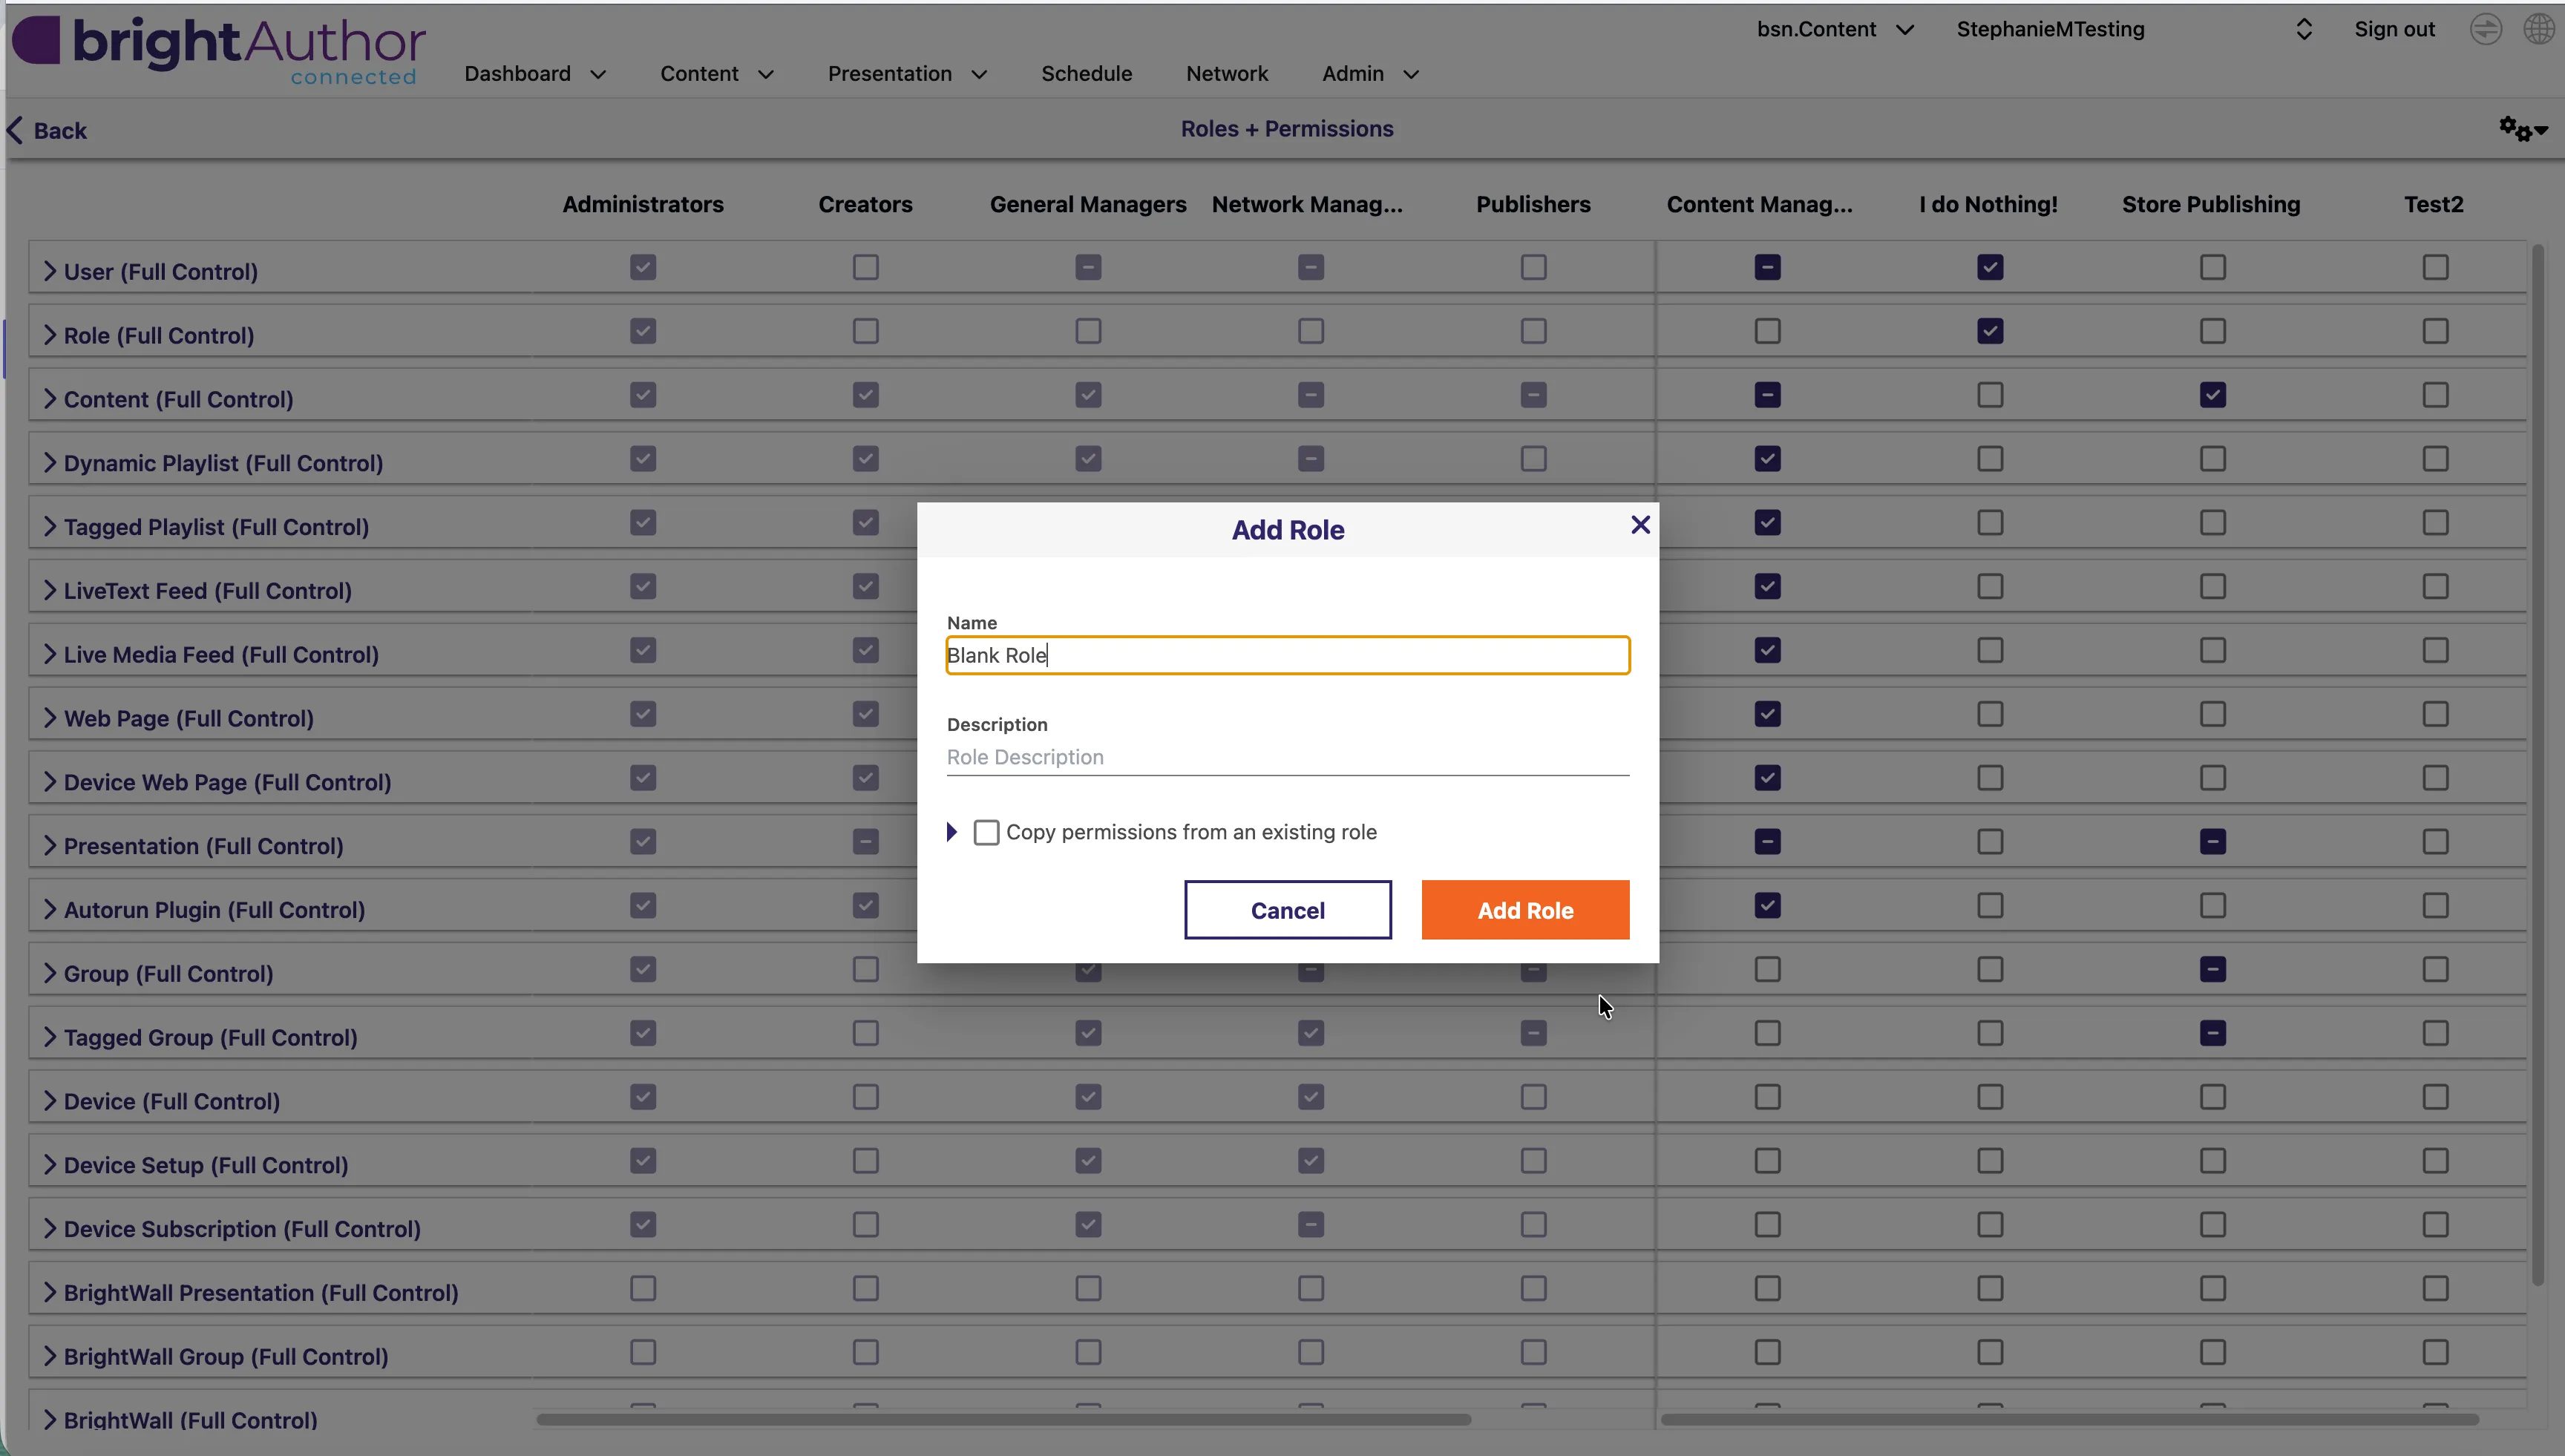
- Go to Admin > Roles and create a new custom role. Do not copy permissions from an existing role, since it is quicker to grant access than take it away.
- Choose what the role can work with by checking each type of object the role should be able to use. Turn on every type the role might need - you can turn them off later. Open the arrow next to a row to see individual permissions. The Content row, for example, breaks out into View, Upload, Update, Manage Tags, Assign, Unassign, Edit Permissions and Delete.
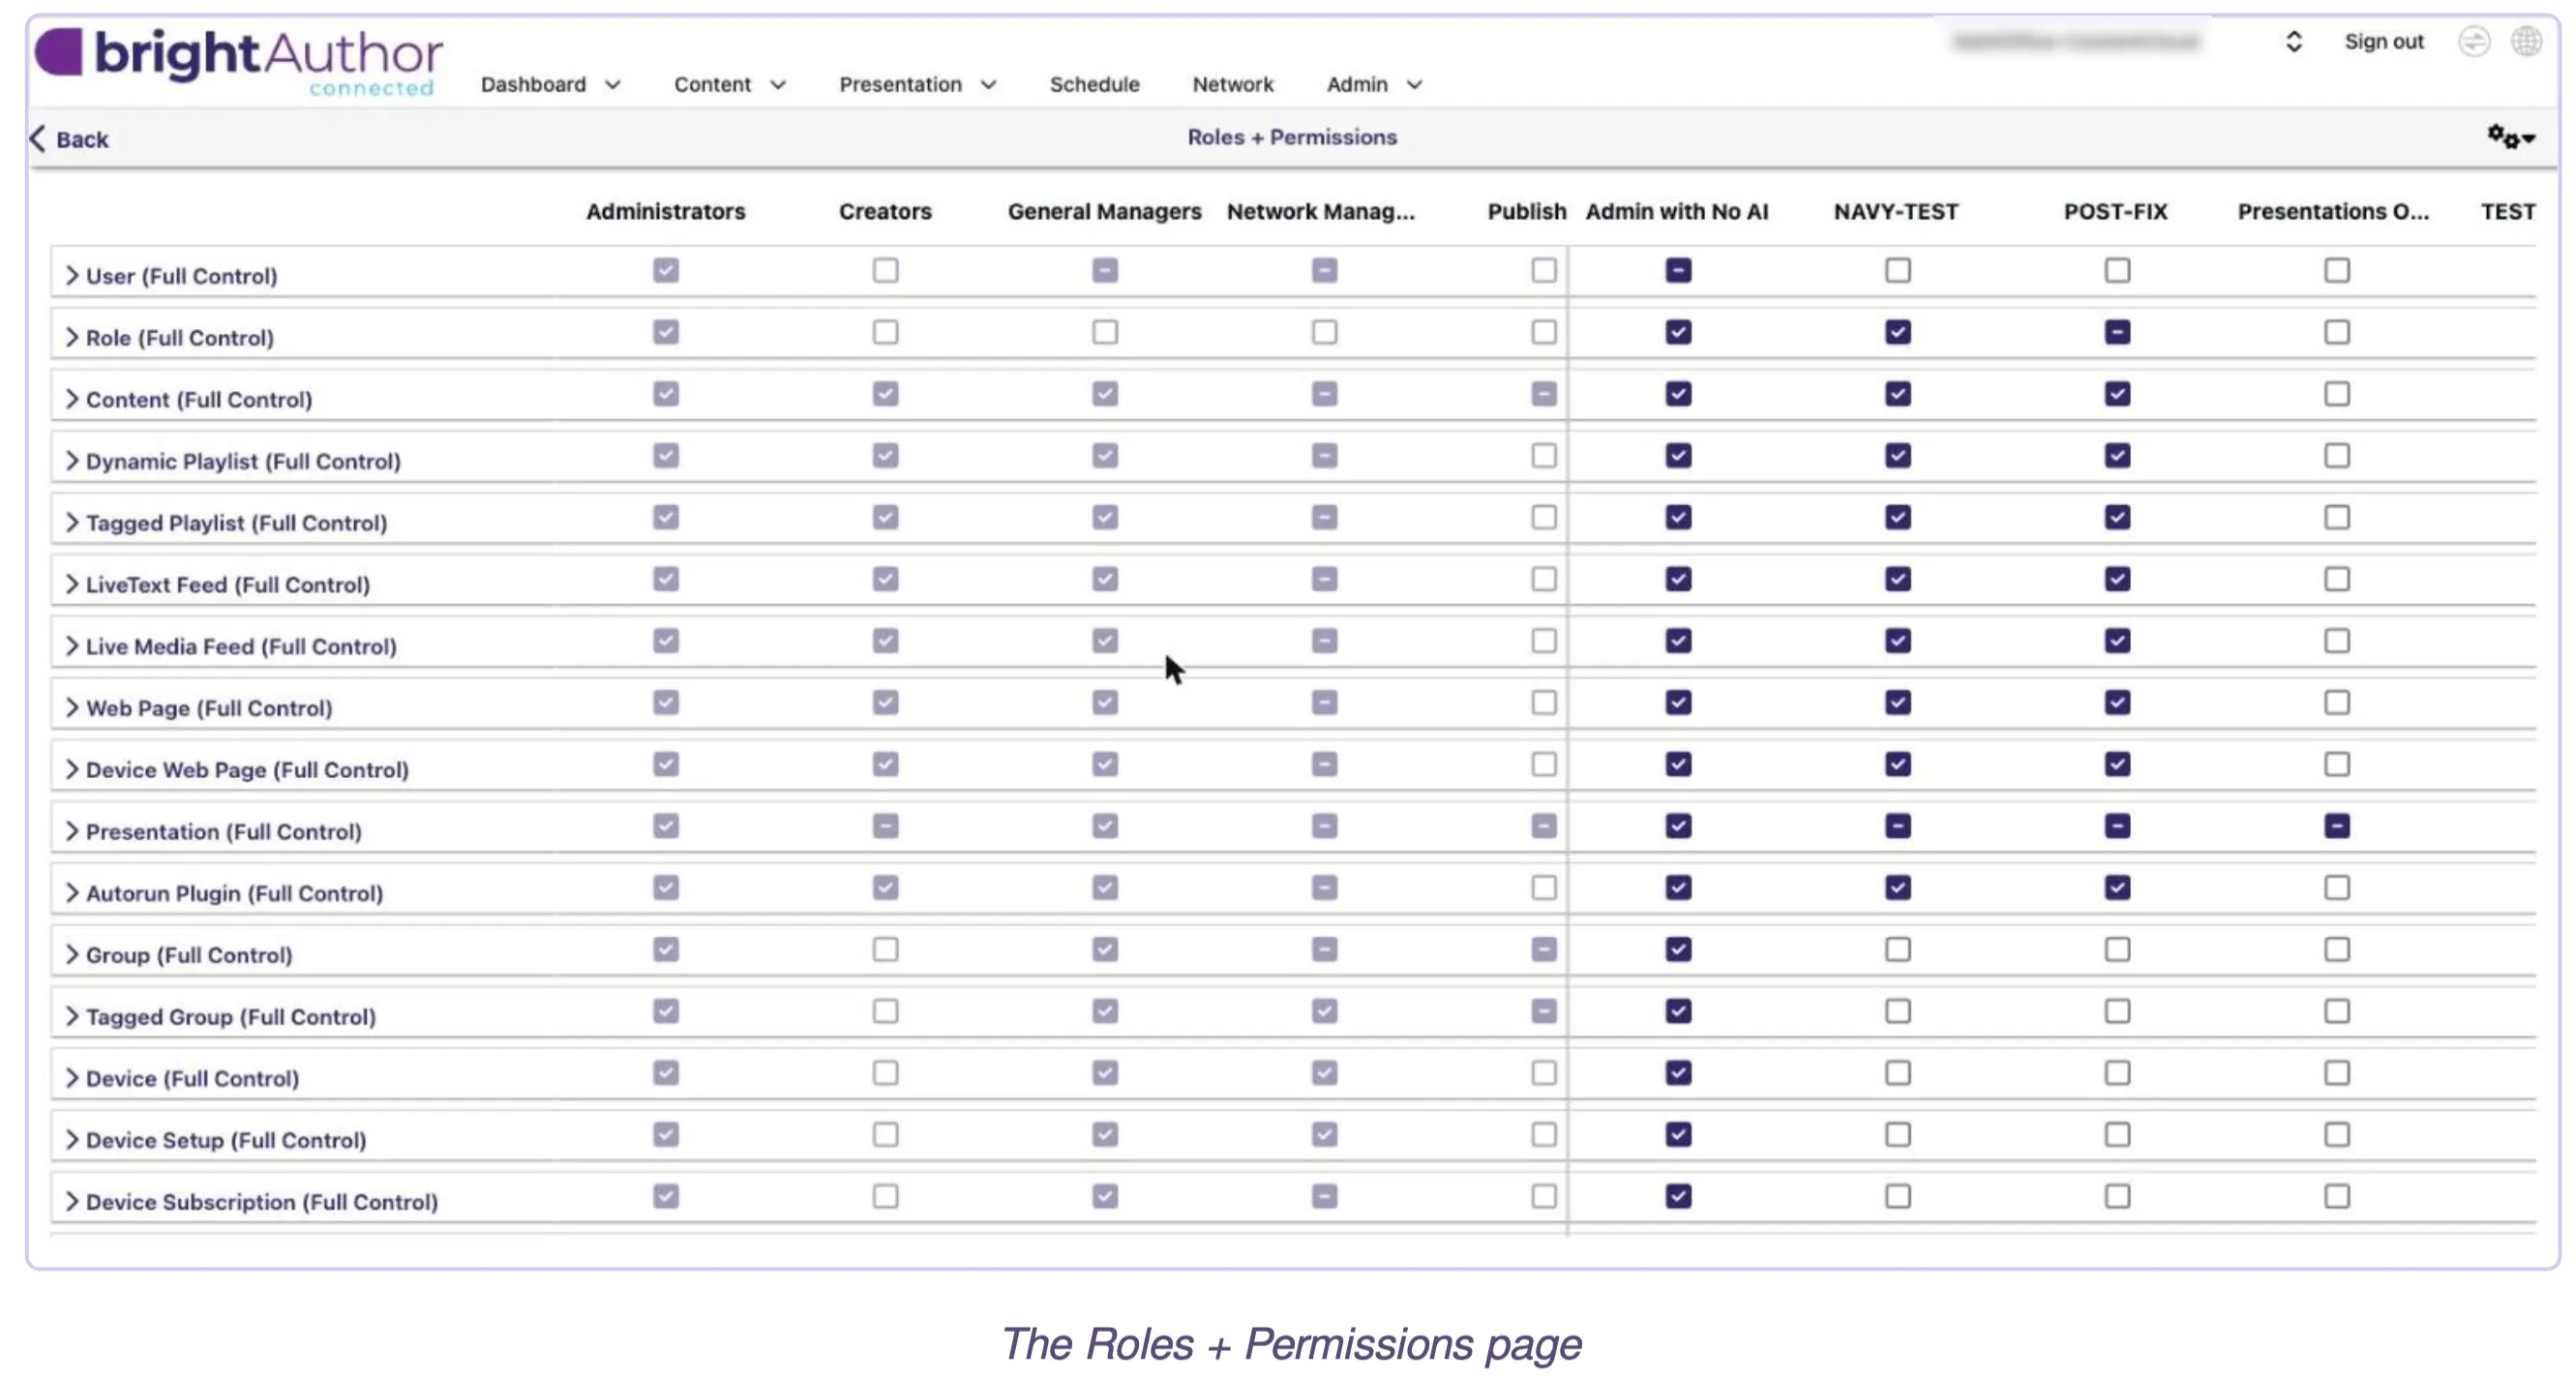
Here is how the rows on this page match what you see in the Library:
- Content = Media folders and files
- Dynamic Playlist, Tagged Playlist = Playlist components
- LiveText Feed, Live Media Feed = Live Data Feeds and Live Media Feeds
- Web Page, Device Web Page = HTML Sites / Node.js Apps and Device Web Pages
- Autorun Plugin = Scripts
- Presentation = Presentations
- Group, Tagged Group = Player groups
- Device, Device Setup, Device Subscription = Players
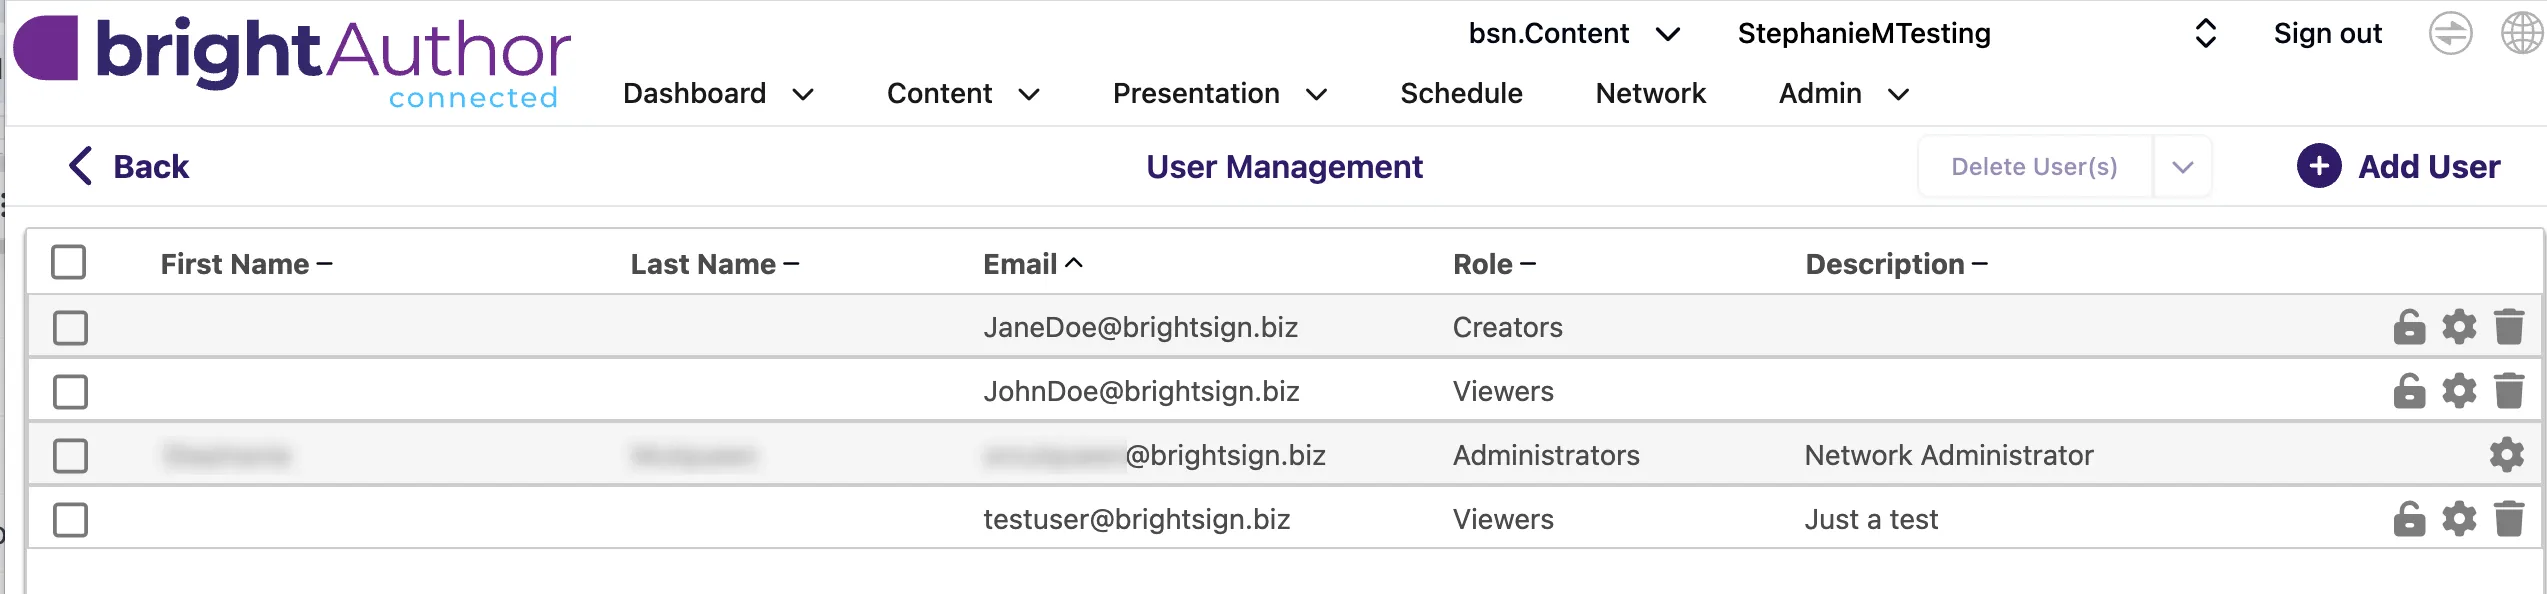
- Go to Admin > Users and click on the gear to assign a role to a person:
Object Level Permissions
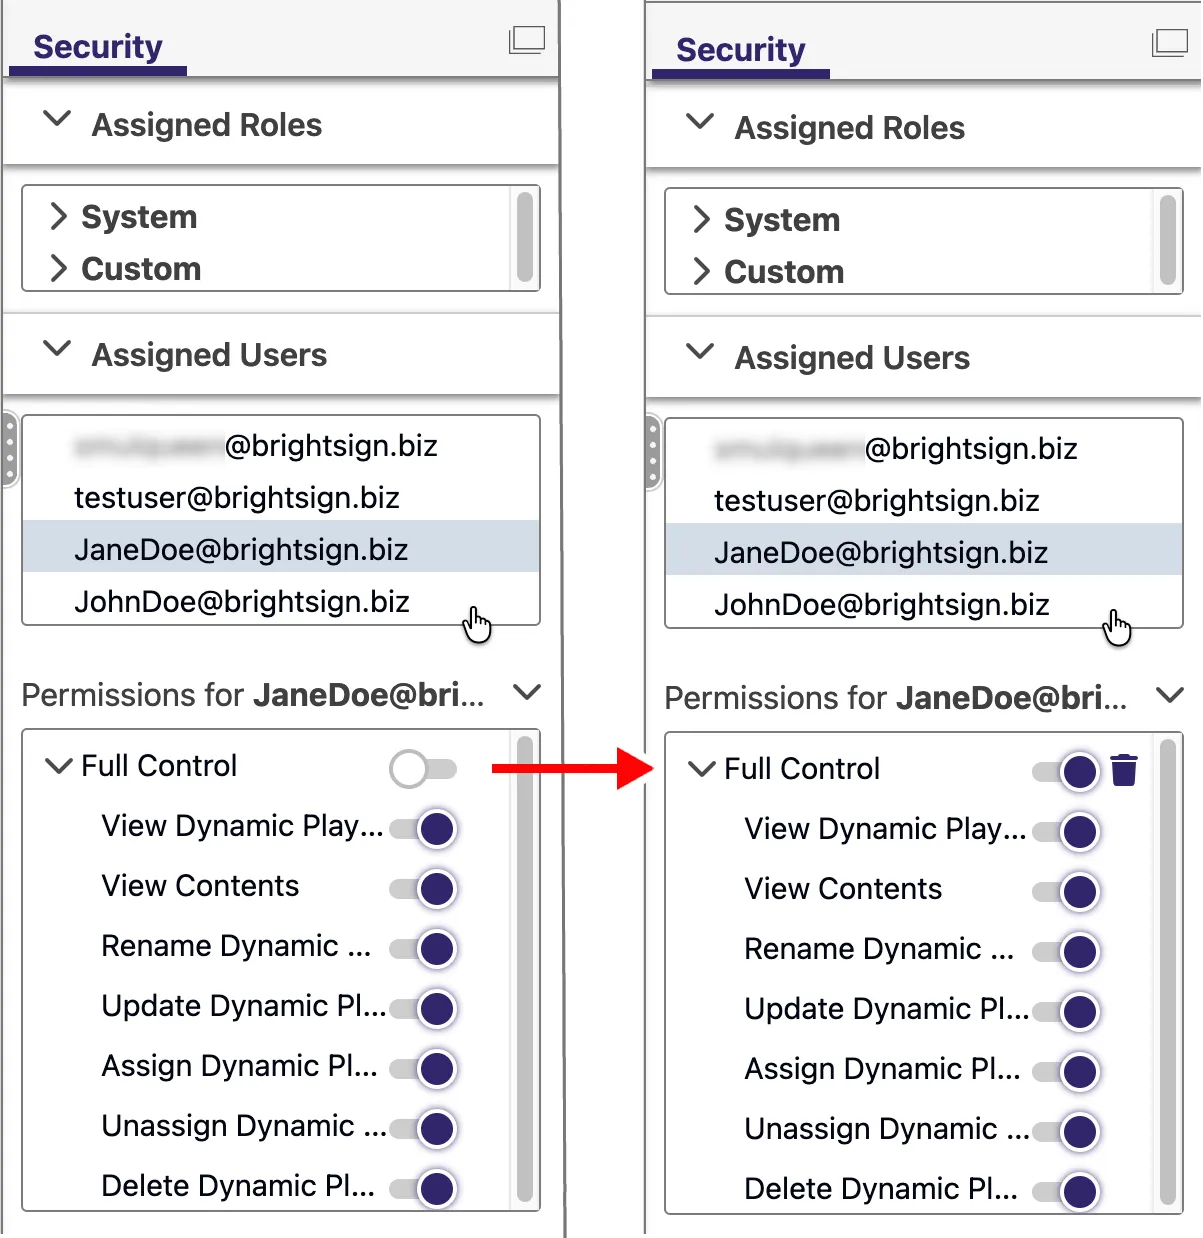
When you have assigned a role to many users, but you need to make a temporary or permanent exception, you can use object level permissions to modify access at the user level:
- Select the object (folder, media, presentation, etc.). Its Properties panel opens on the right.
- Under Security > Assigned Users, open Custom and select the user to modify the permissions for the user for the selected object.
- Open Permissions for [the user] and expand Full Control to see each switch.
- When you first open an item's switches, they show the value inherited from the role. They are not active for this item yet. You can tell because there is no trash can icon next to them.
- Toggle the switch off, then back on. A trash can icon appears. The switch now applies to this item.
- Turn the view switch off to hide the item from the role. Leave it on to show it.
Restricting Access
Here is what you can restrict and where you can set that access:
To hide | Go to | Switch |
|---|---|---|
Media folders/files | Content > Library > Media > select it > Security | View Content |
Components | Content > Library > Components > type folder > select it > Security | View [type], for example View Dynamic Playlist |
Presentations | Presentation > Library > select it > Security | View Presentation |
A player group | Network > Player Group(s) > tick the group > gear icon > Security | View Group |
Players in a group | Network > Player Group(s) > tick the group > gear icon > Security | View Devices |
A single player | Network > All Players > select the row > Security | View Device |
Restrict Content
The Library has two top-level folders: Media and Components. Both work the same way.
Media folders and files
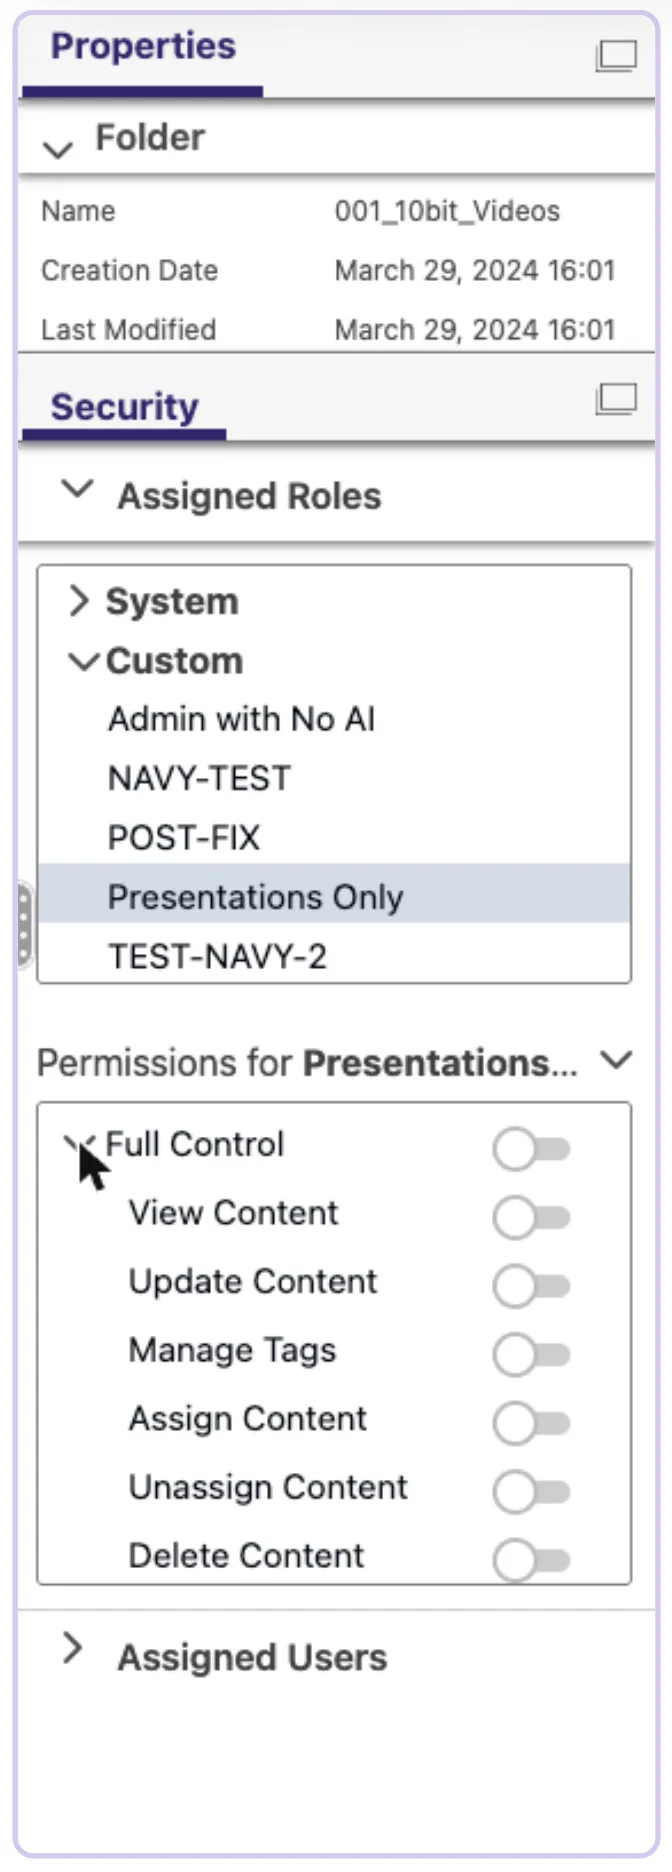
- Go to Content > Library > Media.
- Select the folder or file.
- Under Properties > Security, select your role and expand Full Control.
- Toggle View Content off and on, then turn it off.
Components
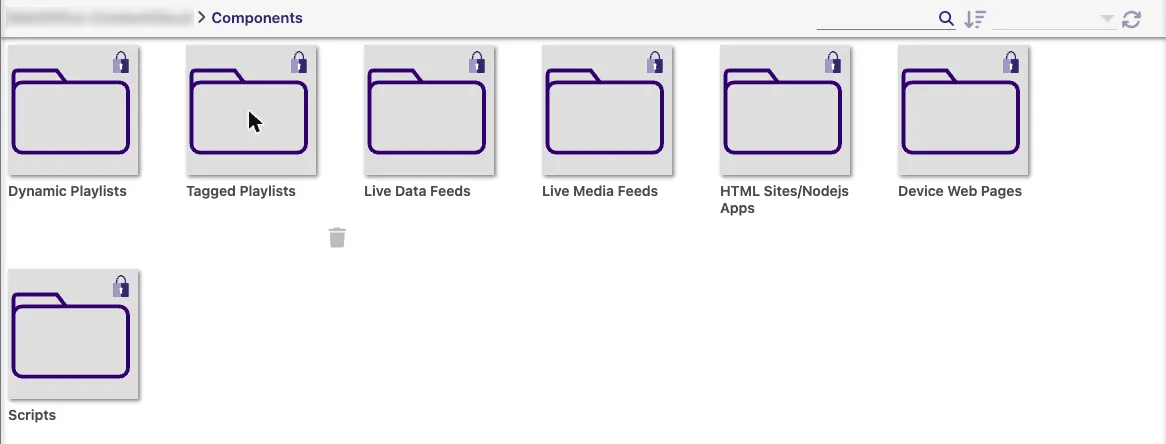
- Go to Content > Library > Components. Each type of component has its own folder.
- Open the folder and select the component.
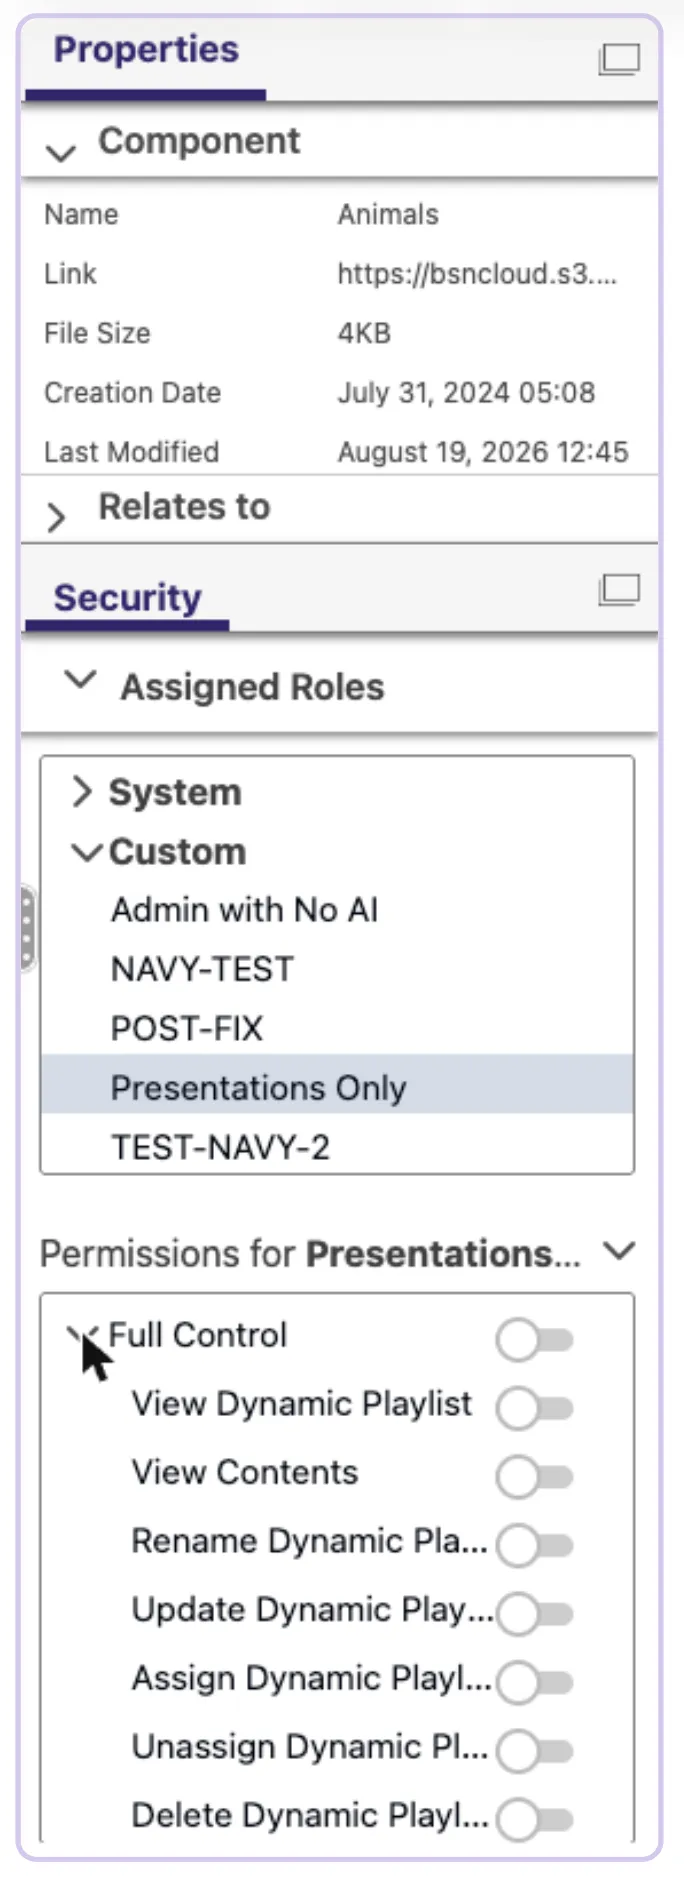
- Under Properties > Security, select your role and expand Full Control.
- Toggle the view switch off and on, then turn it off.
Each component type has its own view switch. For a Dynamic Playlist it is View Dynamic Playlist.
Restrict Presentations
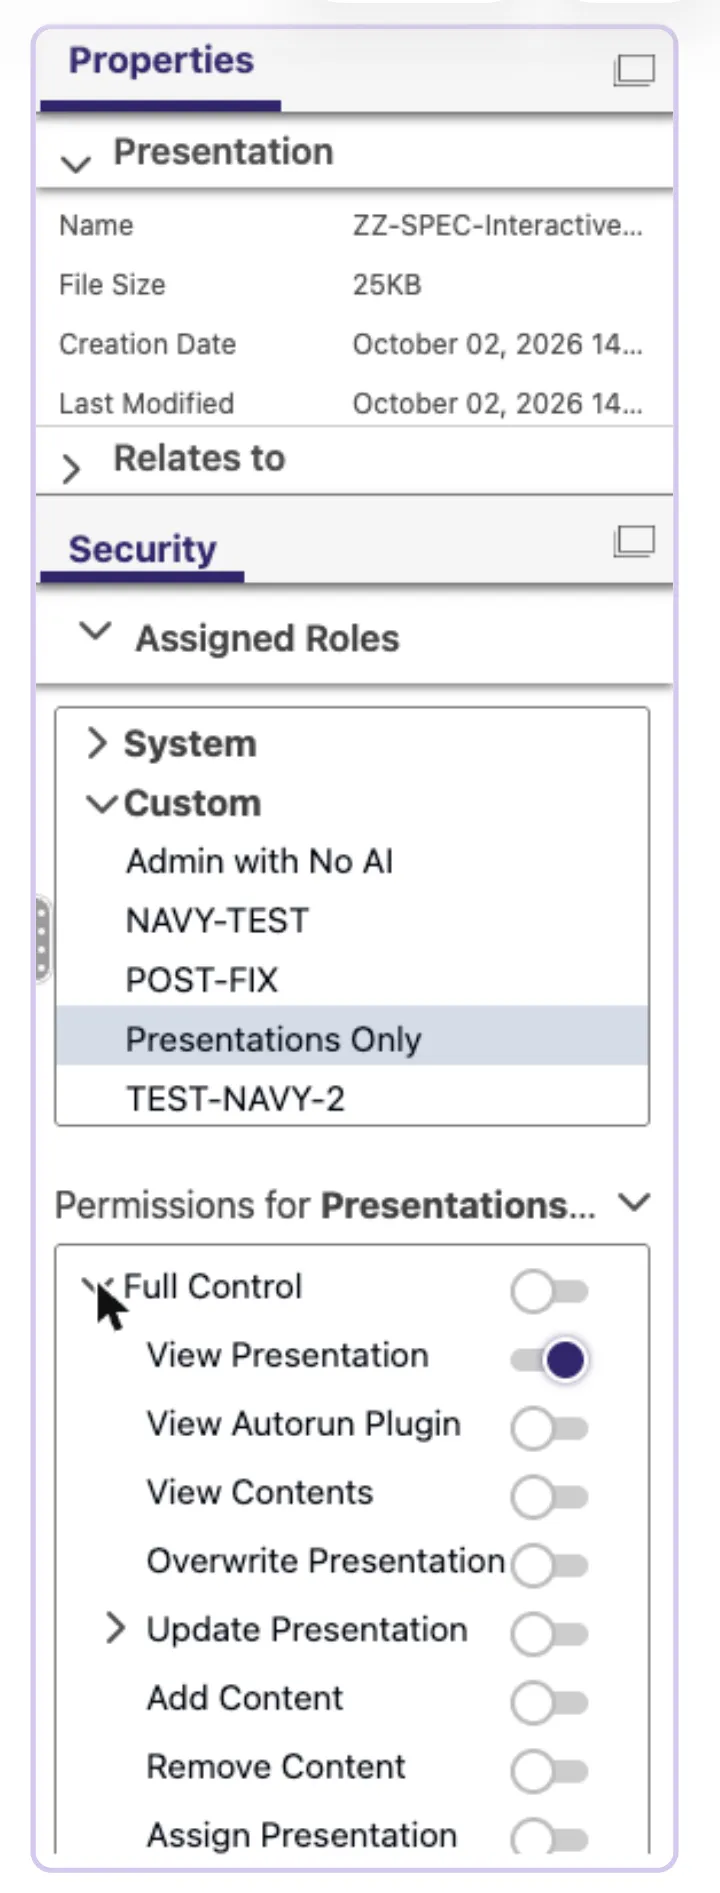
- Go to Presentation > Library.
- Select the presentation.
- Under Properties > Security, select your role and expand Full Control.
- Toggle View Presentation off and on, then turn it off.
Restrict Player Groups and Players
You have three options. Hide a whole group, hide the players inside a group, or hide one player at a time.
Player Groups
- Go to Network.
- In the Hierarchy panel, change All Players to Player Group(s).
- Tick the group. Its header appears in the player list.
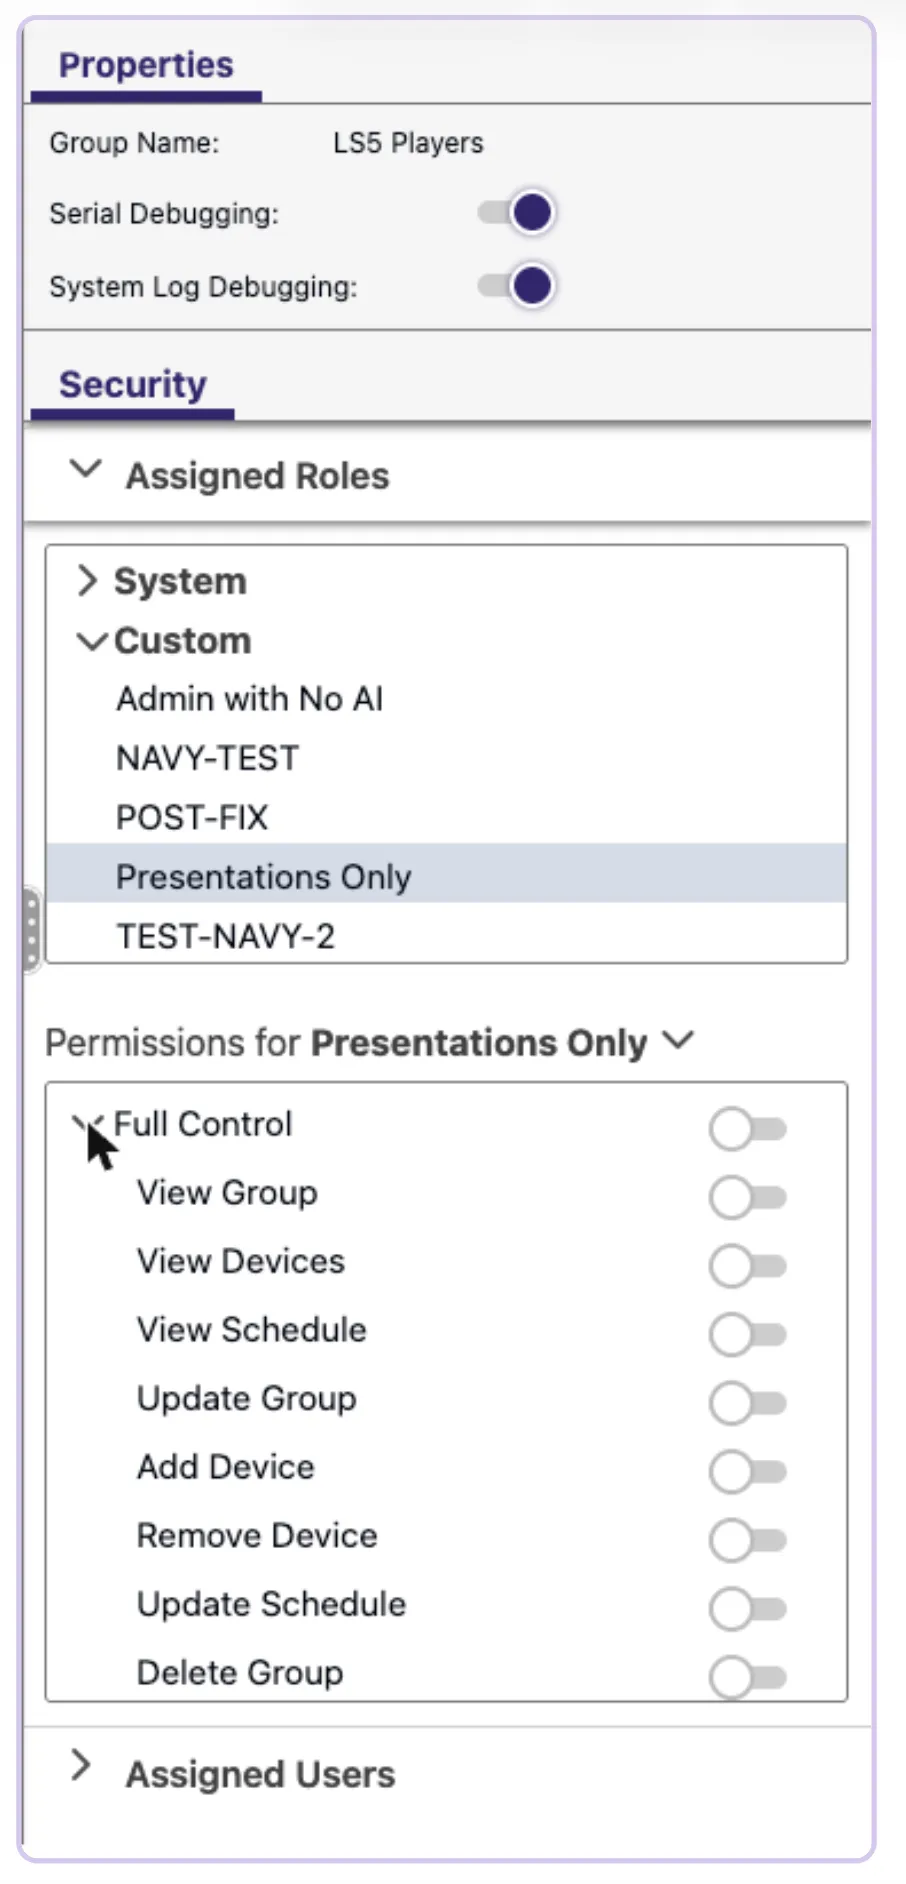
- Click the gear icon on the group header. The group's Security section opens.
- Select your role and expand Full Control.
- Toggle the switch you need off and on, then turn it off:
- View Group hides the group itself.
- View Devices hides the players in the group.
- Leave the Network tab and come back.
Single Player
- Go to Network and make sure the Hierarchy is set to All Players.
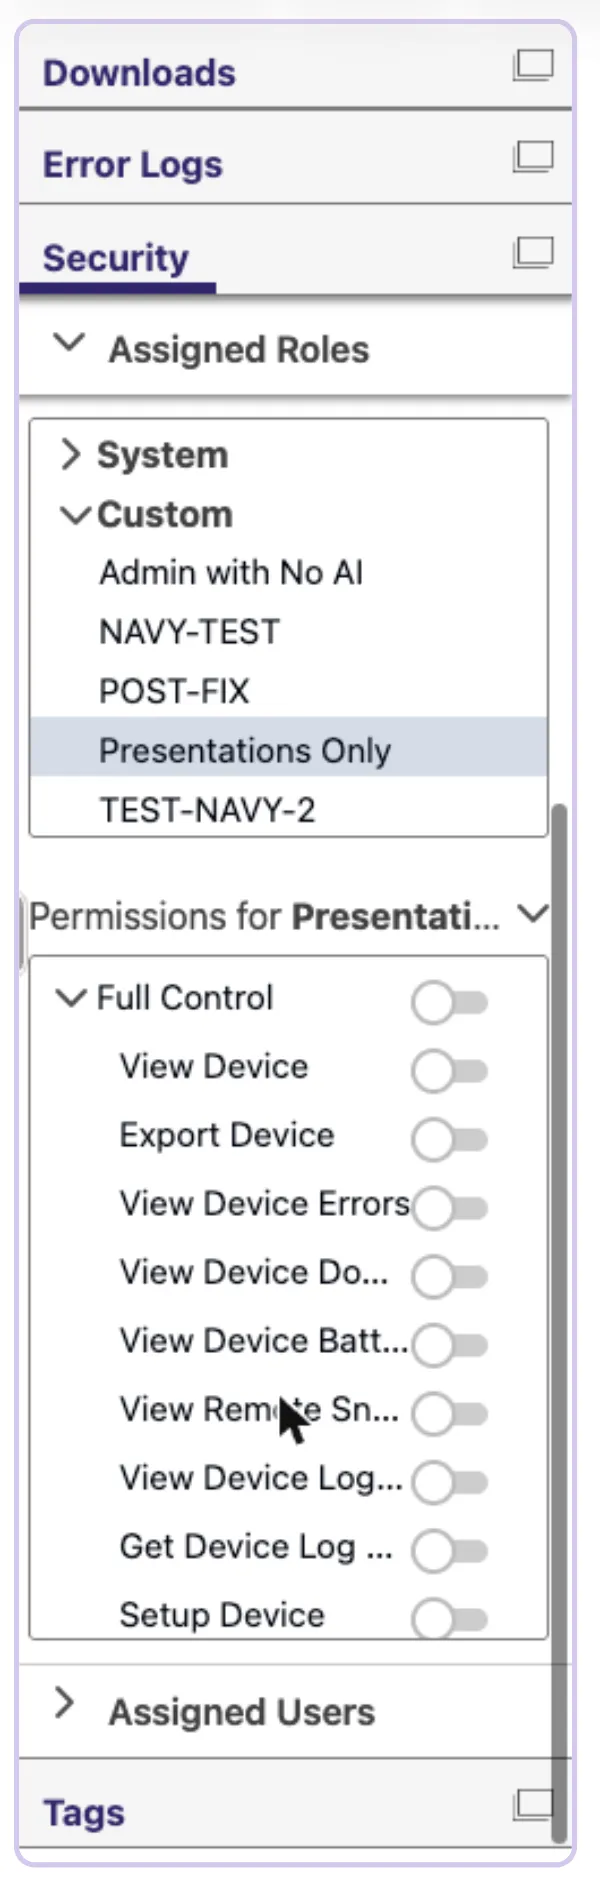
- Select the player's row. Its Properties panel opens on the right.
- Scroll down to Security, select your role and expand Full Control.
- Toggle View Device off and on, then turn it off.
- Leave the Network tab and come back.
Network changes don't show up right away. After you change a player or group, go to another area such as Dashboard, then come back to Network. (The refresh button won't help since it does not reload permissions.)
If you are still not seeing your changes, test in a separate browser or browser profile. Signing in as two people in the same browser can sign you out or mix up the accounts.
Known issues
You may notice the following issues:
- A person whose role hides groups still sees every group if their default network view is set to Groups. To fix this, set the default network view to All Players in that person's Preferences.
- The trash can icon looks like delete but it only resets the switch to the role's setting. It never removes the item.
- Switches look active when they are grayed out. To fix this, turn the type on in the Roles + Permissions page first.