Edit Player Network Settings
This page / section pertains to BrightSign Network (often abbreviated BSN), our legacy cloud platform. Our latest cloud platform is BSN.Cloud. Development of BSN has largely ceased and the platform will eventually be deprecated and replaced with BSN.Cloud.
This page outlines how to update the network settings on a player. If you're using the BrightSign Network, you can update the network settings of players remotely. If you're using another publishing method, you will need to write BrightAuthor Classic setup files to the local storage of the player–there are several ways to do this (see below).
Edit Network Settings via BSN
You can use either BrightAuthor Classic or the BSN WebUI to edit the network settings of a BSN networked player.
BrightAuthor Classic
Open BrightAuthor Classic.
If you're not signed in to BSN, go to Tools > Sign In to BrightSign Network and sign in using your credentials.
Navigate to the Manage > Status tab.
Expand the group that the player belongs to.
Right click the player and select Edit.
Edit the Network Properties as needed.
Click OK. The player will update itself the next time it checks in with the BSN servers.
BSN WebUI
Log in to the BSN WebUI.
Go to the Groups tab.
Expand the group that the player belongs to.
Click the properties link beneath the player.
Expand the Network Settings, Advanced Wired Network Settings, and Advanced Wireless Network Settings sections and edit the network settings as needed.
Click Save. The player will update itself the next time it checks in with the BSN servers.
Publish Setup Files via Diagnostic Web Server
If you have the Access the Remote DWS enabled, you can edit network settings by writing setup files to the player over the local network:
Open BrightAuthor Classic.
Navigate to Tools > Setup BrightSign Unit.
Specify the Network Settings of the player, along with other device settings, as needed.
Click Create Setup Files and save the setup files to a folder on your computer.
Download the autozip.zip file and unzip it.
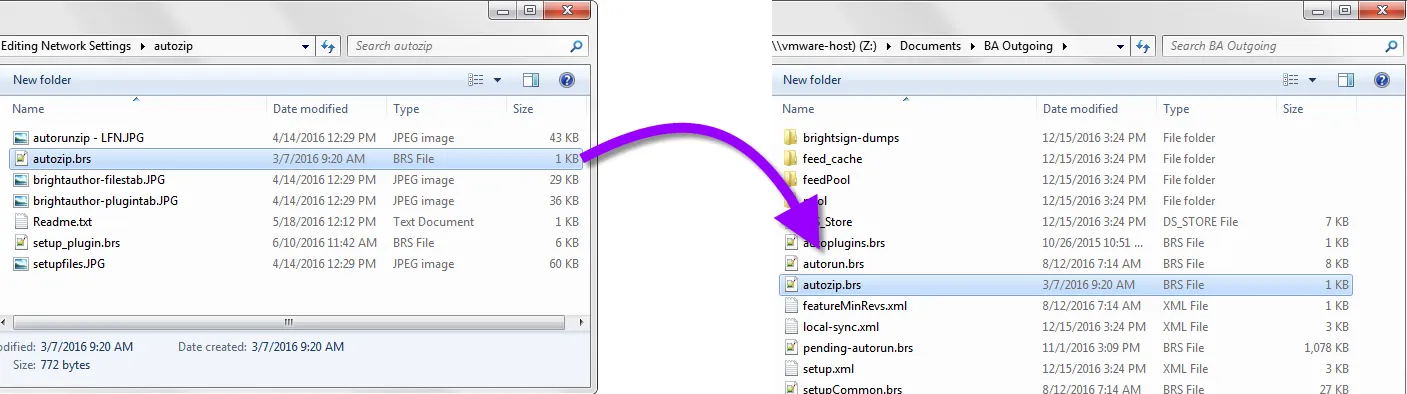
Copy the autozip.brs file to the folder containing the setup files saved in step 4.
Zip the folder containing the setup and autozip.brs files.
Rename the newly zipped file autorun.zip.
IMPORTANT
Ensure the setup files are located in the root of the autorun.zip file (i.e., when you open the autorun.zip file, you should see all the setup files and folders immediately, without having to click through other subfolders first).
Transfer the autorun.zip file to the SD card on the player:
- Go to the SD tab.
- Click the Choose Files button under the Upload to /[drive] heading.
- Locate and select the autorun.zip file.
- Click the Upload button.
Delete the autorun.brs file from the SD card:
- Click the blue hammer/wrench button next to the autorun.brs file.
- Click the Delete button.
Reboot the player:
- Navigate to the CONTROL tab on the DWS.
- Click the Reboot button.
When the player reboots, it will unpack the autorun.zip file, reconfigure itself, and reboot again. The current presentation(s) on the SD card will be erased, so you will need to republish them to the player.
Tip
If you don't have the DWS enabled on the player, you can edit the network settings by writing the autorun.zip file to the root of an SD card, inserting it into the player, and rebooting the player.
Publishing Setup Files with a Presentation
You can also edit network settings by attaching the setup files to a presentation and publishing it to a player:
Follow steps 1-8 above to create an autorun.zip file containing the setup files.
Open BrightAuthor Classic.
Create Presentations (the contents of the presentation will not be played).
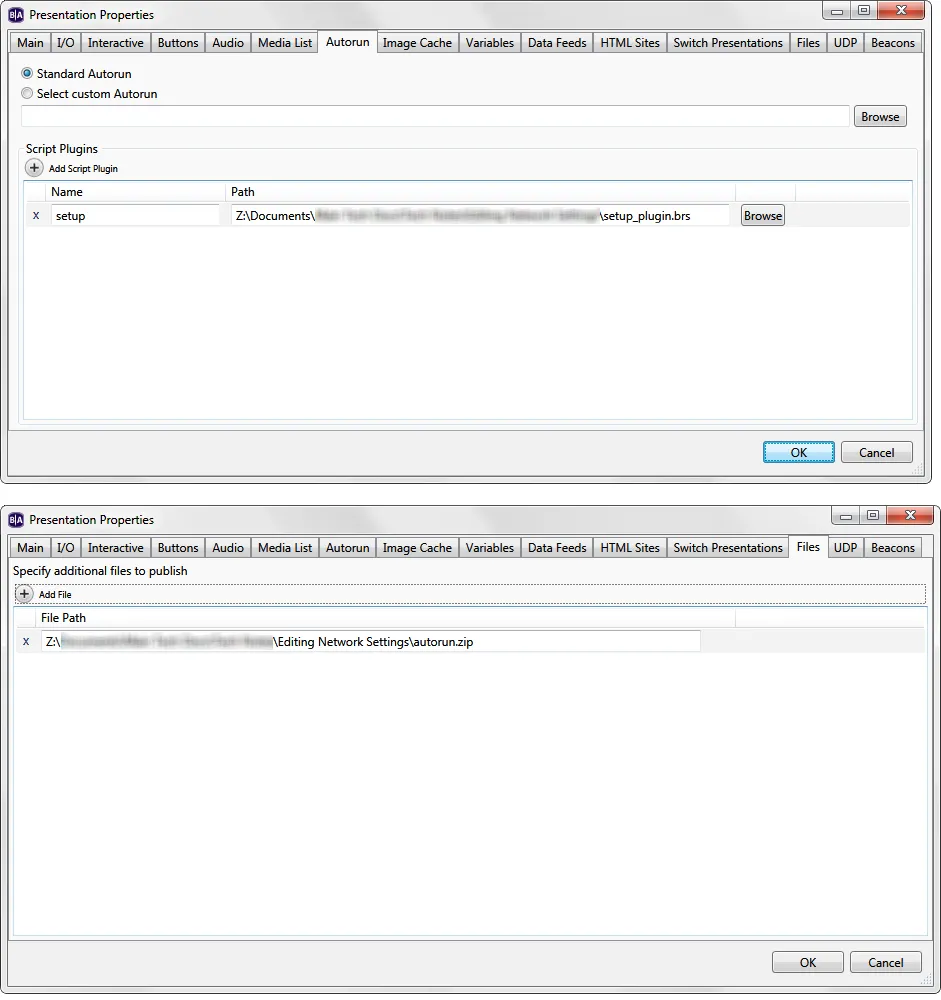
Navigate to File > Presentation Properties > Autorun.
Click Add Script Plugin.
Select the setup_plugin.brs file from the autozip folder.
Specify the plugin Name as “setup”.
Navigate to the Files tab in the Presentation Properties window.
Click Add File.
Locate and select the autorun.zip file.
Publish the presentation as you would normally (Local File Network, Simple File Network, etc).
When the player receives the presentation, it will reboot, unpack the autorun.zip file, reconfigure itself, and reboot again. The current presentation(s) on the SD card will be erased, so you will need to republish them to the player.