Trigger Content Playback with RSS
This page / section pertains to BrightAuthor Classic, our legacy app. BrightSign Author is our latest app for managing content and players.
Development of BrightAuthor Classic has largely ceased and the app will eventually be deprecated and replaced with BrightSign Author.
To use a value from an RSS feed to trigger playback of a specific media item on a BrightSign player, follow the steps below. There is also an attached demo for reference.
Create the Feed and Variables
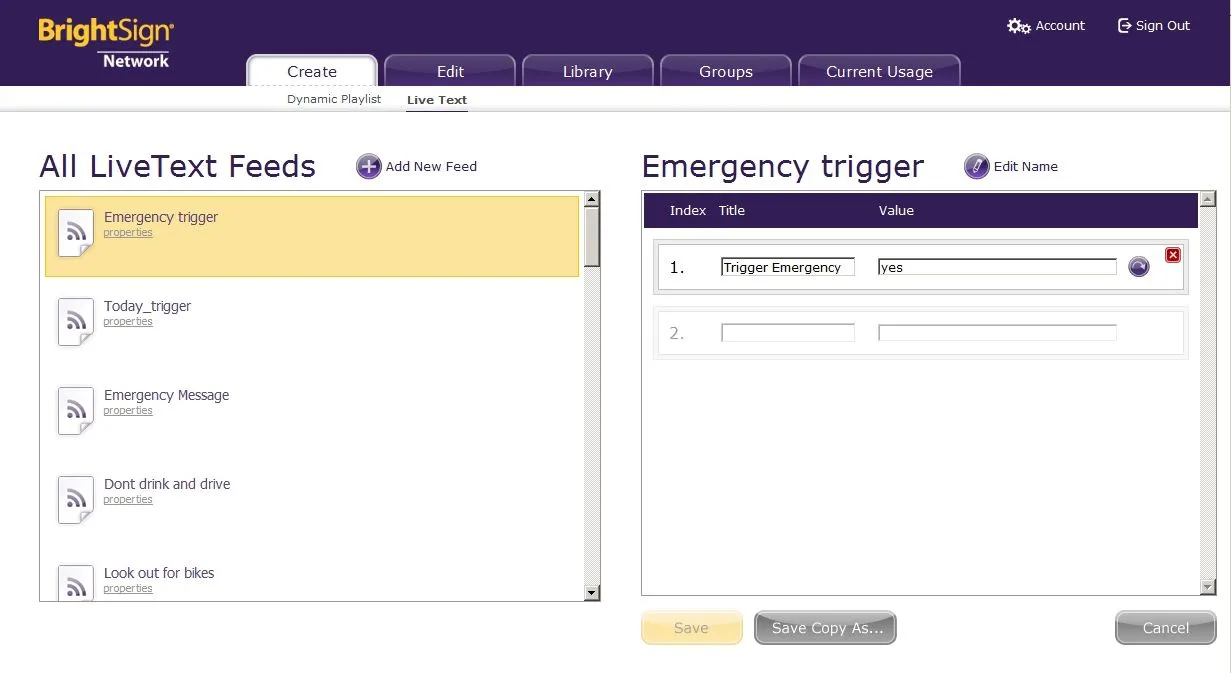
Create an RSS feed with the necessary trigger variables/values. Image 1 uses the BSN Live Data feed feature, but you can instead use your own hosted RSS feed.
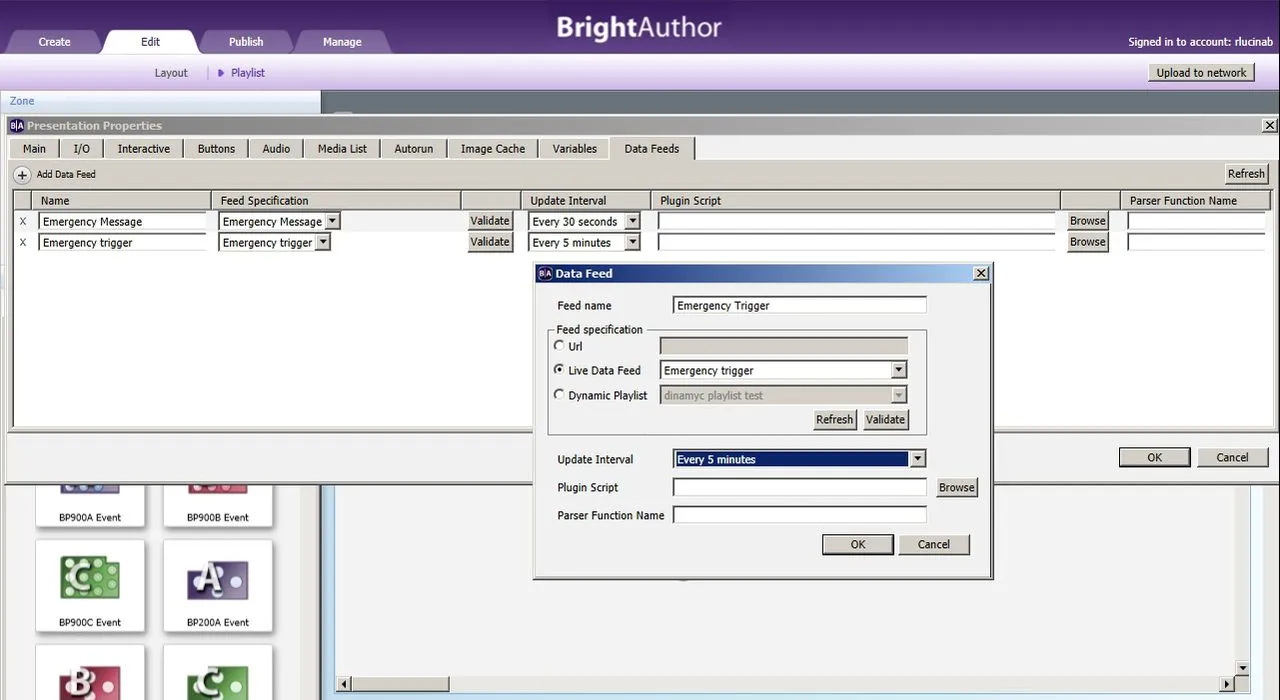
Add the RSS feed that contains your trigger value to the Data Feeds list of the presentation. In BrightAuthor, this is in File > Presentation properties > Data Feeds > Add Data Feed.
Under Feed specification, select Live Data Feed and select the feed created in BSN. If you're using a privately hosted RSS feed, select Url and enter the URL of the feed. The Live Data Feed option is only available if you’re logged in to your BrightSign Network account in BrightAuthor.
Go to Presentation Properties > Variables. Click Add Variable and enter the User Variable Name and a Default Value. The variable Name should be identical to the Title given to the item in your Live Data or RSS feed (in Image 2, this is "Trigger Emergency").
Under Type, select Networked and choose the Data Feed you just added to the presentation. Click Validate to ensure that the User Variable name matches that of the Live Data or RSS feed.
Add an Audio Only zone as a placeholder for your Event Handler states. See Image 3.
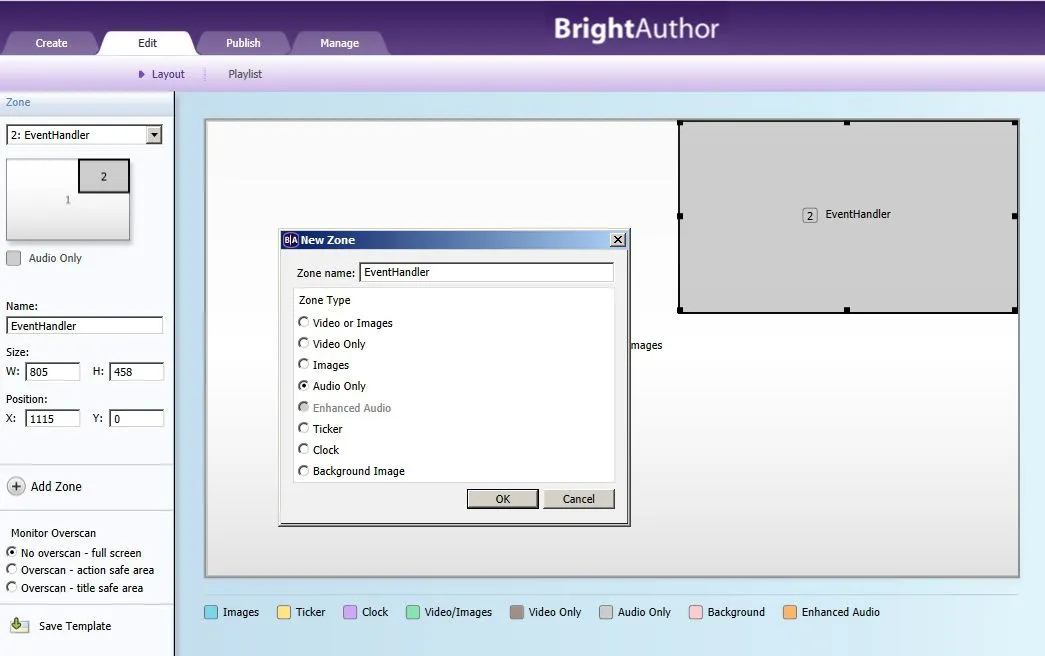
Select the zone and switch the Playlist type to interactive
Create the Timeout Events
Under Media Library, click the Other tab. Drag and drop two Event Handler states into the EventHandler zone.
Name the first Event Handler state “Checking trigger var” and the second state “var No”.
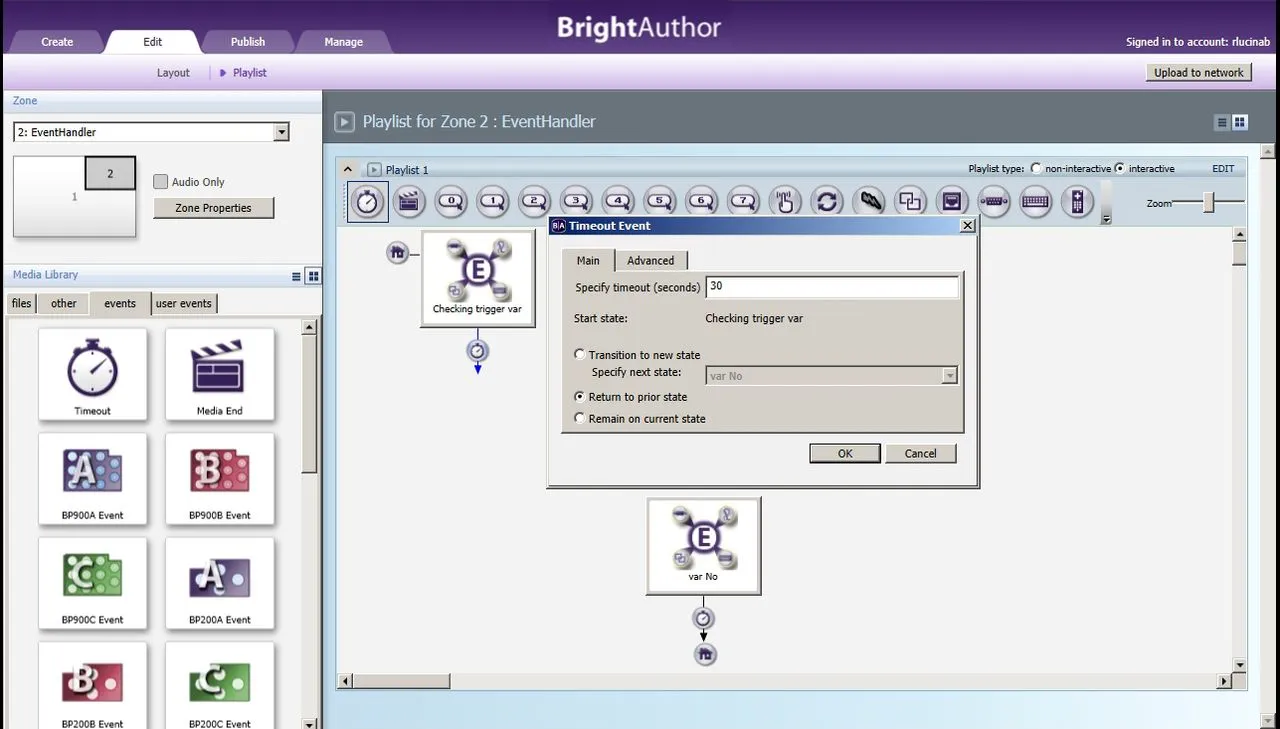
Drag and drop a Timeout event onto the first state ("Checking trigger var").
In the Timeout Event window, select Return to prior state. See Image 4.
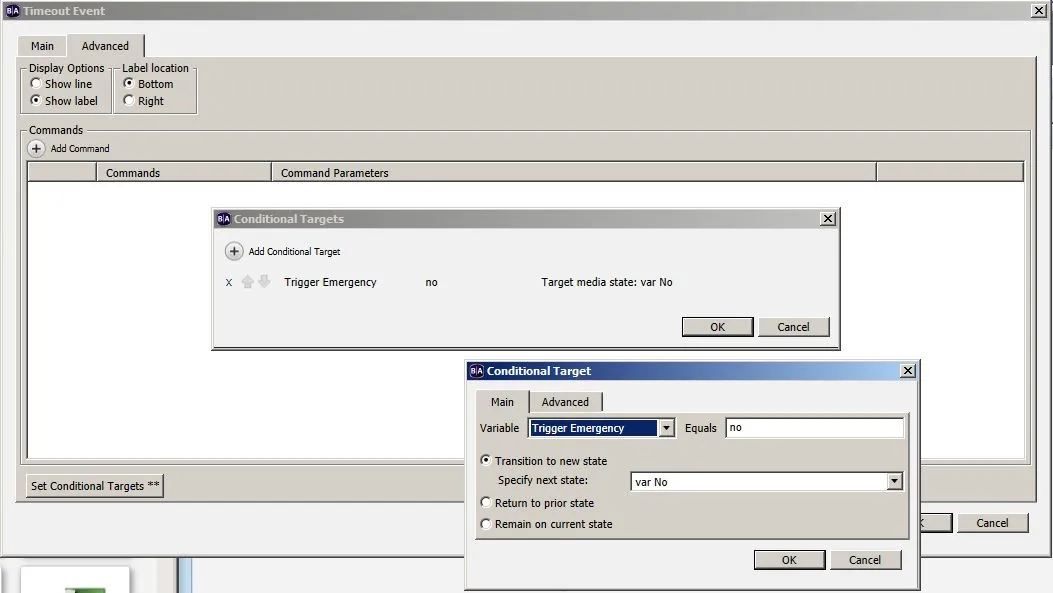
While in the Timeout Event window for the first Event Handler, go to the Advanced > Set Conditional Targets and click Add Conditional Target.
Select the trigger variable (“Trigger Emergency” in the example presentation) and set it to Equals "no".
Select Transition to new state and specify the second Event Handler as the new state (“Var no” in Image 5).
Drag and drop a Timeout event onto the second state ("var No").
Select Transition to new state and choose the first state ("Checking trigger var").
Add Commands
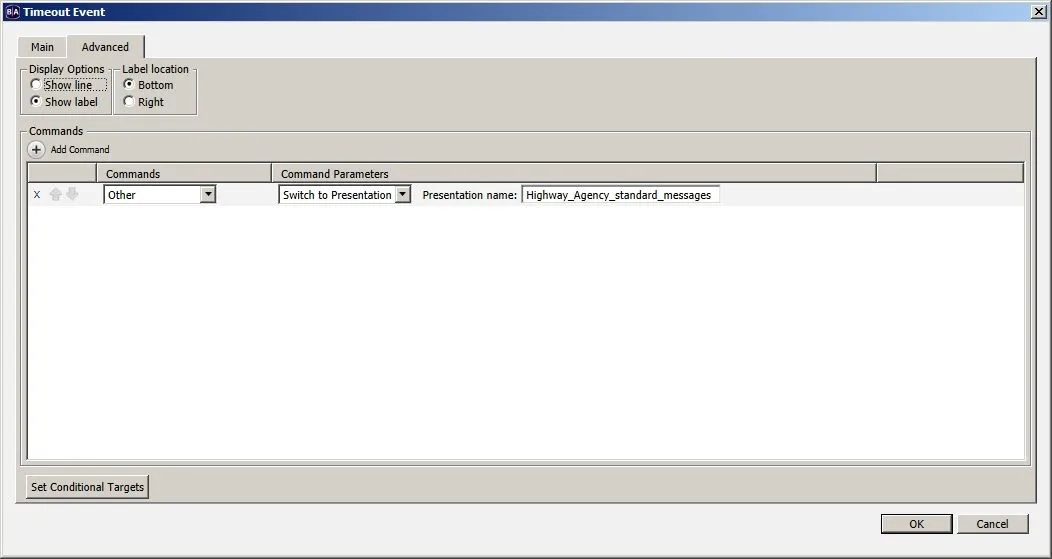
Go to the Advanced tab of the second Timeout event (attached to "var No") and select Add Command.
Under Commands, select Other.
Under Command Parameters, select Switch to Presentation > Specify Presentation.
Select the presentation name to switch to. In Image 6, the script will switch to Highway_Agency_standard_messages. You can switch to a different presentation depending on the value of the “Trigger Emergency” item found in the “Emergency Trigger” Live Data Feed.
Here is a demo which uses the features mentioned above.
These are the direct URLs for the Live Data Feeds used in the demo: